I’m interested in getting a custom faceplate for the Machinedrum made and am curious if anyone has a vector file of the faceplate made to scale?
Specifically I’d need to know where all the button, knob, and mounting holes are. Ideally there’d also be a separate layer for the graphic overlays for silkscreening on later.
Any ideas? Would Elektron help in this department?
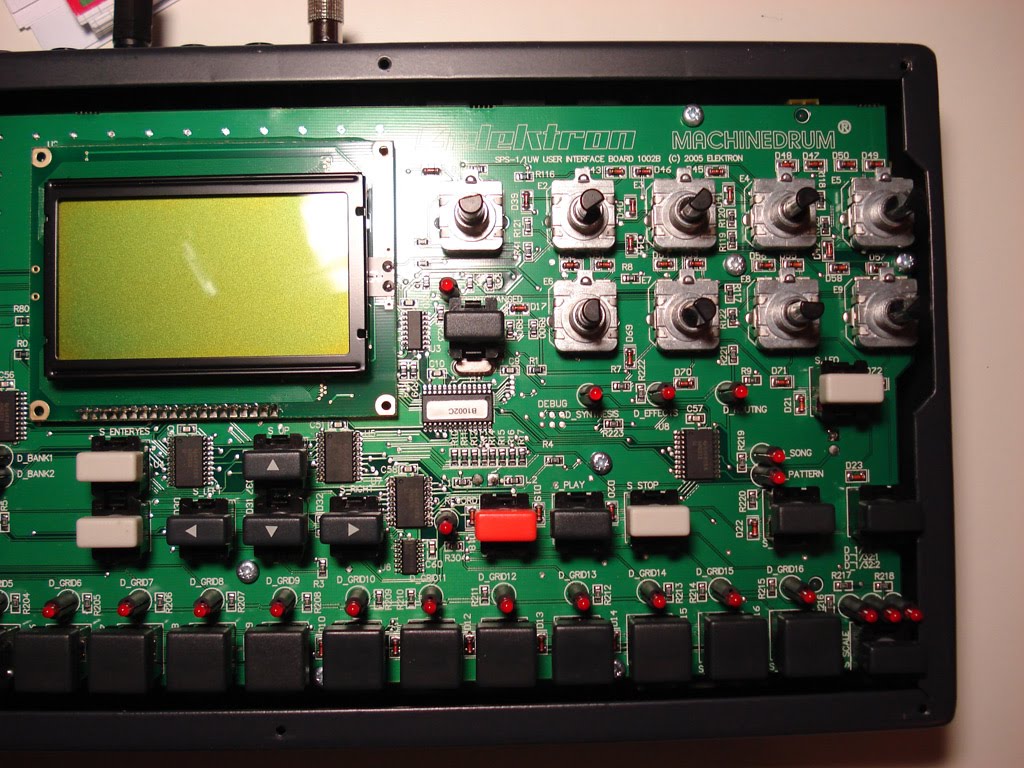
That sure is an odd faceplate. You’ll likely have to desolder. Going by this picture it looks like the led’s are on plastic spacers so bending might be difficult…
This is just general information, not MD specific. You can probably remove the plastic stand, you can see the slot on the side of the spacer separating the legs of the led light if you look close at the picture. but because the legs are at a firm tension between the spacer slots, to remove you risk damage of the led leg, or destroy the spacer to get it out. The spacer may even have a small inclusion on the board where the spacer has a bump that aligns with for consistency of assembly.
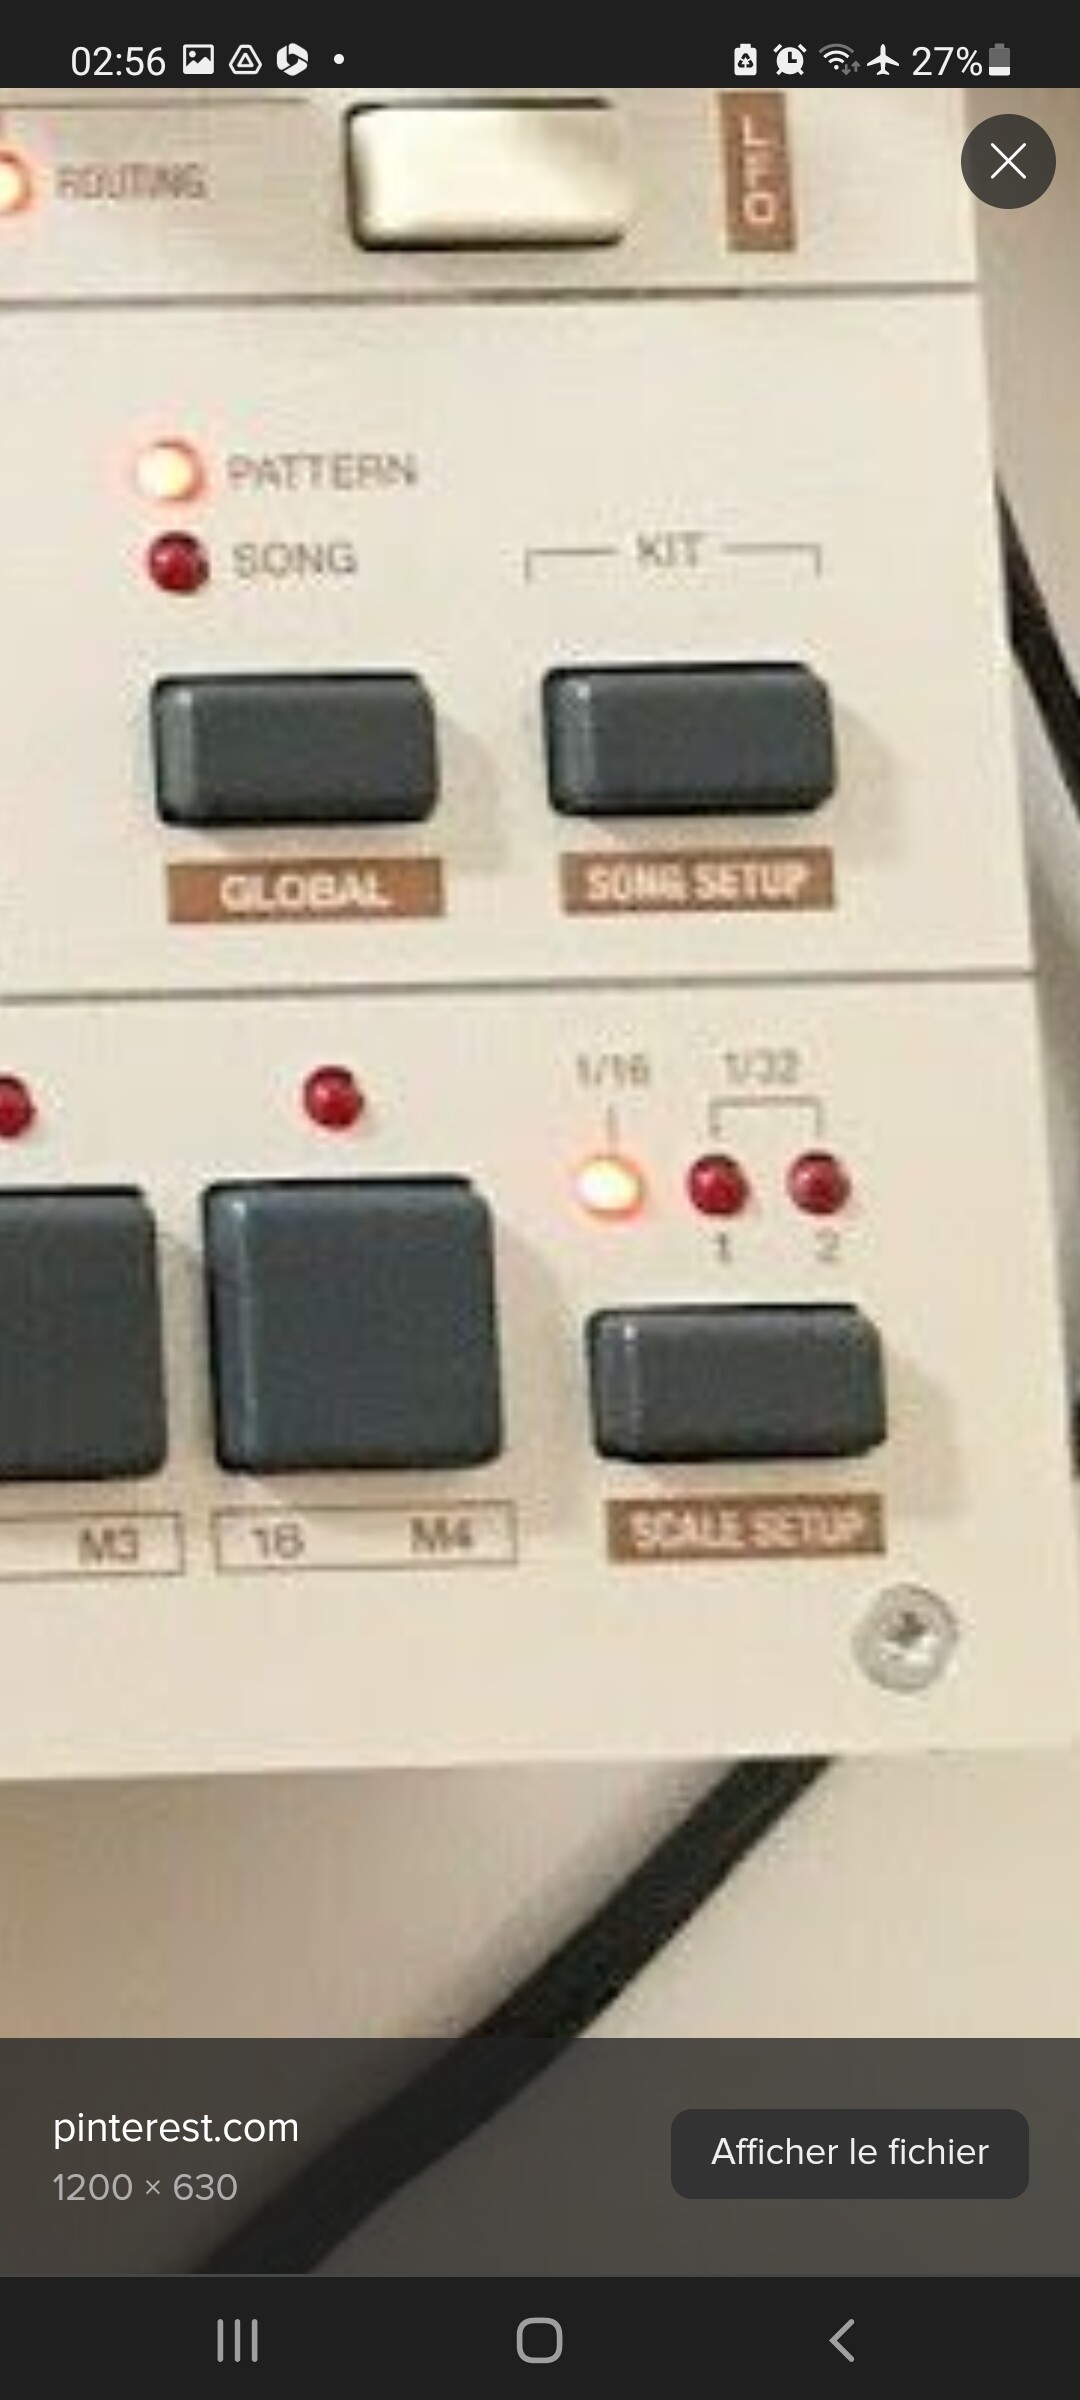
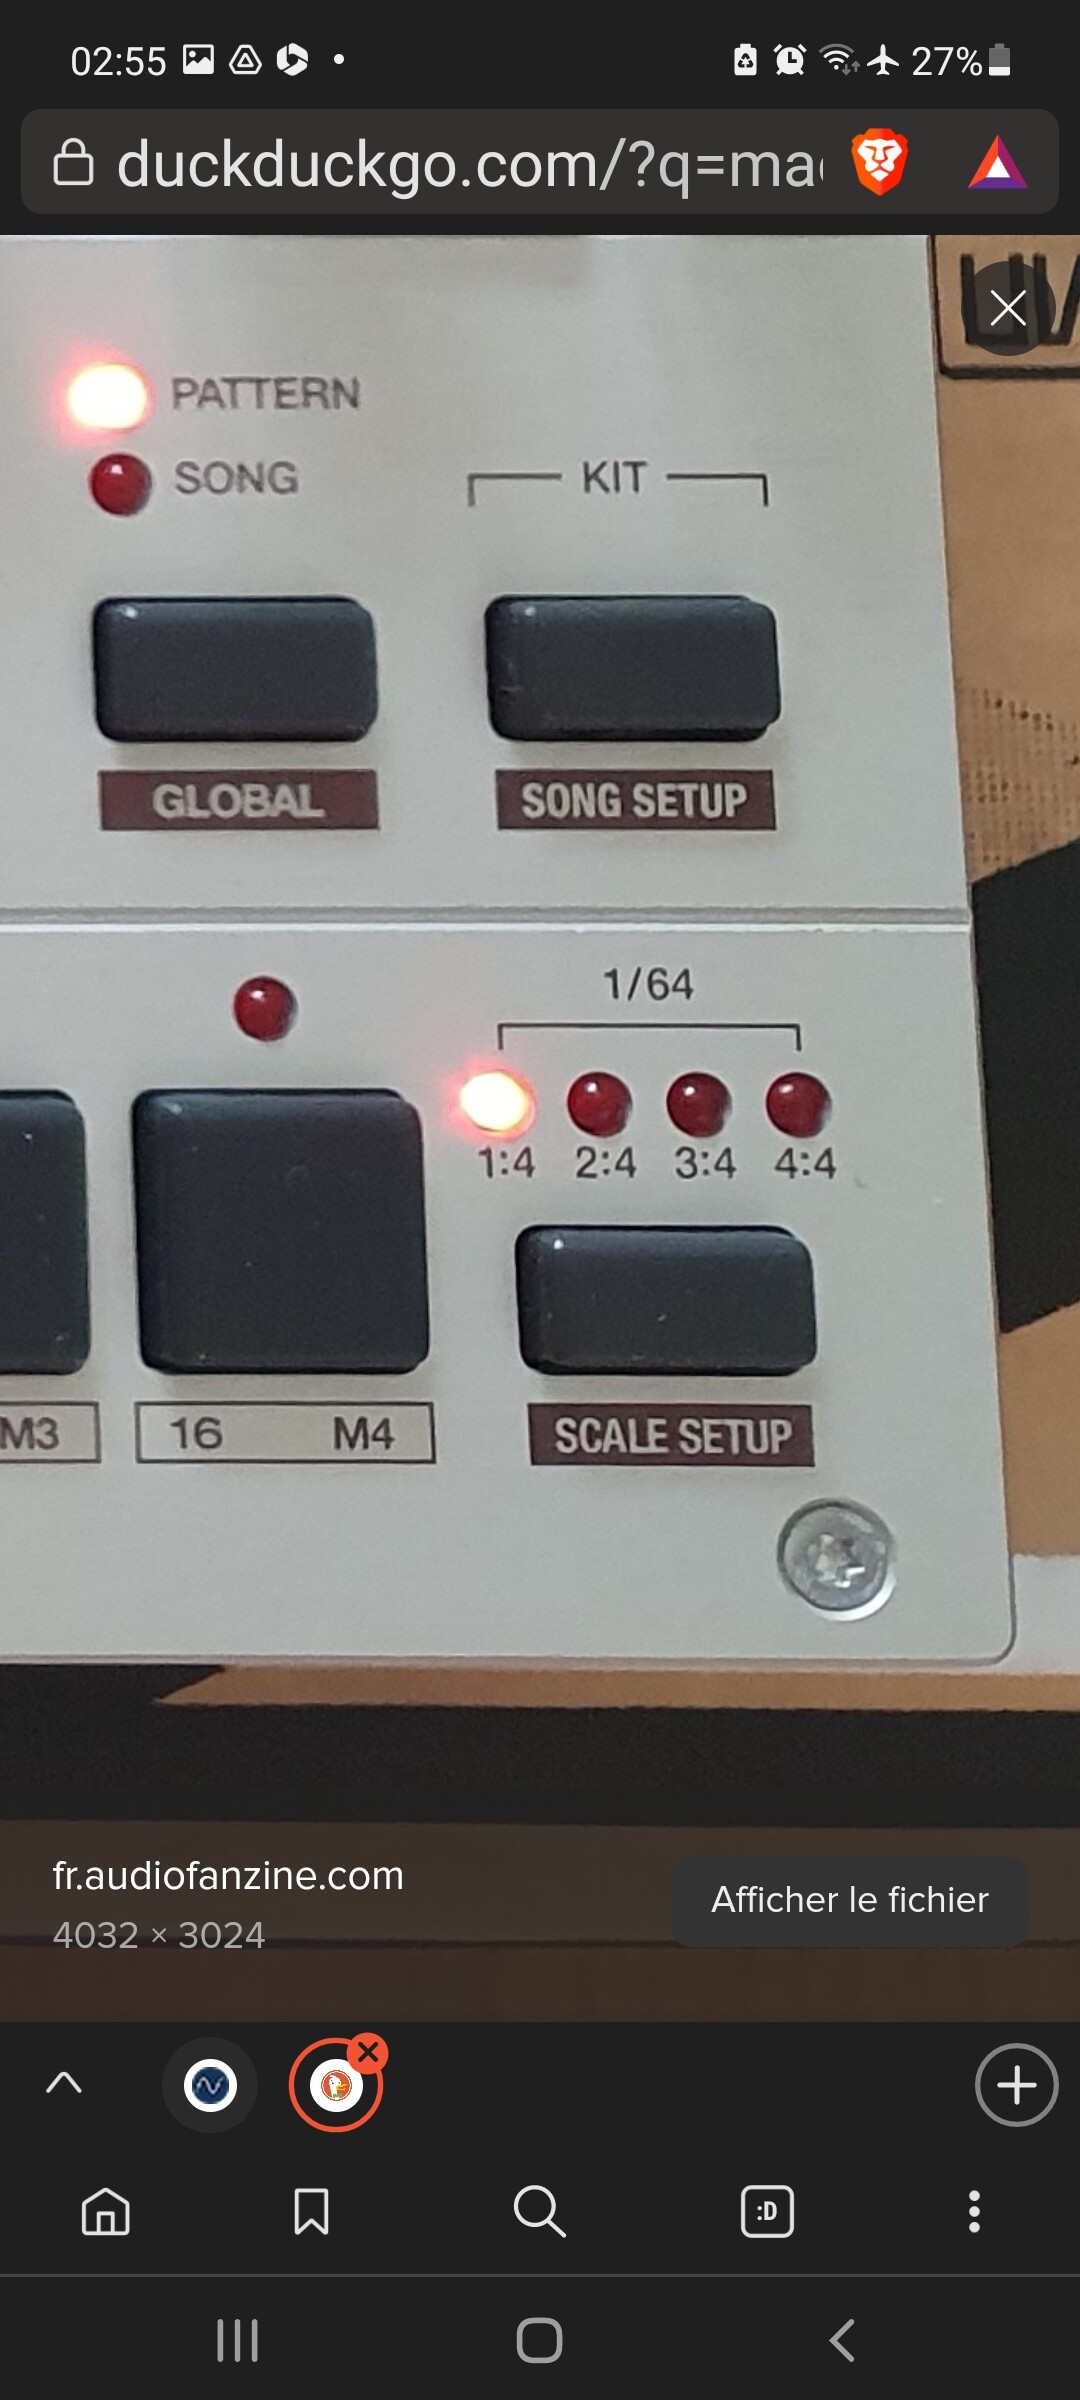
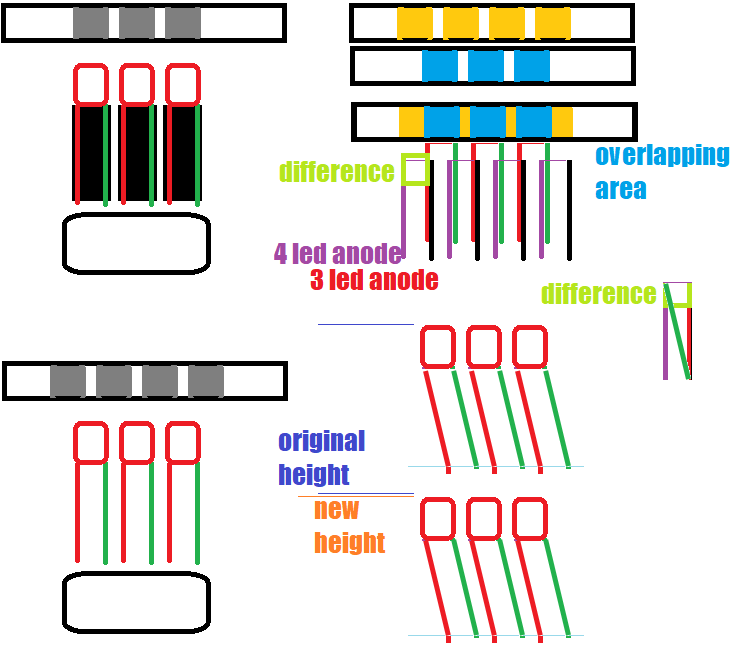
Also, when you have freestanding LED, it is weak on it’s own because led legs are just thin wire. When you shift positions of the led’s to tilt for the new holes, the height of each will change, alignment in the holes will be uneven if you are not careful, and in any case it will sit below the intended height so that is a matter choice if 1 is worth the other. From looking at the image and using the size of the button as reference, and considering IF the holes are the same spacing just they shift to add a 4th hole on the faceplate but the center of the button is the point of consistency, this is the information I am able to extract:
I think it can be done, but the question remains should it be done. I think you would be happier with the result if you or a friend uses a soldering iron, take a small strip of pcb with appropriate spacing and make an insert with 3 new lights and 1 dummy light to fill the last hole, use either the original or new black spacers (they are cheap) then implant above the original spot on the factory pcb. Would be able to return to stock specs very easy that way, just remove the pcb and add the original lights back. Hope this information can help you make an informed decision.
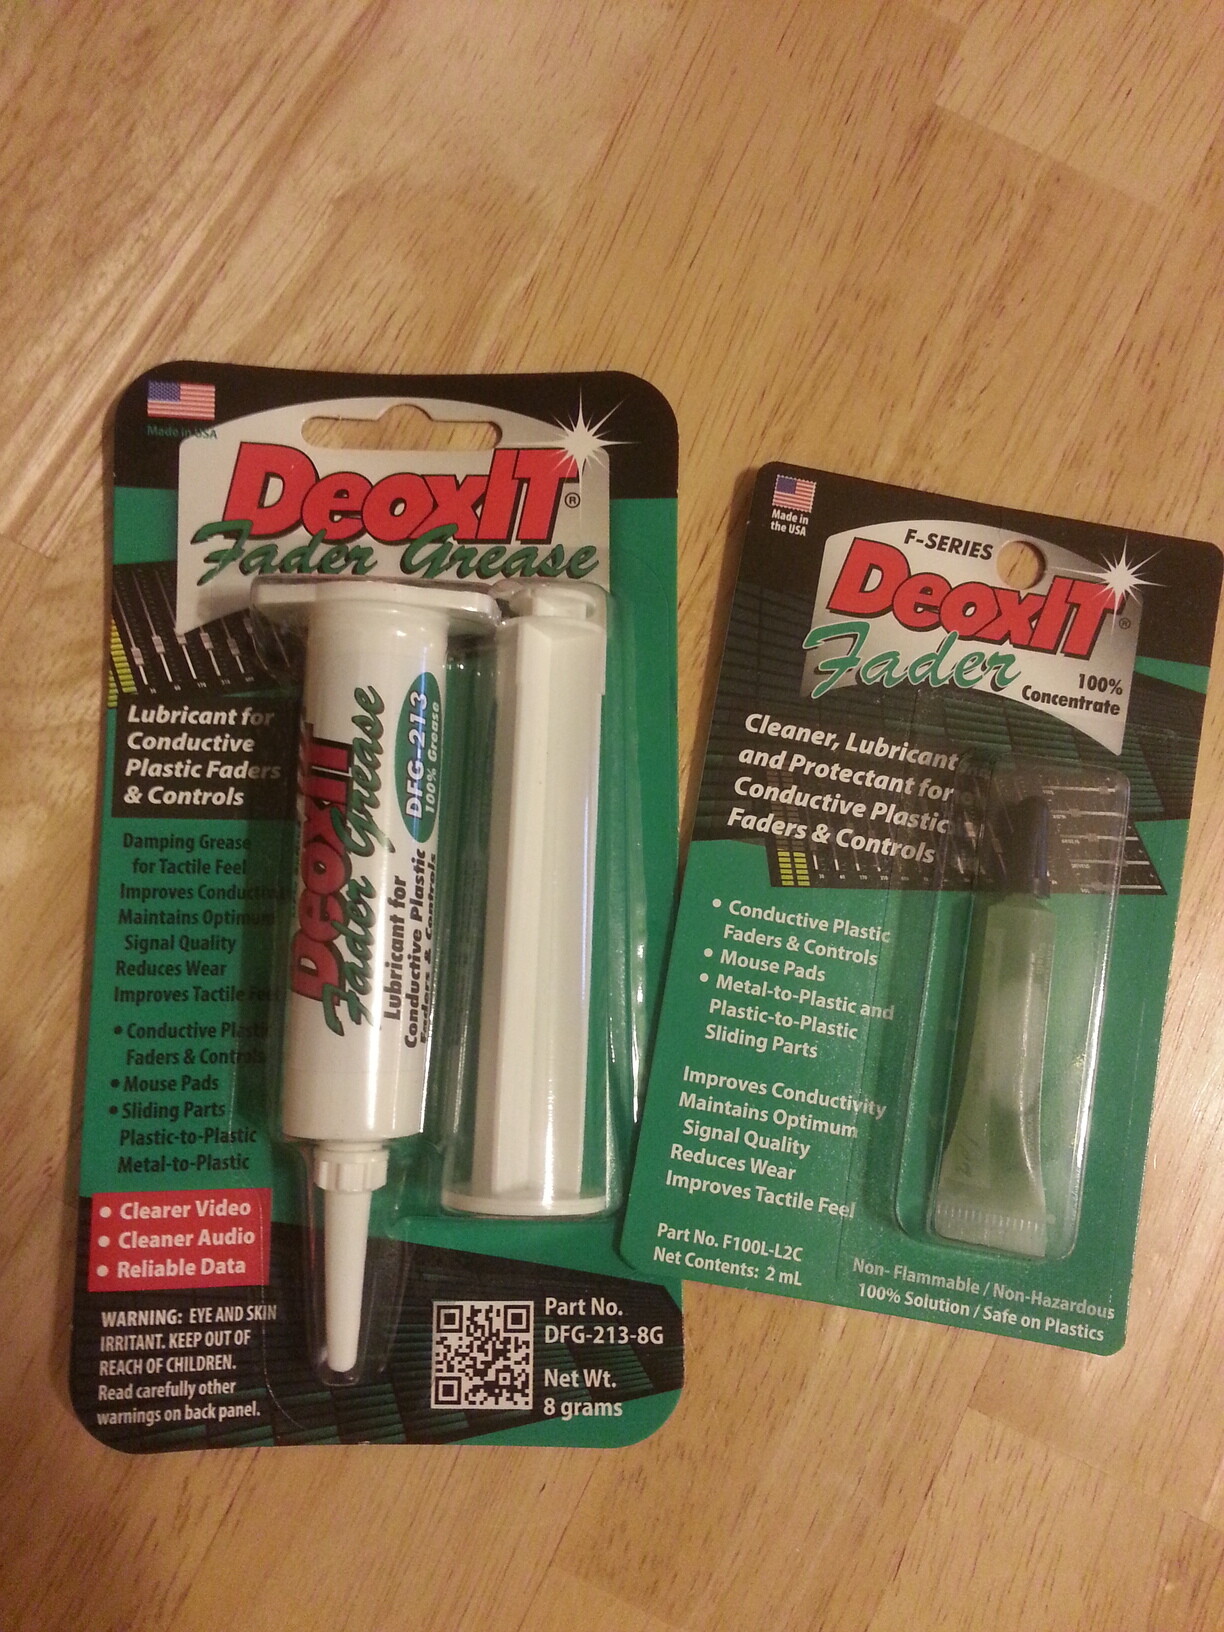
moved the potentiometer shaft around a lot and worked to impact as much grease as I could into the small crevice between the bushing and the shaft using various methods, not worrying about how much I wasted because I wanted to be sure some (enough) got in. wiped off the extra then applied a little more around the top of the bushing, bottom of the pot shaft.
end result is that it’s now more stiff feeling than my digitone, but I’ve only just done it and I think that’s to be expected. most of all my volume pot makes no noise, dead silence.
I’m still ordering replacement (potentiometer) parts as a precaution (because inexpensive), but seems that even if you spill, you can put the milk back in the glass after all (despite some people claims of ruin.)
all seems to be good to me, I’ll keep updated. Cost was about $20 since I bought both kinds, but I think the one I show in use ($14) would have been fine by itself, I just had no concrete evidence to know I could do this. But now it exists, the evidence you can easily fix the volume pot scratch even if you use contact cleaner on the pot and the original grease is gone, if that is the only issue causing it, this fader grease and some patience seems to be the answer. Only the long term will tell the full story though. The other one, small lube, would have worked similar but would not have had anywhere near the amount of resistance. might have been good for an encoder since they have such small gap between bushing and shaft but the analog volume pot I was able to work some into place and it doesn’t wobble about now either.
edit: @Eaves if you were curious as to the resolution, I think it’s ok to clean and regrease your pot if you’re careful but definitely need to open the machine (not too complicated). in the end, this has worked out well, I just wish I had known to order the grease before I cleaned the pot with the contact cleaner - but within a short time, it’s all resolved.
Very bad news : I totally fucked a Classic/Ext switch with glue. I wanted to exchanged it with tempo switch when it was still working, in a sticky way, but I also fucked the soldering point of PCB, don’t know how it is called :