hell yeah!! a screen!! now you’re talking!!
1 Like
Great job for everyone! Thanks for sharing! Actually, I think that with only one arduino can do the foot controller and a complete desktop controller to handle volumes, mutes, parameters, etc., in a modular way.
One question, what boards of arduino have you used? (original, compatible, brand?)
I see that there are several different in your developments.
Idea: with a converter module from 9v to 5v it could be powered with the same source of the pedals (if you have other Guitar pedals, Bass …).For example this one:
or similar.
Maybe I’m encouraged to set up one, I’m a developer even if I have the FCB1010 (with UNO) it would be more out of curiosity than necessity, but it seems fun! 
1 Like
wow these are great, love seeing these diy solutions people build!
Most (or all?) Arduino boards have a VIN pin to use with at least 7-12V as input voltage whith an onboard regulator. So 9V is fine.
I am using very often Arduino Nano clones from China for 2€ over ebay and everything alwasy worked fine.
I like the small size of the Arduino Nano and you have 8 analog inputs (instead of 6 at the UNO)
1 Like
Good to know it ![]() .
.
I have not tried any yet but this week I will ask for some Chinese kit to test all the functionalities, like ELEGOO for example. With how cheap the components and these boards are, they have many possibilities.
I used an arduino compatible small board as well, not sure how it was called. Something like pro micro. It is similar to the arduino nano, but much cheaper.
1 Like
This is sweet ! Any way to change presets it on startup and while it’s running . Would be awesome to change on the fly
2 Likes
Well, anything’s possible. Maybe with a combination of switches but this is not ideal. The best and easiest would be to have dedicated (foot)switches for that.
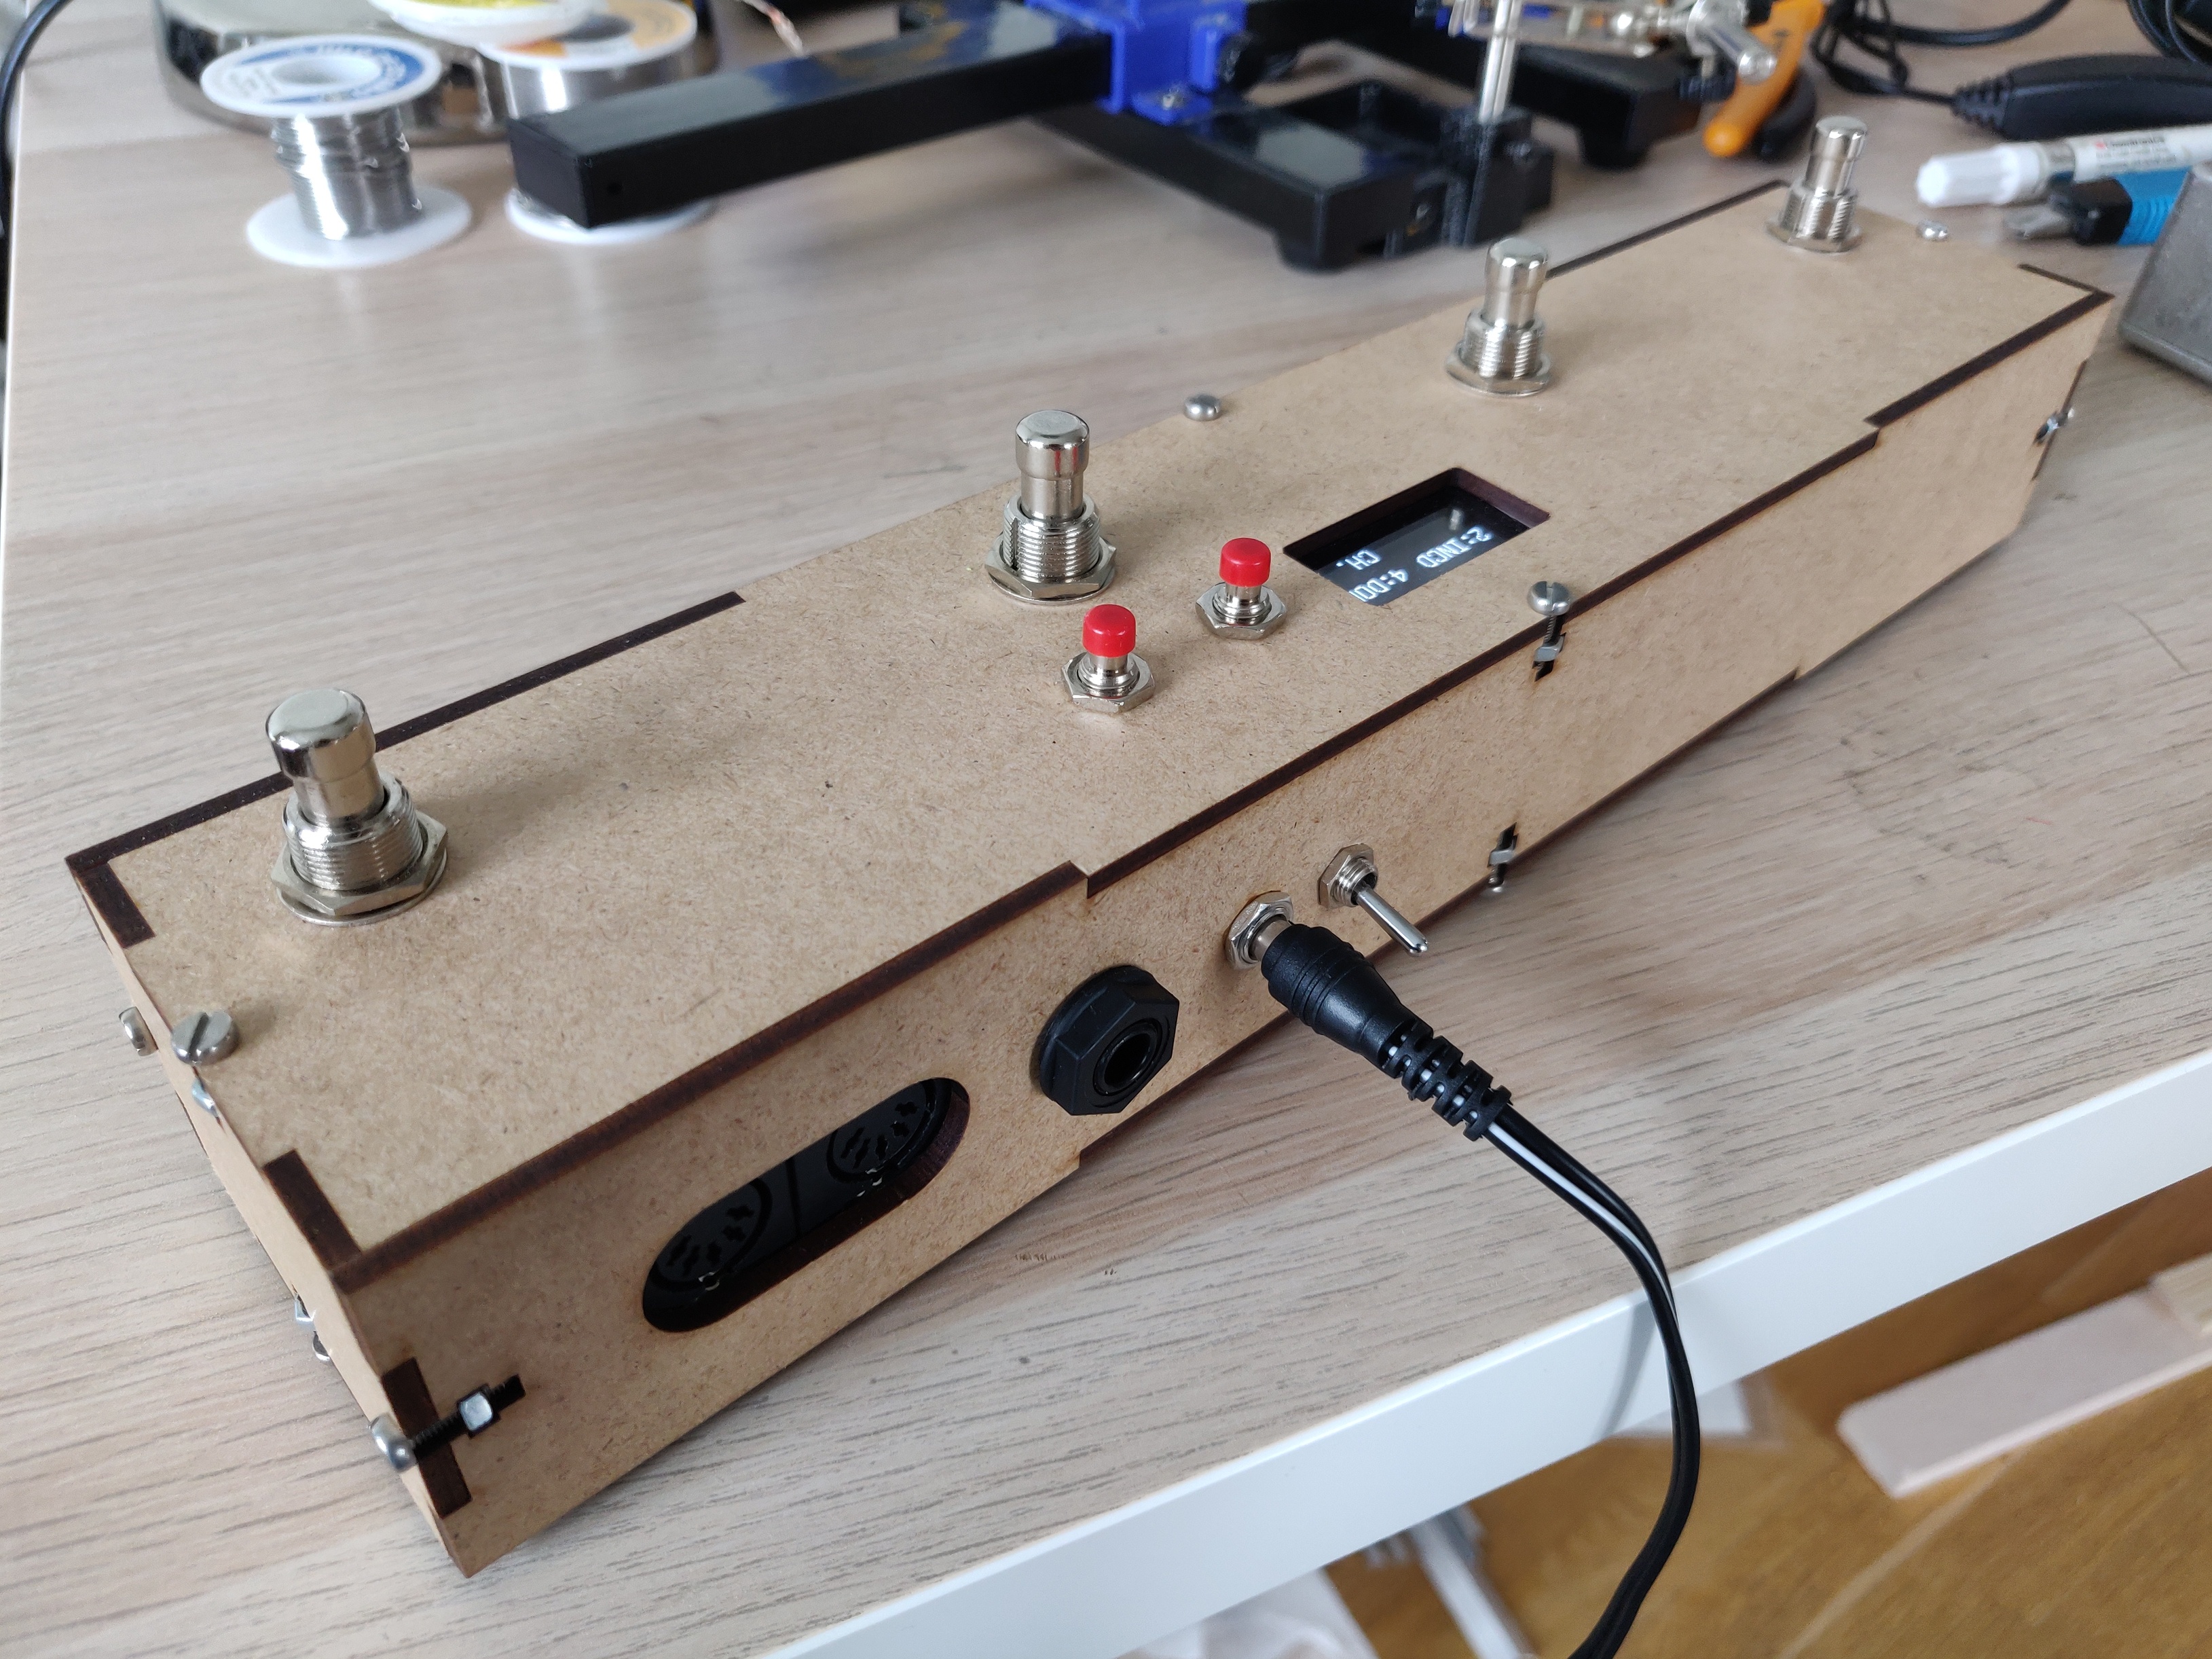
Sharing the next iteration of the project, now with MIDI in, expression pedal input (which the arduino converts to MIDI CC), a display that tells the function of the footswitches, and two tiny buttons to change presets on the fly!
Made a laser cut case this time, it’s a bit easier to work with. Might share case design and code in the future, I was thinking of maybe designing some PCBs to make the assembly of this thing much easier, since now it has so many wires inside.

10 Likes
So sweet ! Would love to get my greasy eyes on that code
Sure! It works pretty much the same, except I needed to add the MIDI reading (from the same library I used for the MIDI out), plus reading the analog pin to which the expression pedal is connected, and map it to a MIDI CC out. Just got an expression pedal, need to test if it’s working.
Also, for the screen I used the ug8lib library.
Hey peeps , got my foot switch built and it works awesome thanks to all the help here. Currently I got an Arduino uno with a 5 pin midi , working as midi out , controlled by 3 momentary switches .
Probably a dumb question but I can’t find info about it or I’m looking in the wrong places , I’m looking to add another momentary switch that changes the midi cc each of the other three switches are sending out , for example I have it controlling:
pickup recAB for SW1
Pickup stop/play for sw2
pickup recCD for
But for sw4 I want it to change to cc’s to change to
SW1: start/stop the seq
Sw2: start/restart the seq
The dealbreaker here is to do it in realtime, not upon startup . And bonus if I can hit the switch (sw4) a third time to change controls for a midi different midi channel so I can control my eventidr h9.
I think this should be doable if you create a variable that changes every time you press switch 4, which could be called ‘preset’. So at the beginning you can declare preset = 0, and then you make switch 4 add +1 every time you press it, for a total of 3 states in this case (default, second preset, and preset for eventide, which would be preset 0, 1 and 2). Then of course you make it reset to preset 0 if you press switch 4 when you are at preset = 2.
Then in the code for every switch, you need to add conditional statements that check for the state of the variable ‘preset’. So for example, make SW1 send midi note_on 61 IF preset = 0, but note_on 62 IF preset = 1, etc.
Hope it helped, this is how I implemented preset switching on the fly!
2 Likes
Awesome ! I’ll try it out , thanks markel
Very cool! I’d buy it 
I read trough the thread, is the code on top of this thread the final code, with the Expression Pedal input?
I’m trying to build one.
Greetings
Glad it’s useful! I have not shared the final code I use because I have not documented the full pinout and it might be a bit confusing, but if you can read the arduino code comfortably just pm me and I’ll be happy to send it to you. You can also let me know if you need help with any step of the process.
In general I’m planning to write this up a bit better, just lacking a lot of time right now unfortunately!
2 Likes
Anybody knows if you can use midi cable power instead of USB power for Arduino?
@Markel, @qlamerand…
Yes it should be possible by connecting the 5V pin of a MIDI DIN input to the Vin of the Arduino
Isn’t it whisky? Euh risky?
![]()
You should have an optocoupler in your midi input circuit, as I imagine the octatrack has, to electrically isolate both machines.
In theory you can run a very low power device from the midi out of a synth, but you must make sure that it needs little enough current that it won’t disturb your machine. This is probably not true with the Arduino, but I don’t know how much headroom the octatrack has…
Long story short, I wouldn’t do it unless you know what you’re doing
1 Like