My baby has a faulty Scene B button (does nothing)
(2) Encoders do not function while in MIDI Mode
Not certain about the MIDI mode and the encoders, if to replace them or if it’s a bug, because the encoders work fine in regular track mode.
have anyone replaced these buttons. Simple thru hole? It was suggested to me it quite complex and I’m better off shipping it to Elektron LA, but I wanted some feedback from others if they’ve done it
Here’s a thread on replacing encoders. The last post contains a video of the process, and a method for restoring encoder performance without replacing the part itself. Very odd that they’re only broken in MIDI mode though, not heard of that happening before.
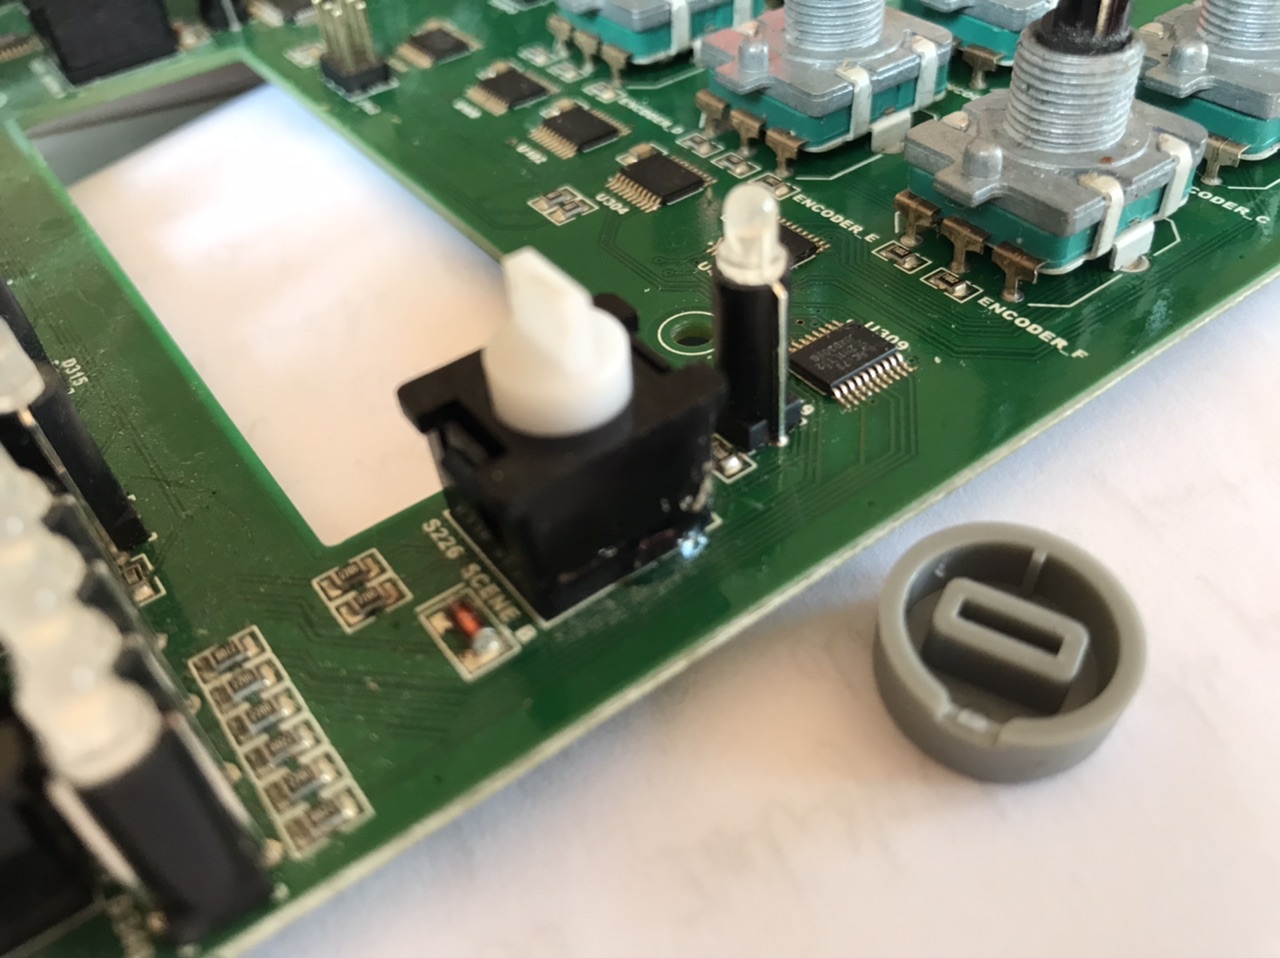
i replaced some switches on the MM a while ago and it wasn’t too hard of a process, it requires some experience with soldering and removing parts from the board, those are not TH parts.if the switch is broken it does make things a bit easier but you would still need to pay attention to the board
if not feeling like doing it yourself, just get in touch with support…having them do it for you would most probably be the best solution
Good luck, let me know if you need help,
I’ve done it a few times.
I recommend using a good glue (not the cheapest) and putting just the smallest amount. (I aim for the smallest possible drop, one in each exposed corner)
And if the button comes completely off, be careful: inside there’s a small spring and a small ball eager to jump out. (It’s a pain to put it back, but zen-like fingers and patience will do it)
It seems permanently stuck. It behaves as if I was holding it as soon as I use it, after reboot.
Wanted to record something tomorrow. I guess I’ll have to use scene A only. I usually use B of course. That the occasion to solder a permanent switch in order to play scenes with 2 hands!
Yeah I’ve had something like that before.
You might feel the button wiggling a bit. And it might come off with a gentle push (after the faceplate is out, that is)
Do you have multimeter? Don’t make my mistake and start fiddling around before taking a measurement.
Measure the continuity across both scene buttons. It might not be the knob cap, it might be the switch. If you dont have continuity, there is no point gluing, it wont do anything.
If the switch is faulty, it can be cleaned, but be careful! Good luck.
Worst case scenario- like me, you’ll end up getting a new User Interface board. Which actually isnt a bad thing… makes the OT feel like new!
Could you elaborate?
I apparently don’t have continuity between scene A and B solder points.
I don’t get why there should be continuity, not the case for other switches btw…
I have continuity between the 2 scene B solder pounts.
Edit, 3 post limitation
Thanks both, glue worked! @phading I didn’t follow your advice correctly, too much glue, button stuck because of glue! But now it okay.
So @Microtribe could you elaborate about continuity?
To clarify, check for continuity across button A, (with button pressed) then check button B in same way.
I said check both because you knew A worked fine.
Each button has two solder points on the back of the board. Can also check continuity between the button and its associated resistor, if you need further troubleshooting.
Hey peeps, continuing an existing thread instead of creating a new one.
The record button on my OT is broken, and only works intermittently and when pressing in a certain direction. When pressing the play button, live recording is always engaged, which probably means the record button is on also when not pressed.
Mechanically the button mechanism is loose, and can easily be wiggled back and forth. The lower plastic base of the button seems to sit tightly. It’s the upper/bigger part that’s loose. Feels like som snap mechanism is broken or something. In the picture you can see a gap between the base and the upper part, which is not there on the stop and play buttons.
Any suggestions on what to do?
What part of the switch do you think is broken?
Is it possible there’s a plastic snap fit that’s broken, that can be glued?
If so, what’s the best way to fix it?
Any suggestions appreciated. I really hope I can fix it myself, was hoping to spend some time sampling old cassettes and vinyl during the holiday
Hi Nils, I suspect the plastic is broken, probably where those barbed tabs normally keep the top half captive, on the side which is lifting, and it’s caused some internal misalignment of the mechanism.
I’m just guessing, I’d have to see some close up angles in ideal lighting to confirm the break but you may be able to determine if a piece of black plastic is loose inside somewhere, or if you see that a little piece of the housing is cracked or missing by using a bright light to inspect.
It will probably be this piece here:
Same picture on both sides obviously but just trying to make it easy for you to see what I want you to inspect. If it looks like that piece is missing, then I don’t think it can be fixed without replacement.
Even if you find the plastic piece, you’ll need to do some surgery and try to repair it with plastic cement which may not be strong enough to hold for very long. If it’s not broken and just separated, it might be possible to repack and close the button back up to normal operation but you have to confirm the damage first.
Normally you squeeze the tabs in and it releases the top from the bottom. That small bar of plastic is probably not very strong in the long term and thus is prone to eventual failure, which is what I suspect happened.
Thanks for the analysis and pictures mate, that makes the contruction of the switch more clear. Seems like a plausible explanation, since that «locking bar» looks brittle. I’ll have a closer look this afternoon and take some better pictures.
No problem, let me know what you come up with. It’s just difficult to see in the picture, but I think with your eyes on it you should be able to make a fair assessment.