has anyone made a DIY drum machine? Not thinking anything super sophisticated. I’m talking the synthesiser equivalent of a cigar box guitar. I’ve got a CV sequencer so none of that fancy business. How big a challenge is it to make some noisy abomination? Can’t be rocket science surely on a basic level. I know how to solder so that’s a start
2 Likes
The synth equivalent of a cigar box guitar is the Atari Punk Console.
My most complex builds were a Shruti-1 and an x0xb0x, both of which took a few days to build and debug.
A drum machine needs a gate sequencer for rhythm duties. A CV sequencer would be nice for plocking, but then you need some way to route the CV. You also need to make as many drum voices as you want. Unless you want to build one of the 808 or 909 kits, it probably makes more sense to DIY all of the Eurorack components you need for your drum machine. Or get into something smaller but still modular like lunettas.
4 Likes
There’s a few befaco diy drum module its available in eurorack format.
4 Likes
Im all covered for CV/gate and midi sequencing. I think that Atari punk console is the sort of basic starter thing I’m looking for then add parts and learn from there. Been looking at look mum no computers videos on YouTube and that seems like a good start too
@Microtribe I think full kits are a bit more sophisticated than I was thinking. I think I’d probably try cheapo modules before going that route but I’d be interested in that when I’ve got more experience
would love to hear about anyones experiences venturing into DIY electronics as a musician
1 Like
It’s not hard if you can solder and can read a schematic. Even if you can’t, there are kits out there that make it easier.
You could start with something like this:
https://store.synthrotek.com/DS-M_Analog_Drum_Synth_Module_DIY_Kit
4 Likes
My dad taught me to solder (badly) at a young age, and then I was the guy in EE lab who taught the other undergrads who didn’t already know how to solder. And then I dropped out of EE for the far greener pastures of CS. When I got back into electronics projects about a decade and zero physical labor since, I joined a Hacker Space event where we assembled APCs.
The most important advice I can offer you is:
- Practice soldering until your blobs are concave rather than convex. Think Hershey’s Kiss rather than, say, female gender affirming surgery. Practice on cheap APC kits or buy some perfboars with traces/pads and a bag of passives until you are good.
- Expect to make mistakes and have a debugging strategy. At a minimum, you need a power supply, which could be a battery carrier with stiff copper wires soldered on as probes and an LED with a suitable inline resistor. Better would be a DMM, and best (but massive overkill) would be a lab power supply, lab DMM, full sized scope, all with nice probes and banana jacks, etc.
- Before you spend beyond a $50-100 handheld DMM, get a good soldering iron, something in the $100 range with adjustable temperature from Hakko or Weller. I’m sure there are extremely good Chinese soldering stations, but you might need to be able to read Chinese forums to find them.
- Ventilation. Even if you are fully ROHS, most fumes associated with soldering will not improve your health. Make sure you aren’t working in a basement dungeon with no ventilation.
Mind game: from a psychological perspective, I helped my parents demolish interiors and rebuild homes, and then engineered software at several FAANG-tier companies. So I had confidence that I was equally capable of building physical things, and fucking up epically. Knowing that you can do things and also exercising restraint so that you can debug your mistakes is key to the mind game of doing complex DIY projects.
Hilarious levels of overkill (NASA).
10 Likes
i Guess it depends on how ‘DIY’ you want to get? If you’re thinking of building and tweaking circuits from schematics or ones found online then I’d strongly recommend getting at least one breadboard and some jumpers as well as some basic test gear. It’s really frustrating building a circuit on perf board/stripboard only to find there are faults, errors or just component values you want to play with. It’s much easier to do all that on a breadboard before reaching for the soldering iron.
A cheap multimeter will get you so far but if you can stretch to it I’d get a scope too. You’ll wonder how you managed before, especially for viewing waveforms, envelopes etc. You could get old CRT scopes for next to nothing not that long ago, don’t know if that’s still the case? Otherwise there are loads of options for digital scopes from a decent bench one (I use a Rigol) or handheld or PC based scopes.
From a circuit point of view I started building a drum machine from the ground up but got waylaid. I did get a good chunk of the voice circuits breadboarded and tweaked to taste before other stuff got in the way. A good place to start would be something like the TR808 service manual as there are detailed descriptions of how the voices are generated as well as the circuit diagrams themselves.
Electronics as a hobby is really rewarding imo and there are som many paths you can take depending on your interests whether that be analogue, digital or coding/PIC/Arduino etc.
A quick word on power supplies too… ideally you’ll want a bipolar PSU (so you’ve got -ve and +ve supply rails) as it makes life so much easier when working with op amps and stuff like VCO/VCF/VCA chips. There are ways around it either by building your own -ve rail or by biasing stuff around half the supply but they’re both workarounds in many cases and can have limitations (op amps that won’t swing rail to rail etc). Sadly bipolar PSU aren’t as common as they used to be. One thing I’ve thought about is getting a eurorack PSU and modding it into a case with fused protection etc. That way you get both 12v rails and a 5v rail too. Don’t know if anyone else has done this? I suppose you’re limited to 12v but unless you’re designing your own PSU it’s a choice you’ll have to make at some point.
3 Likes
thanks for all the advice so far people, much appreciated. Gonna dig in and try to find some learning resources
1 Like
Radio Shack / Forrest Mims books.
1 Like
Sadly Ray isn’t with us anymore but I learned an awful lot here way back when. Fabulous resource
3 Likes
A couple of things that helped me get going were getting comfortable with a breadboard, drawing schematics for simple circuits by hand and learning how to make my own strip board layouts. These three items will help you understand how things work.
Don’t chintz on the soldering iron. If you want to build nice things get a proper tool. Spend a hundred bucks once and get something your kids can use after you die or buy a cheap piece of shit. Repeatedly. A nice multimeter is worth more than every penny spent on it as well. Get handy with desoldering because it’s definitely necessary and can be a major pain at times. Learn the math. I haven’t really done that one and I need to. I often feel like a big dummy putting things together and my smart friends can barely help me because I just don’t know my basic shit. Lastly don’t let not having any of the above stop you!
I’ve made a metric buttload of guitar pedals in my day and after a few years at it I built this thing.
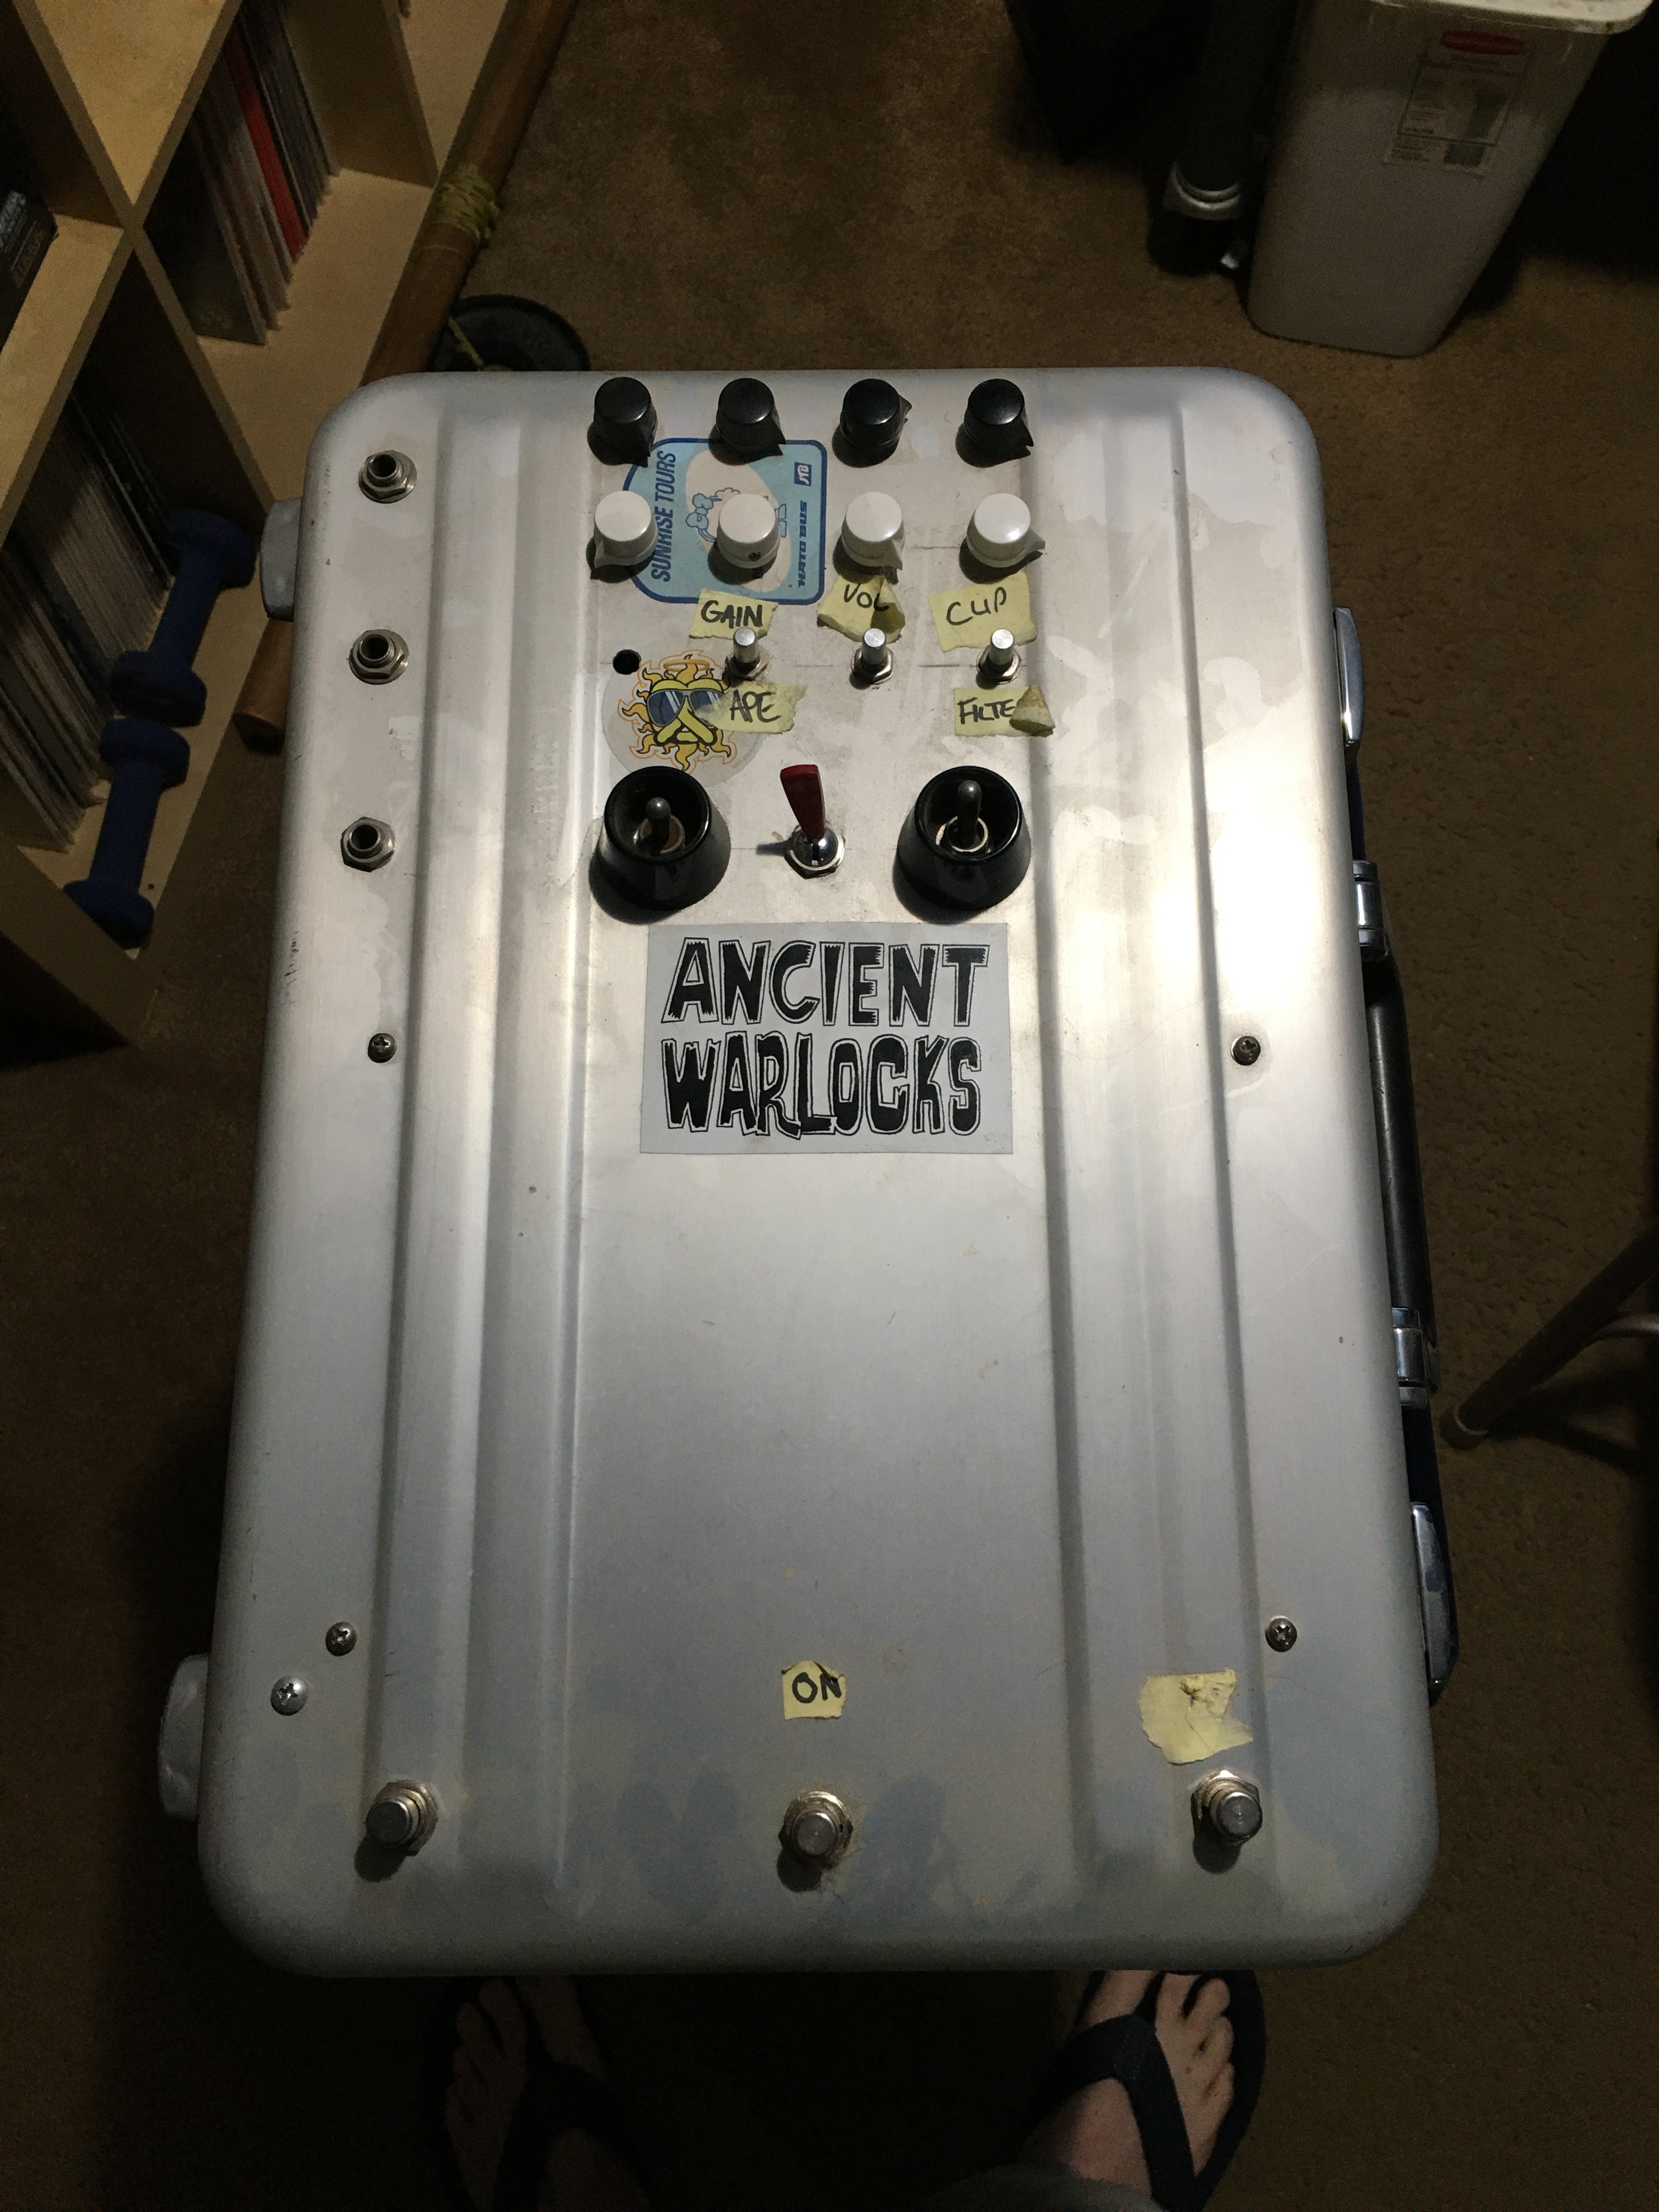
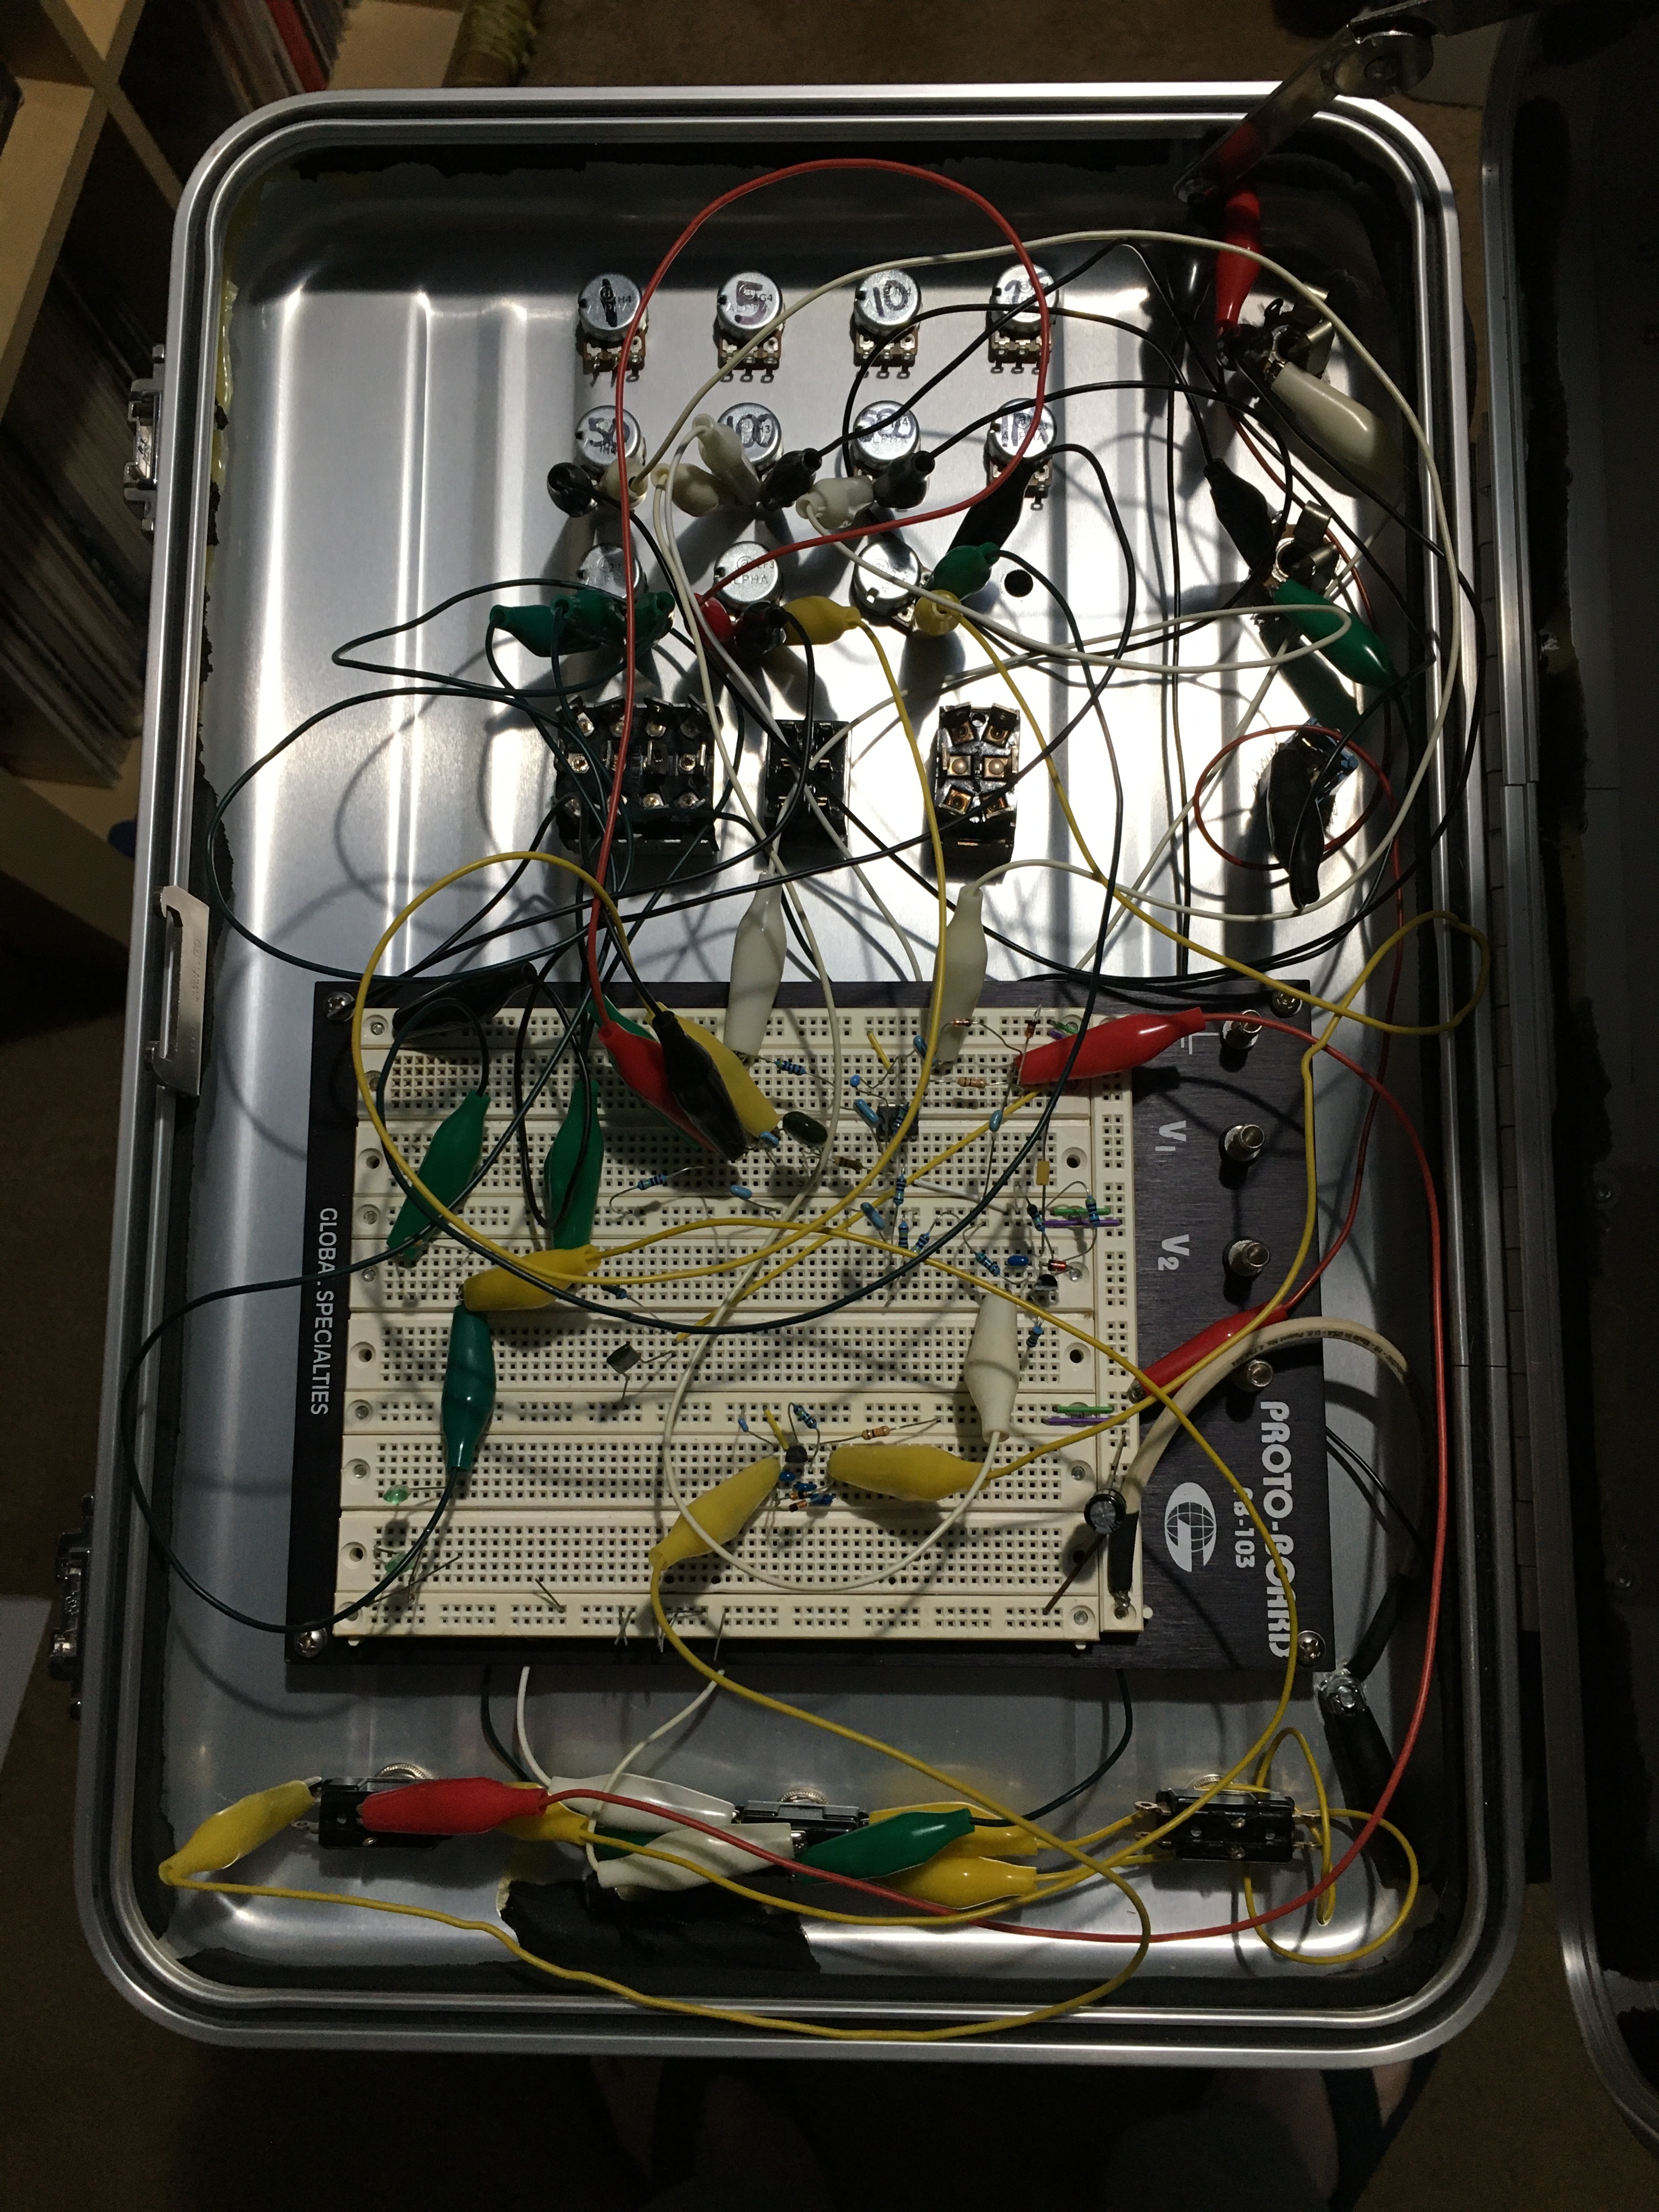
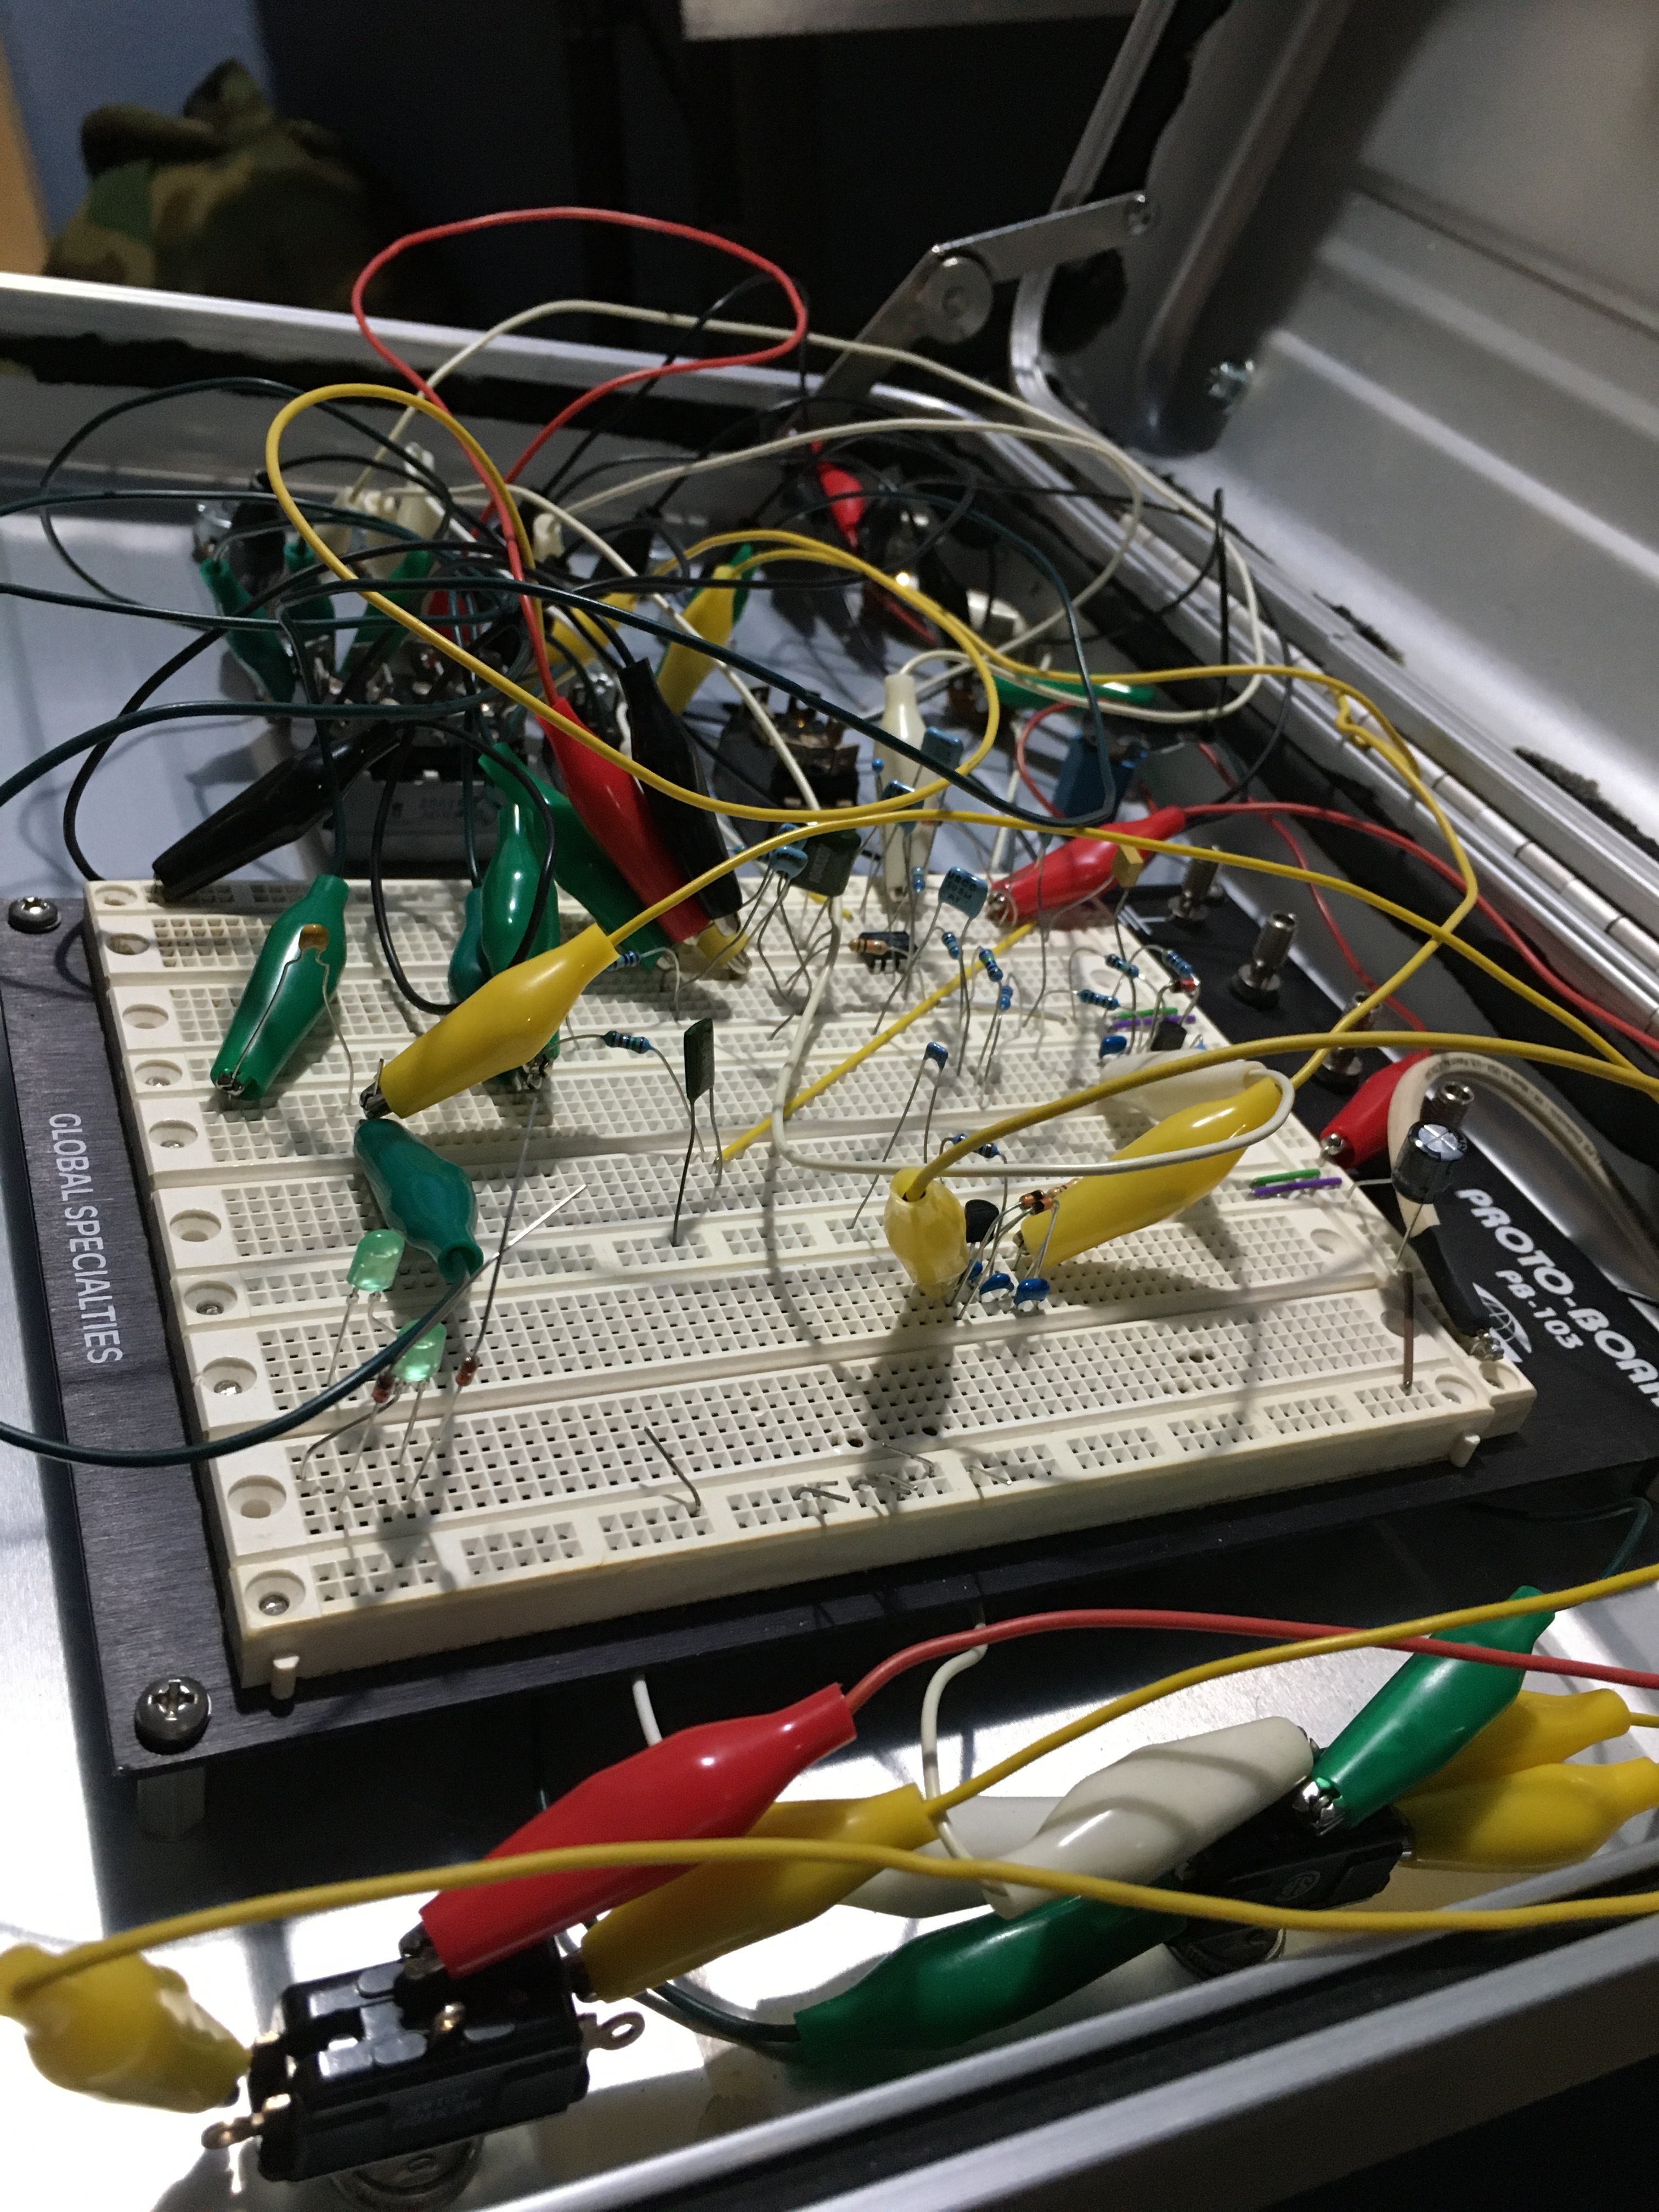
It’s an old aluminum laptop briefcase which houses a breadboard, three two pole stomp switches, three toggle switches, three 1/4” switching jacks, eight permanently mounted pots (one each of the most common pedal values) and four empty holes for more pots as necessary. Three of those holes are filled at the moment. This thing was immensely handy back when I was balls deep in the pedal world. I could build any simple circuit (the breadboard’s not big enough to go crazy deep) and take it anywhere and have it be properly shielded without wasting an enclosure. Looks like the last thing I was working on was a mashup of Distortion+, SHO, and my own Ape Blaster fuzz circuit. It’s nasty as fuck and Tad loved it but it looks like I stopped before it was quite ready for primetime. It’s been sitting like this for at least five years now. Maybe I’ll get back into this stuff some day.
3 Likes
If you want to kick it super old school you could check out this PAIA kit. I haven’t done this one but I do have the Theremax, which I built and got working even though I’m not great with electronics. Think I will dig it out soon and finally finish the case.
1 Like
LXR mk1
1 Like
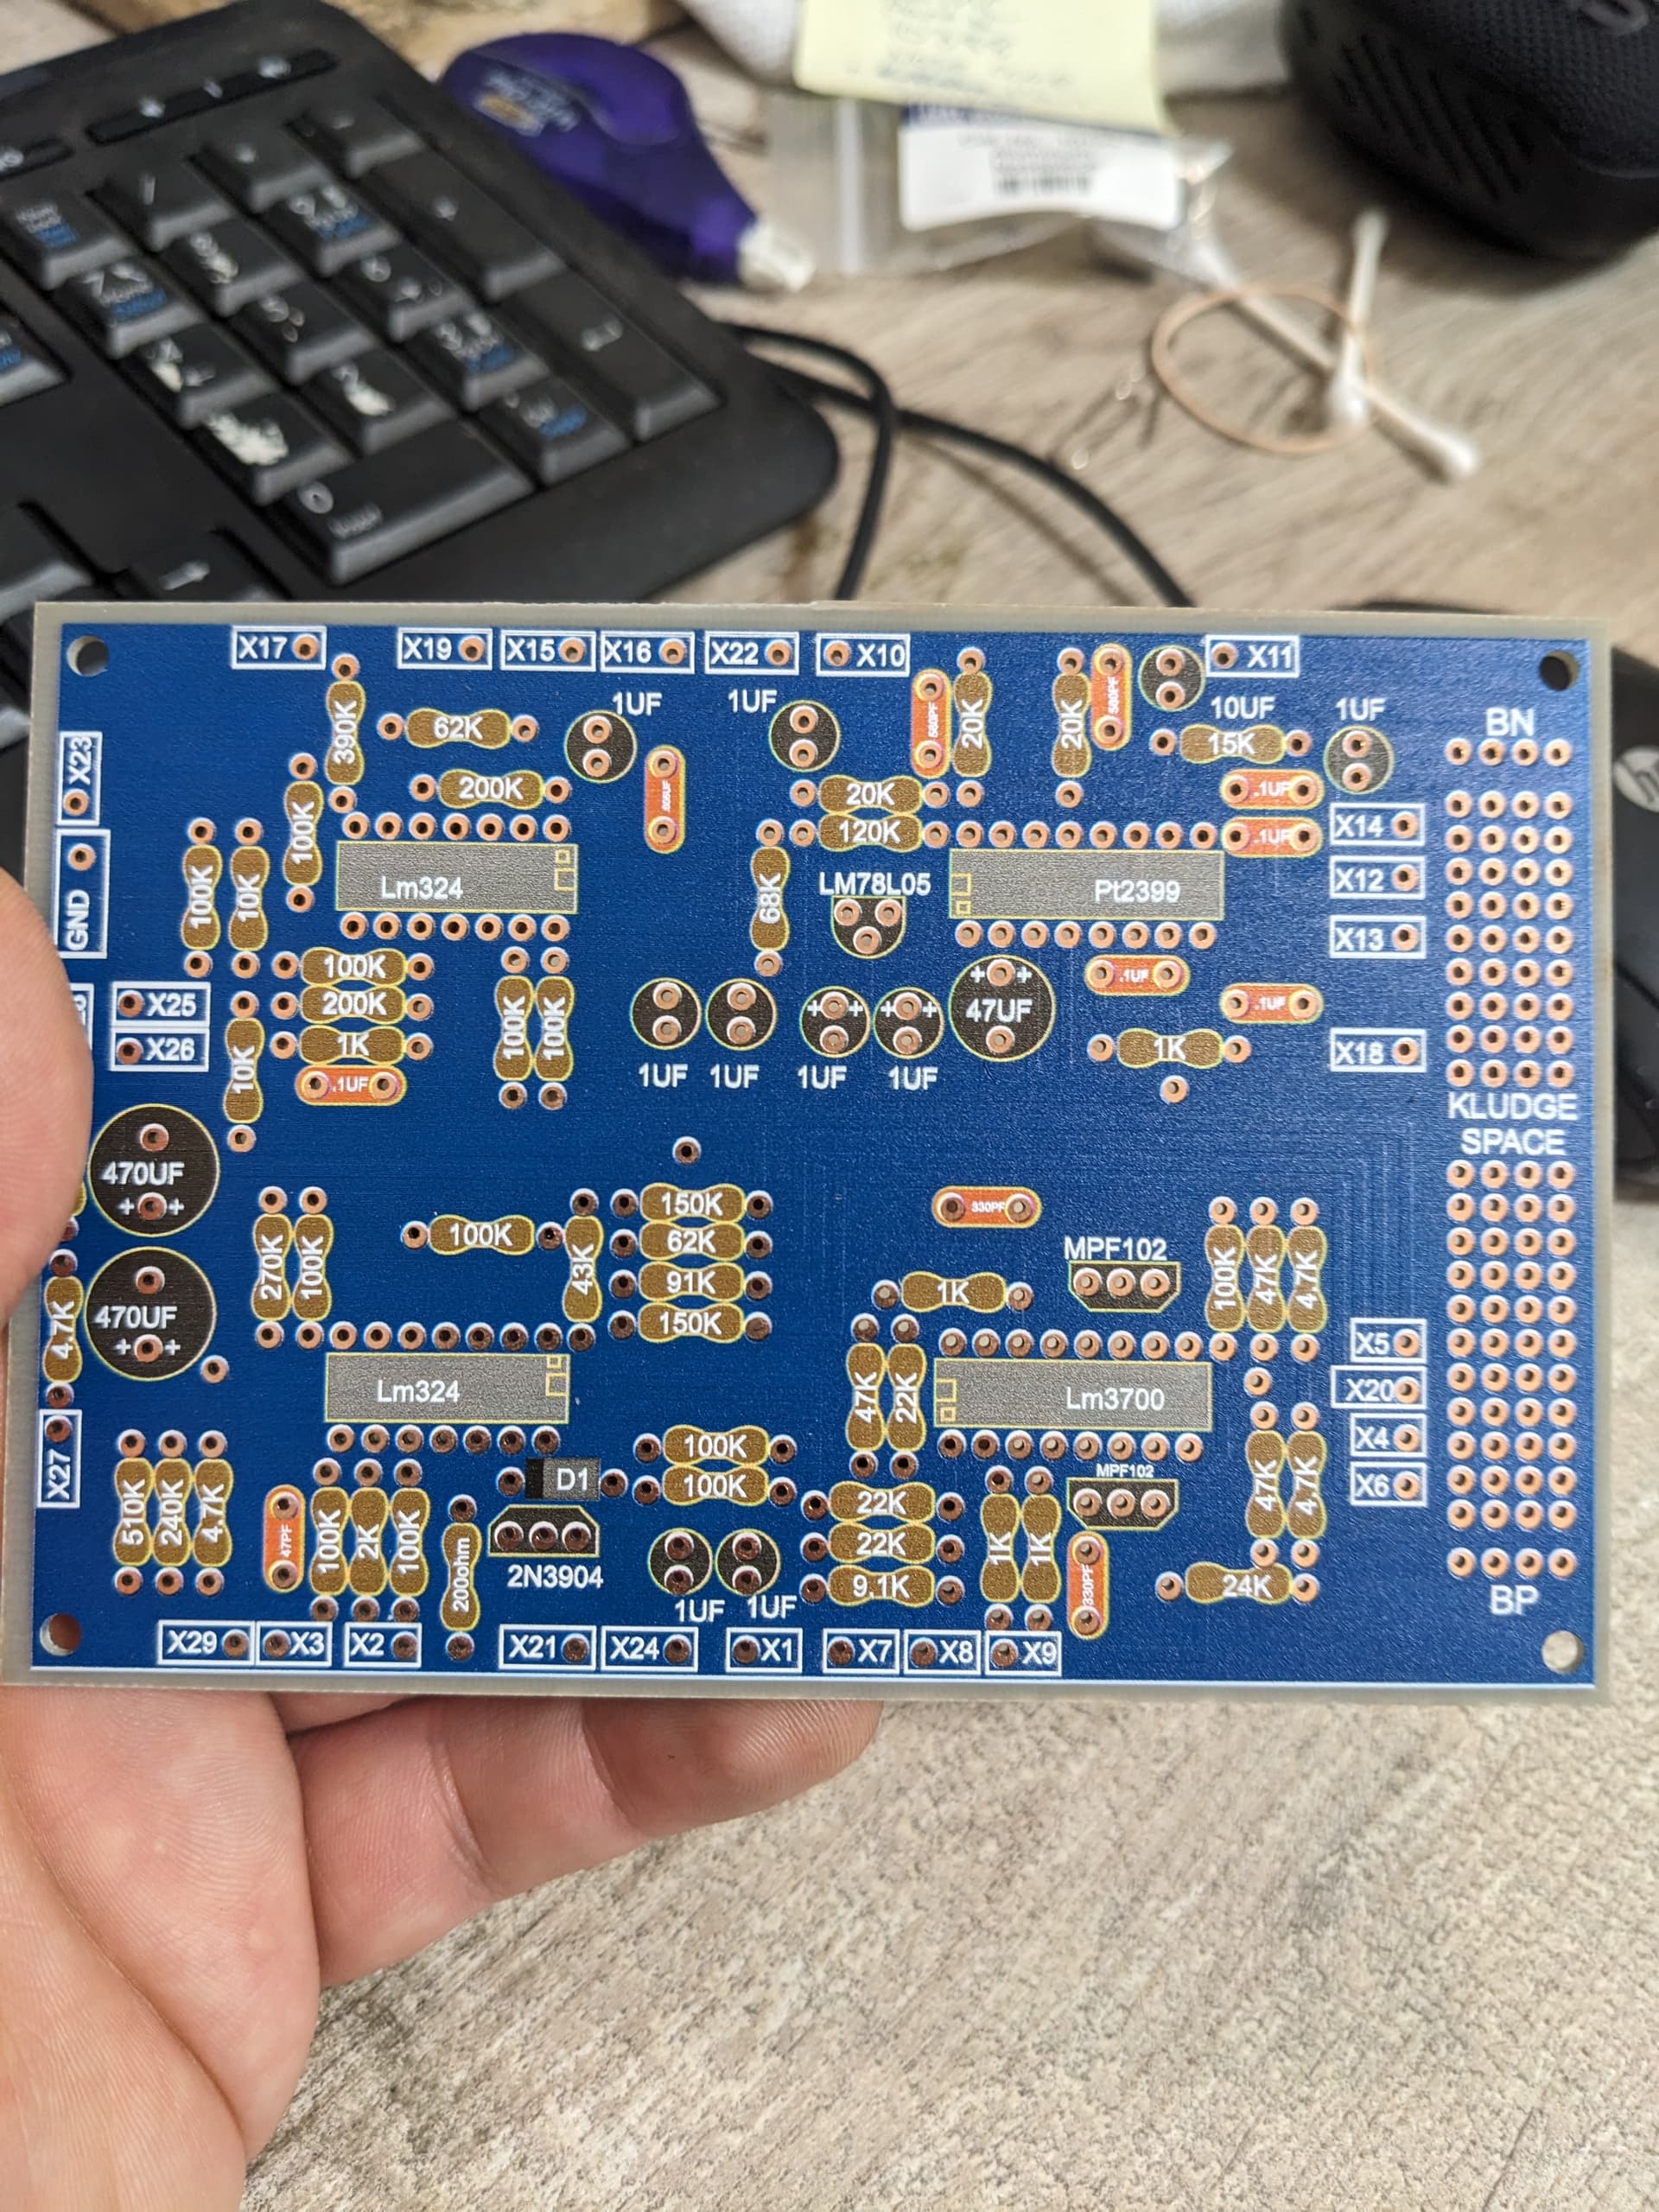
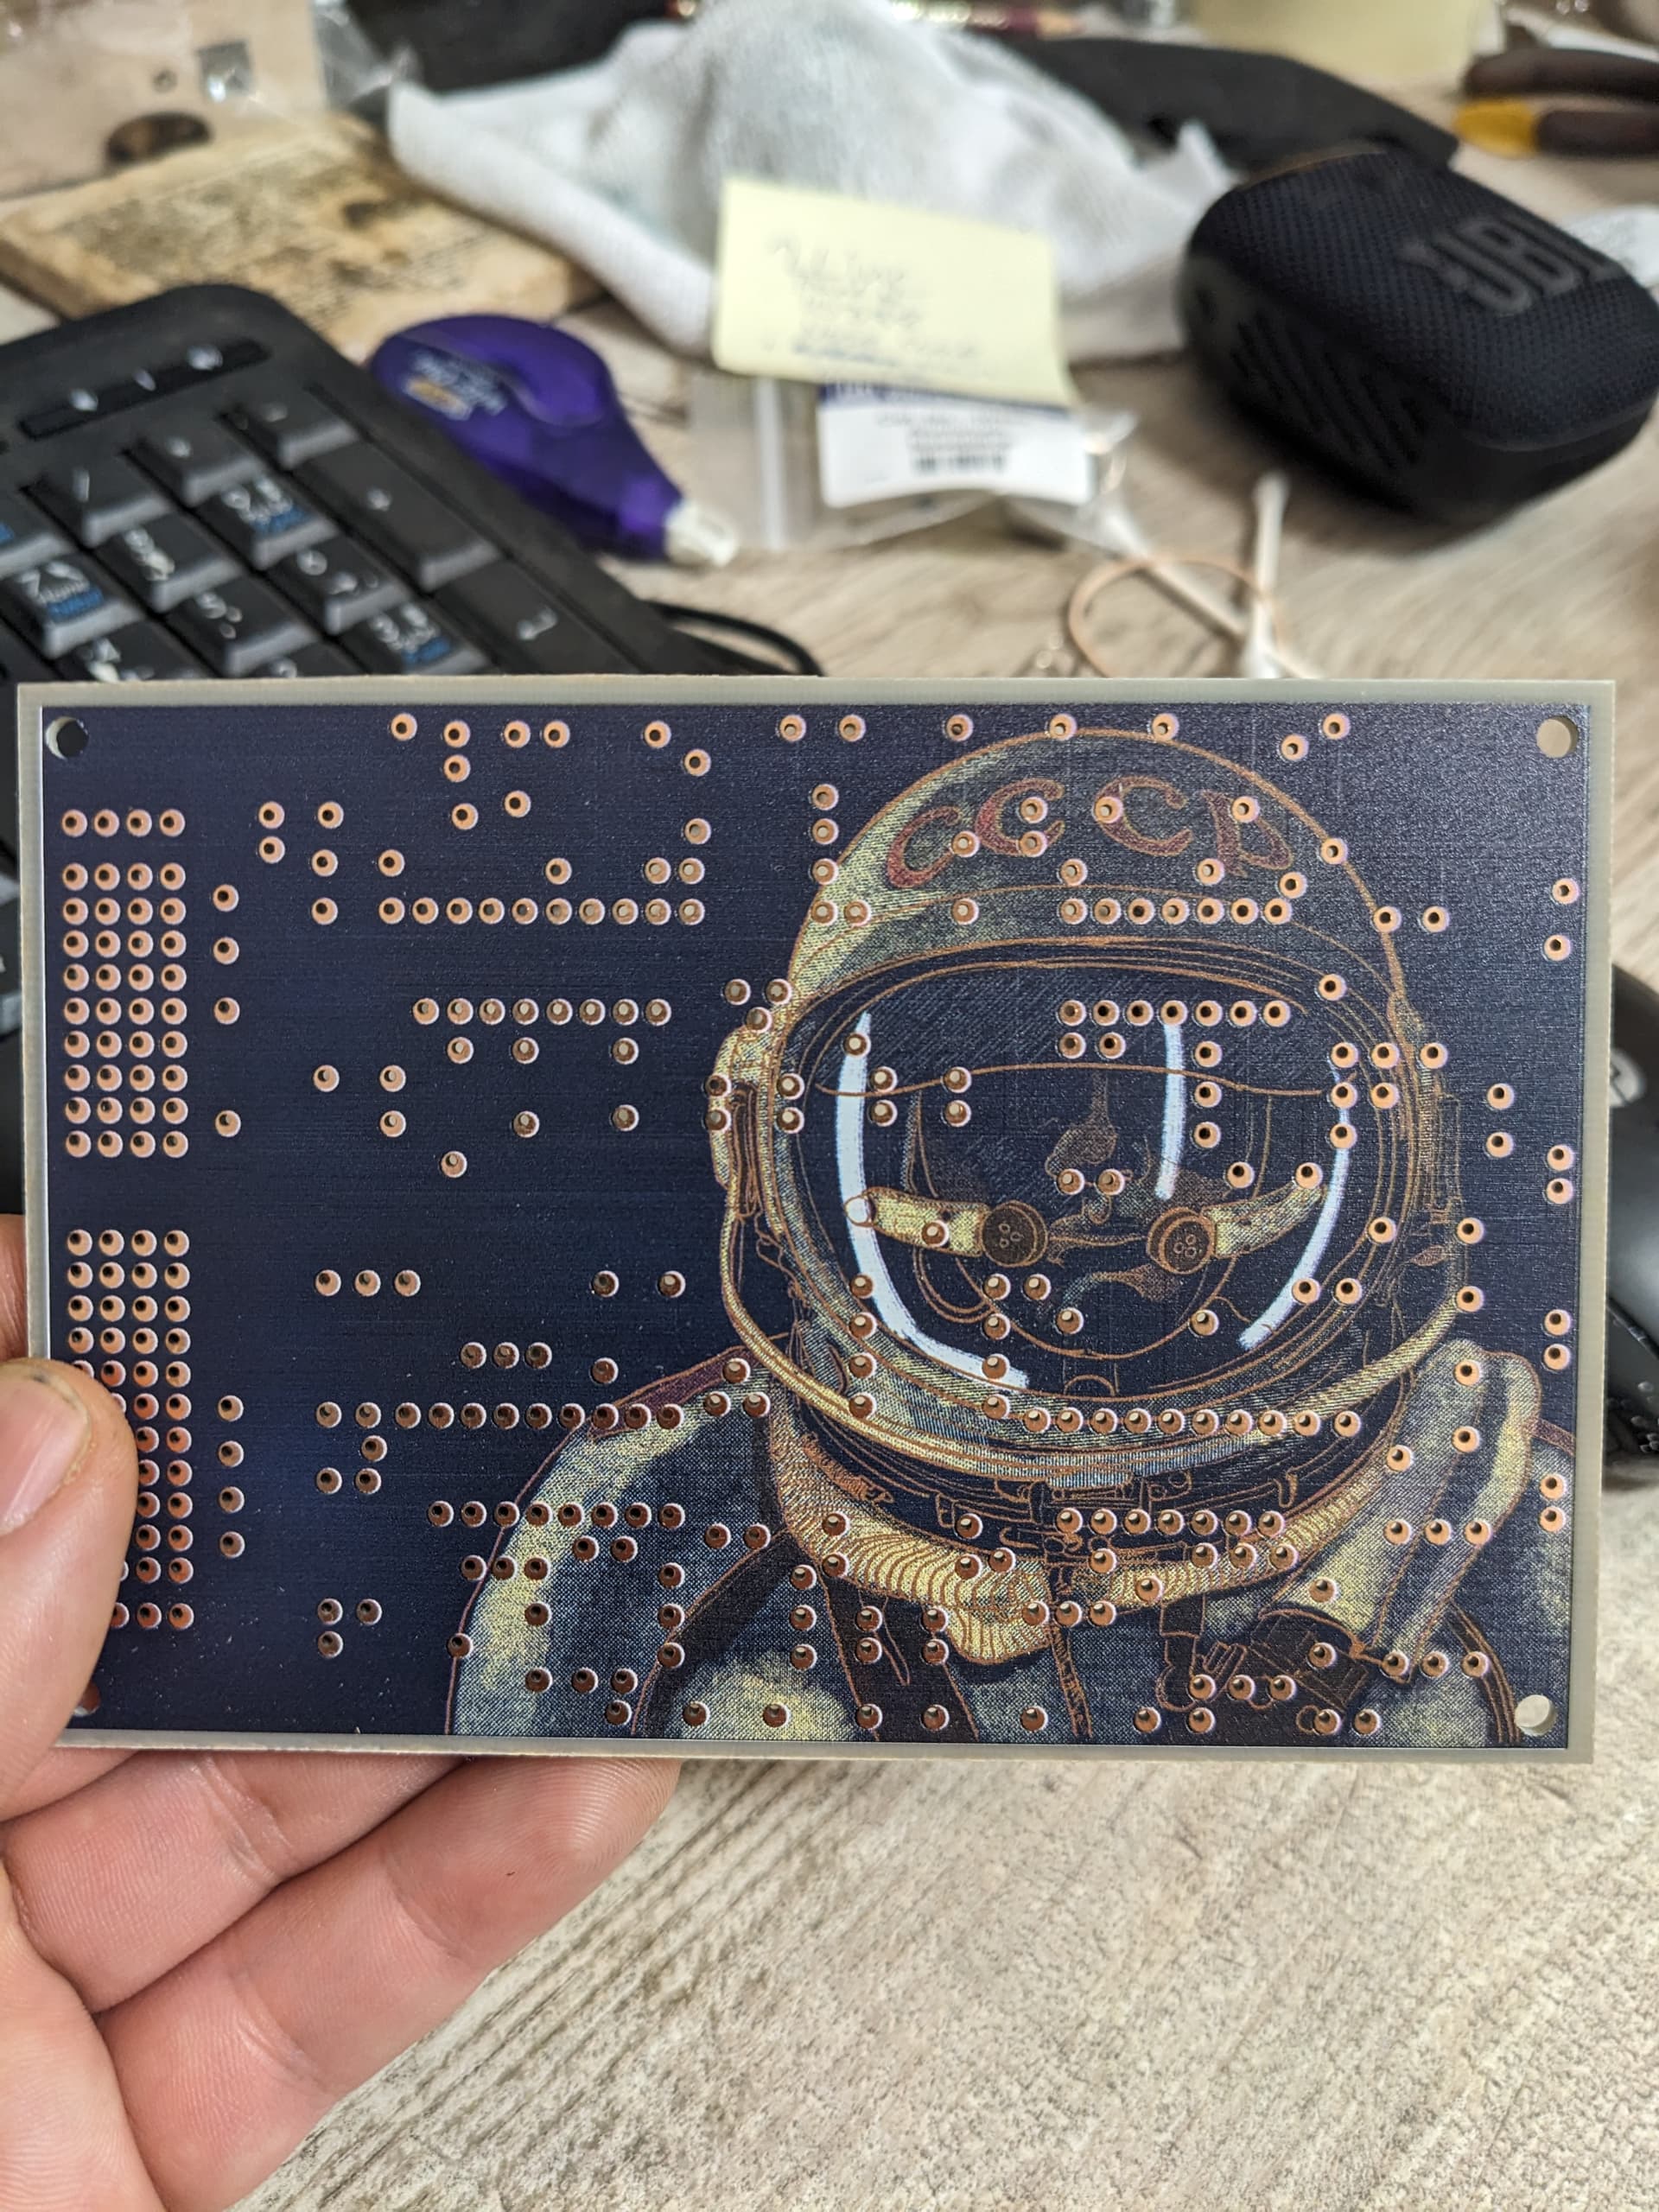
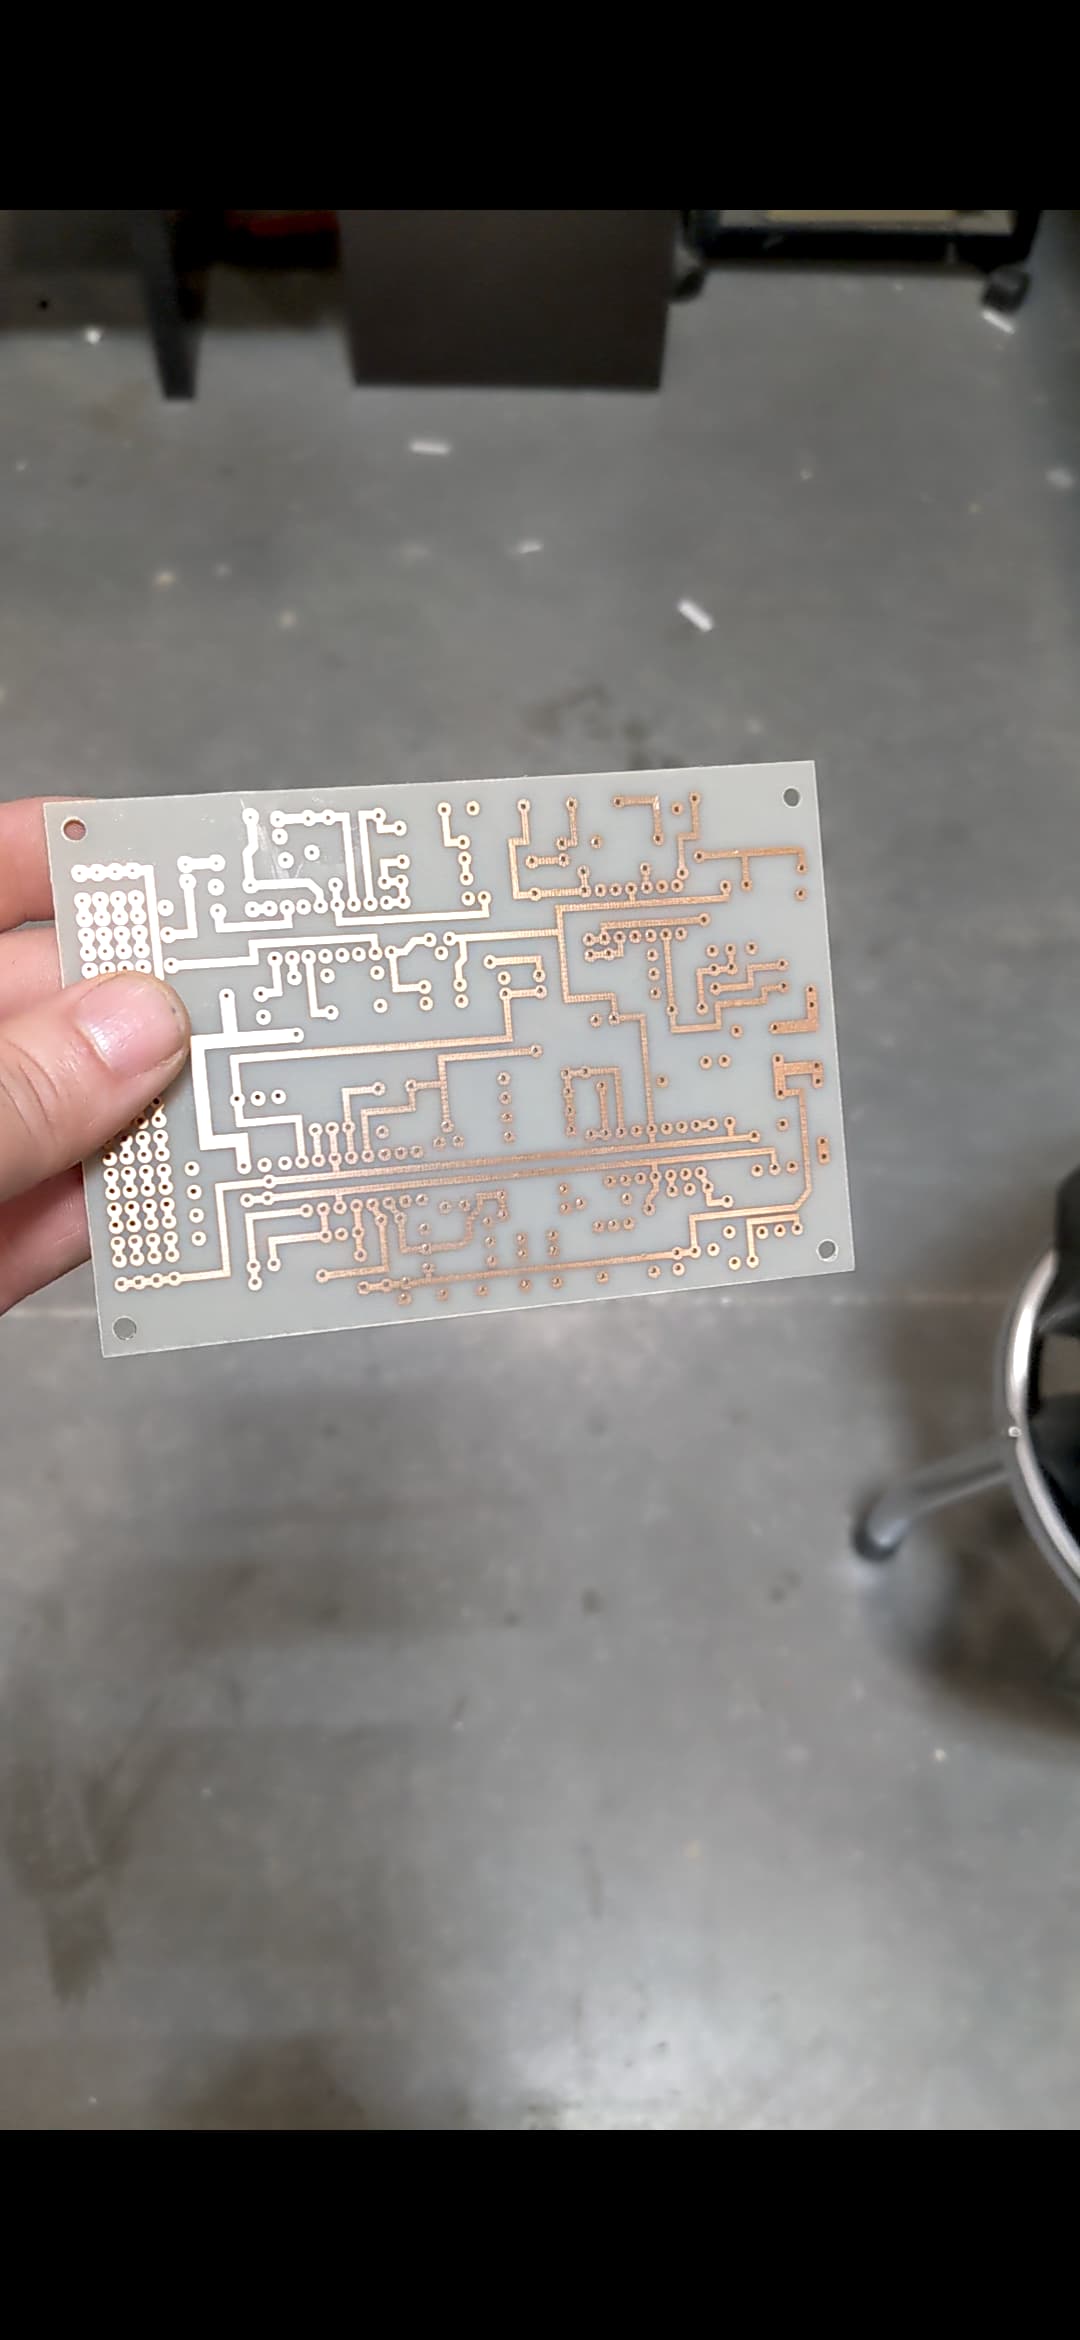
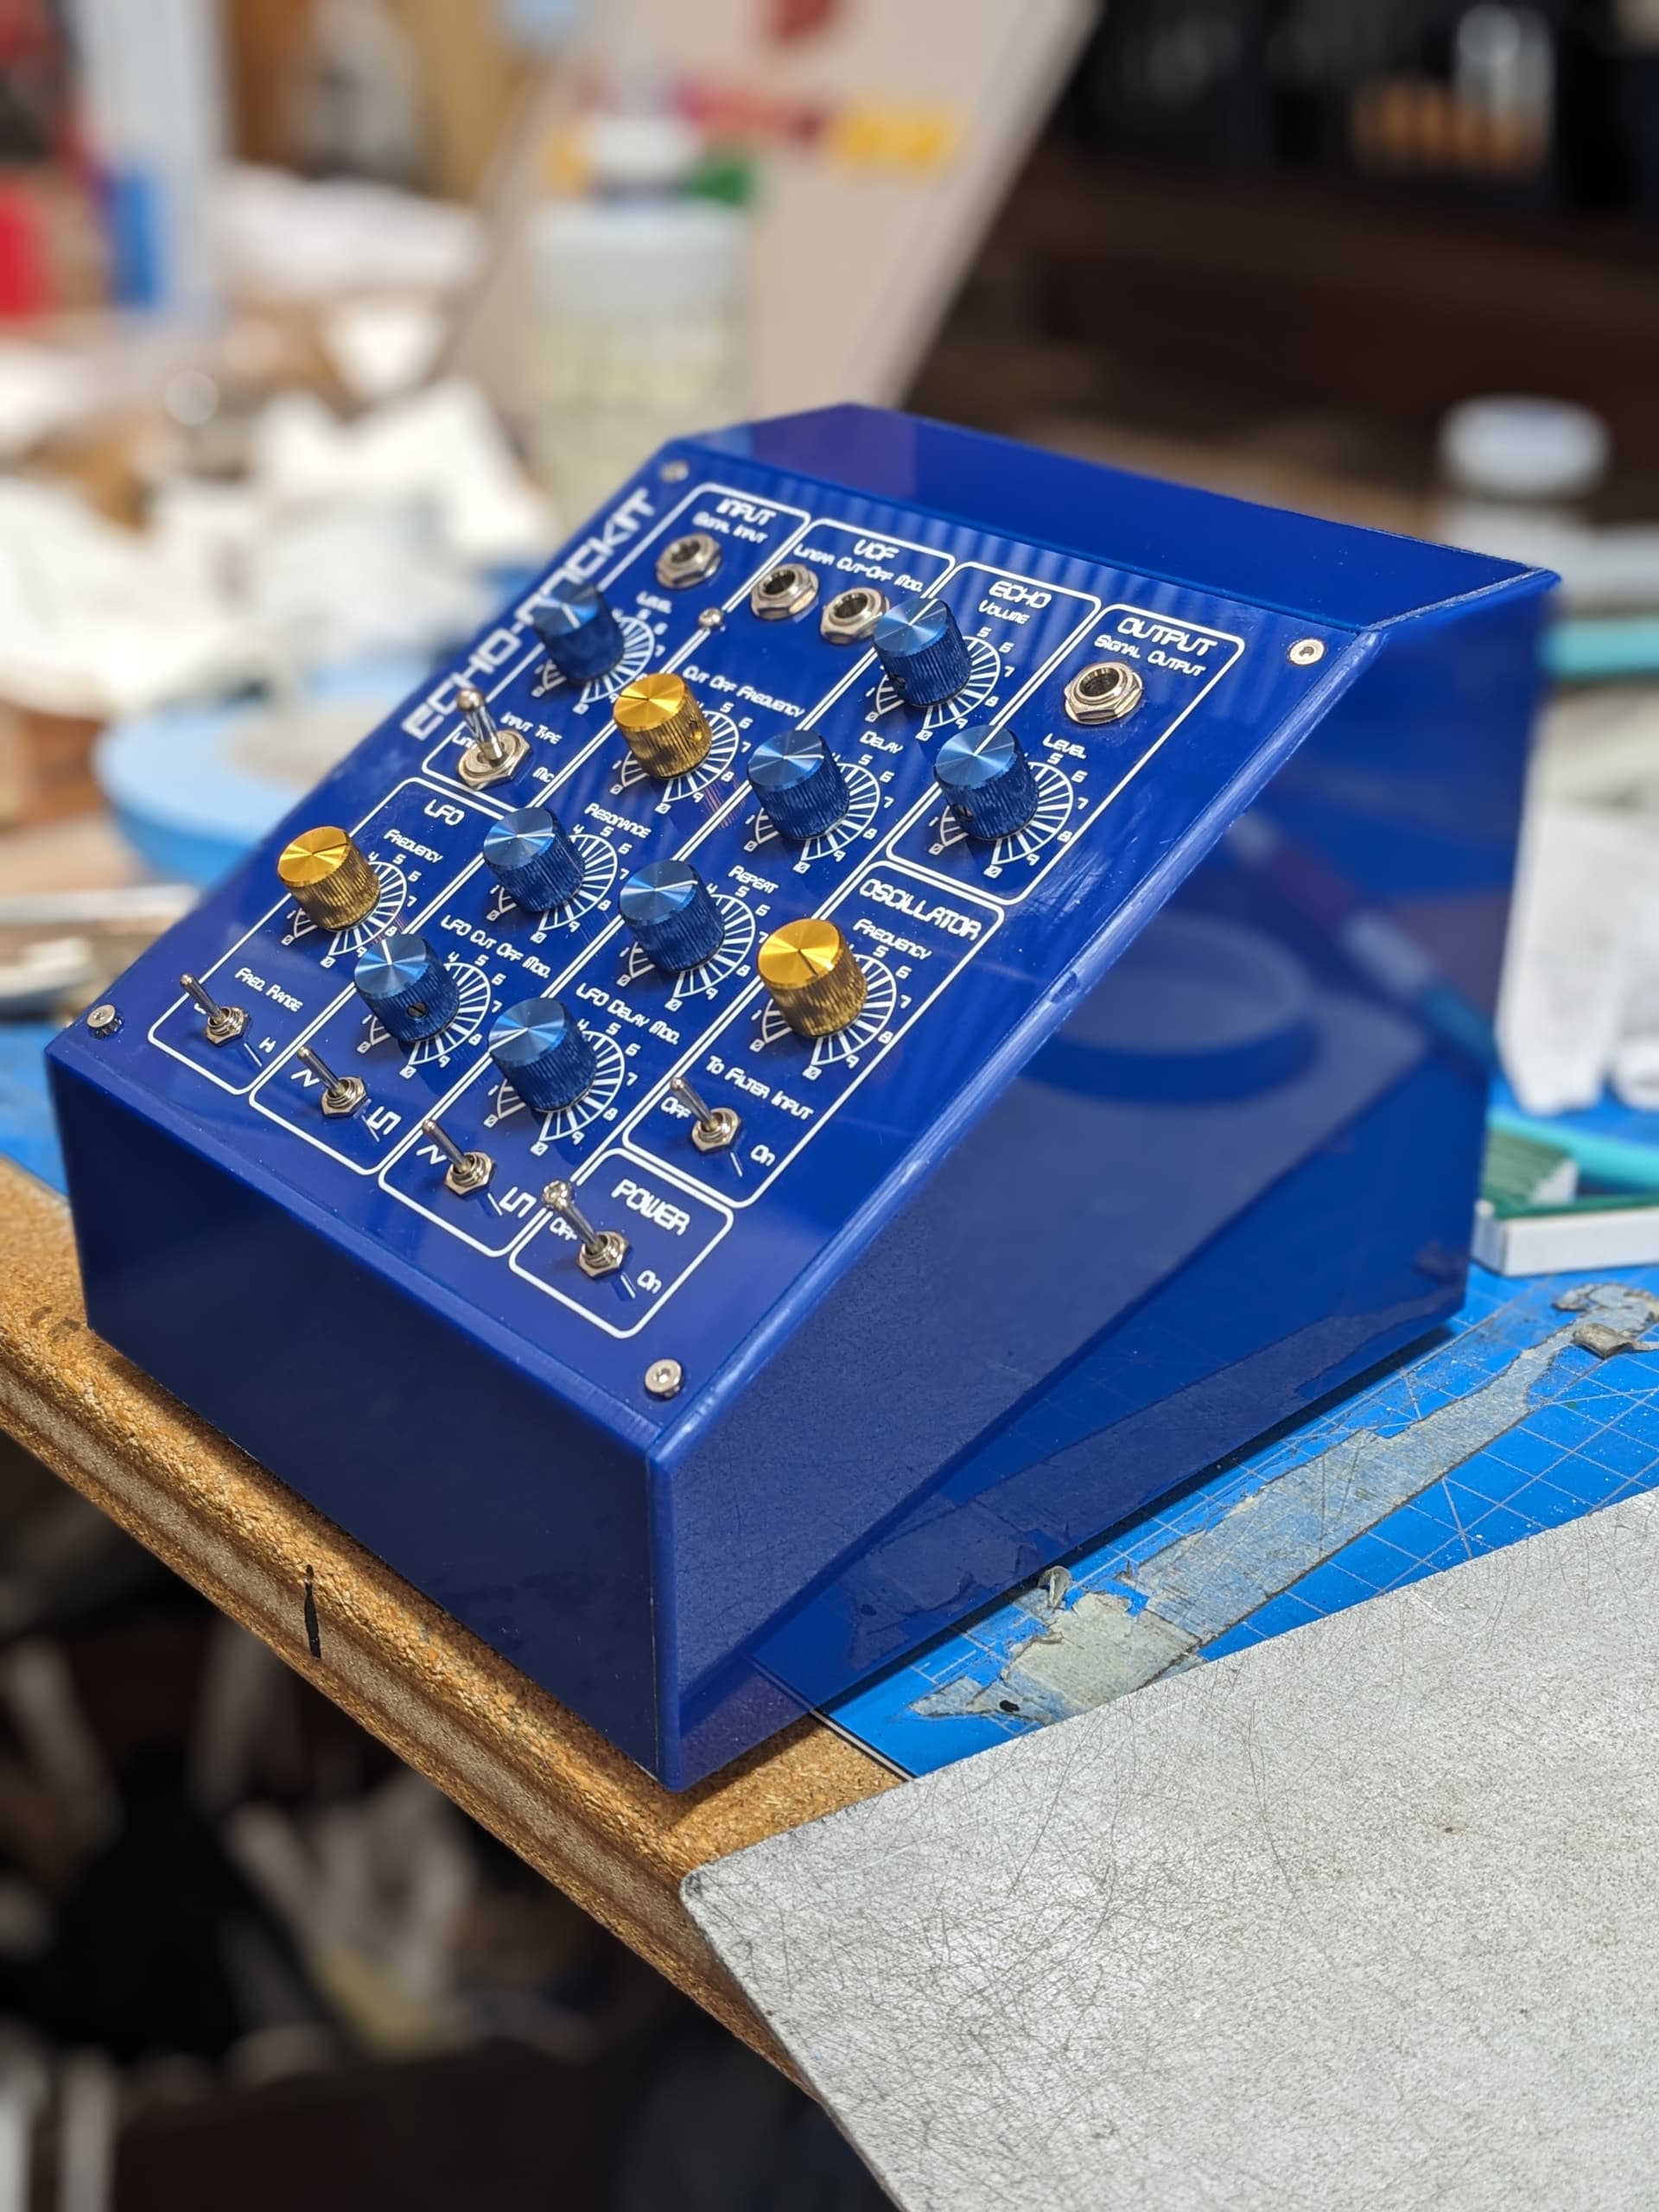
I’m tackling the MFOS Echo Rockit to test my PCB printing abilities. I’ve gathered all the parts and just printed the board (CNC for all the drill holes and then UV Printer for the etch resist and overlay). If I didnt make any mistakes re-drawing the board then this should work right off the bat.
I eventually want to tackle the Soundlab Ultimate plus Expander.
7 Likes
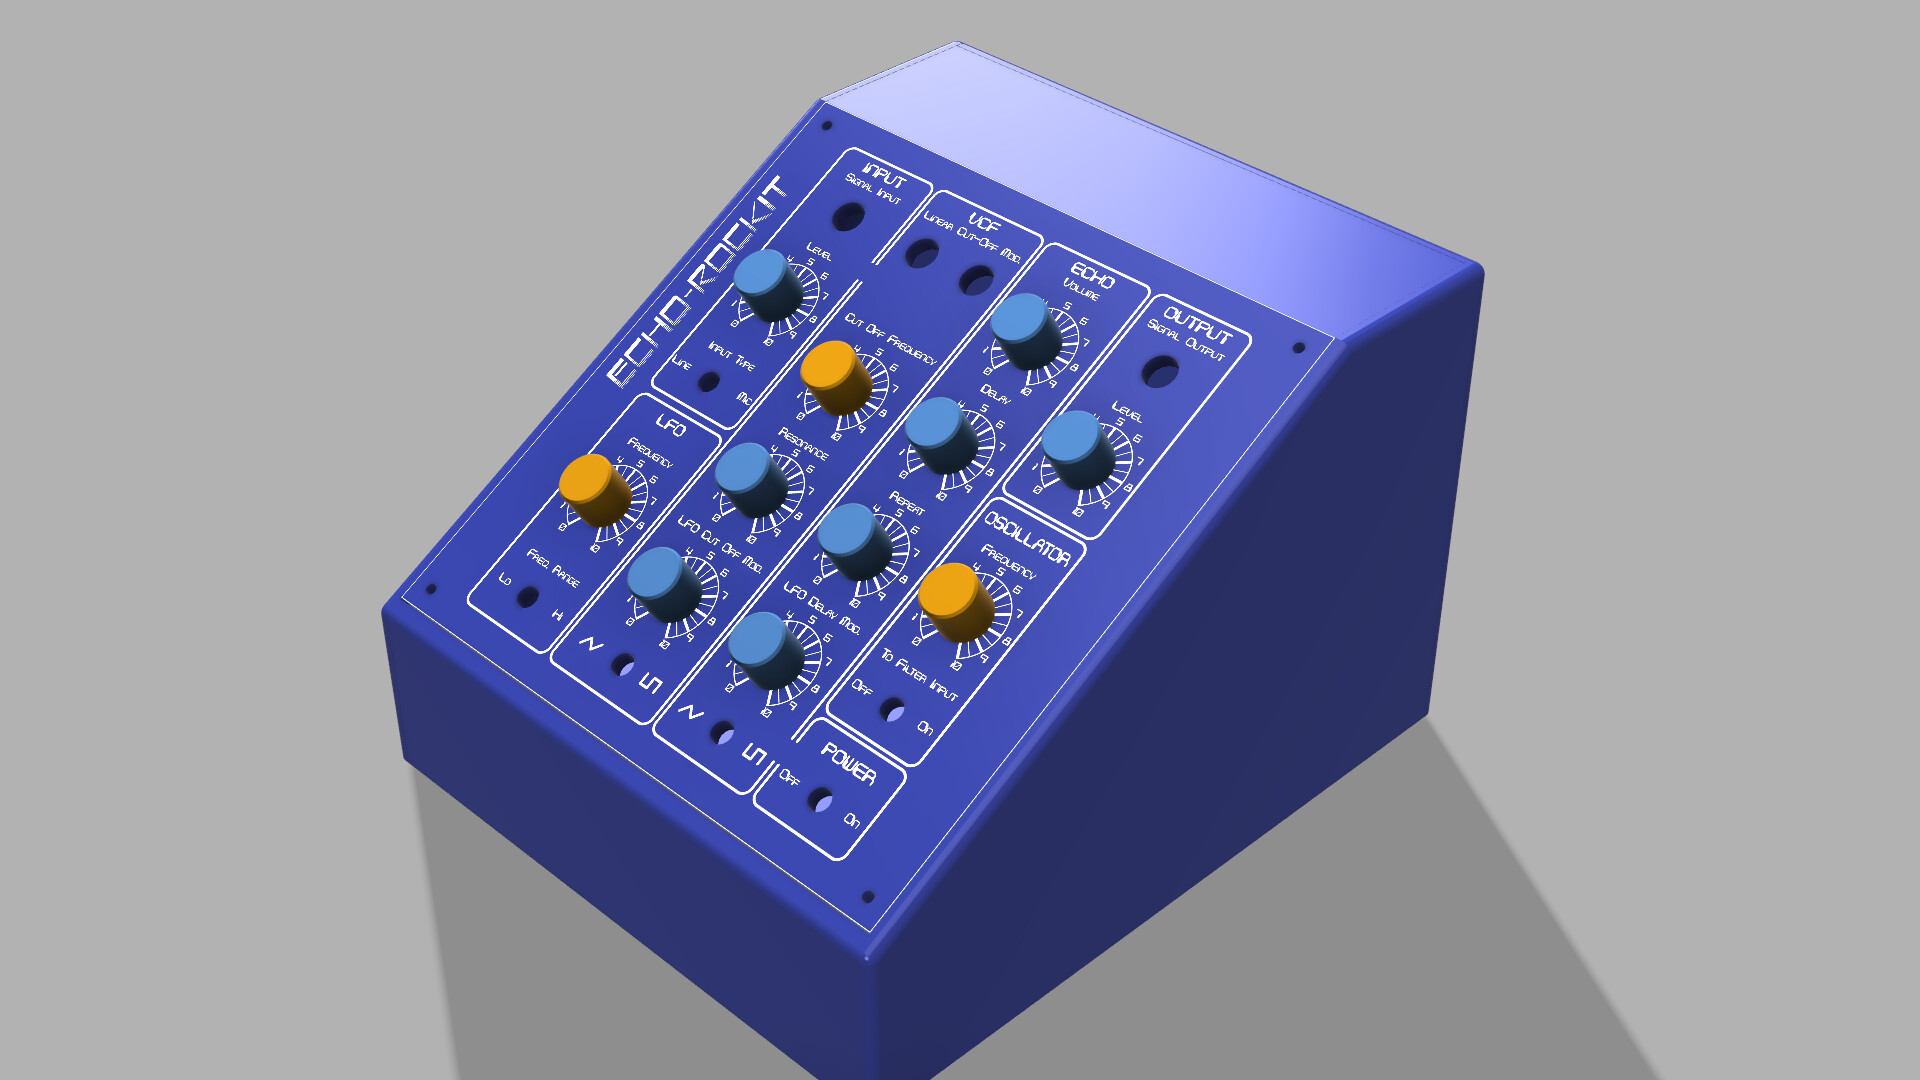
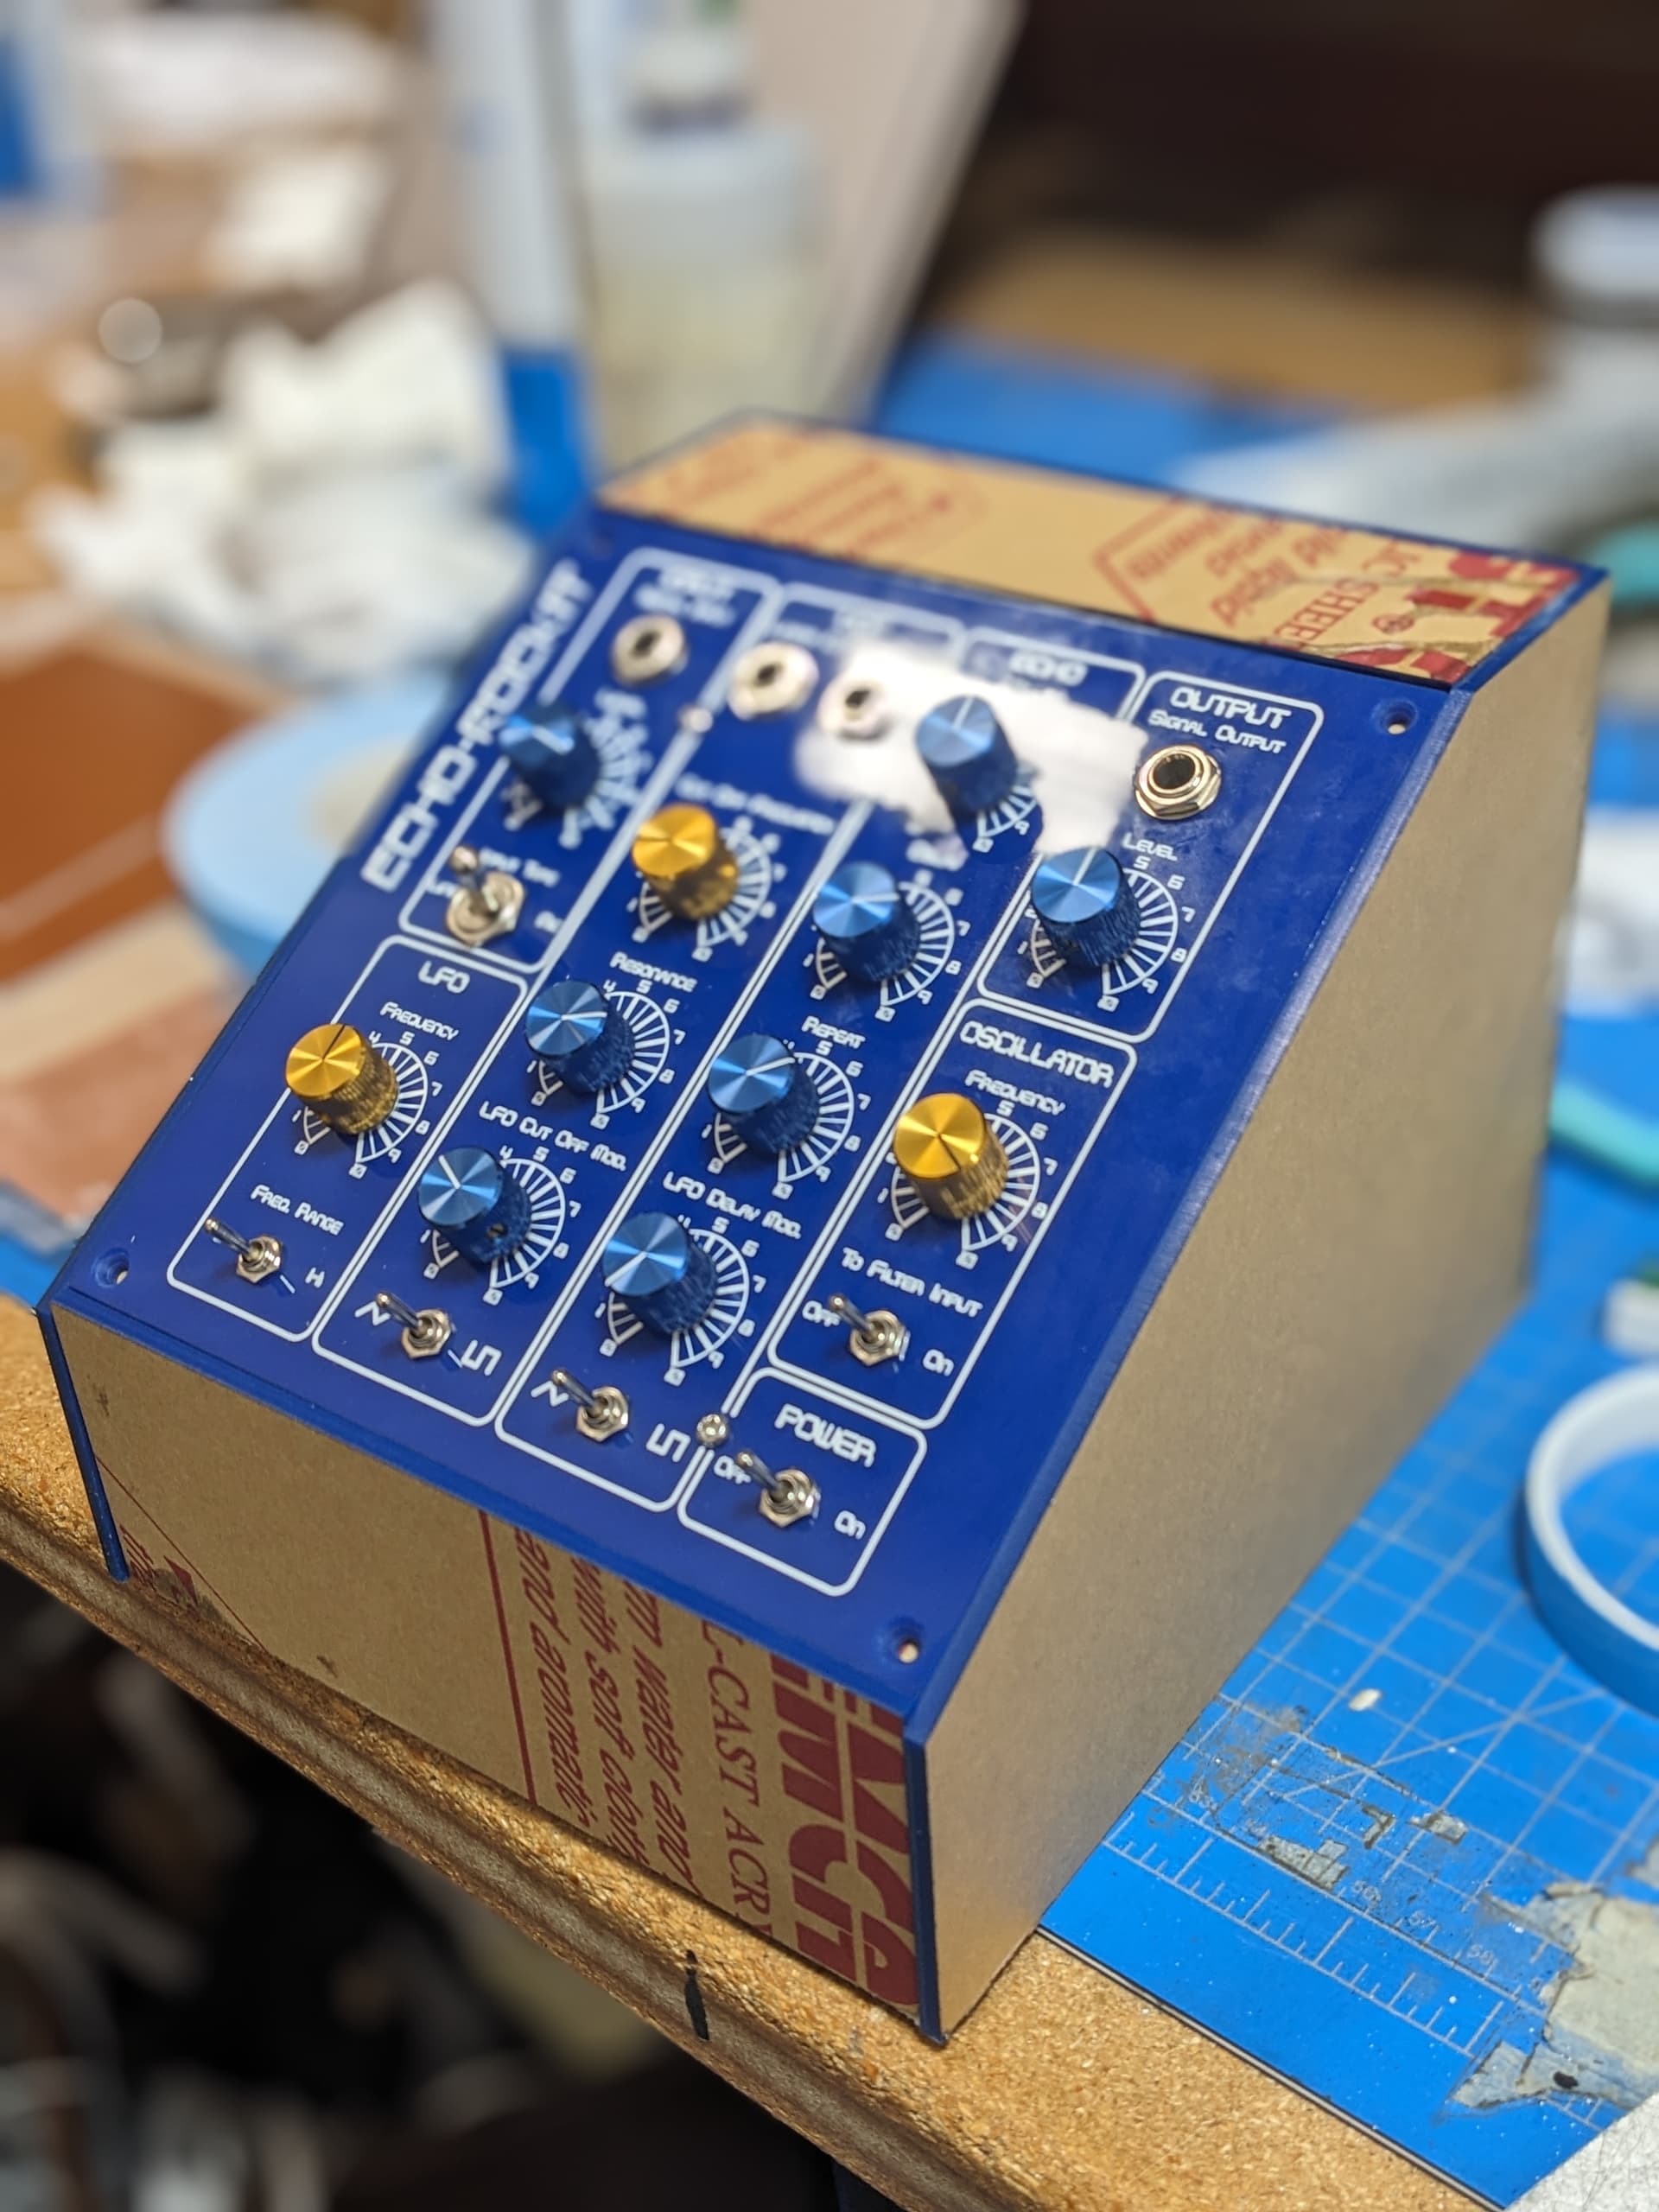
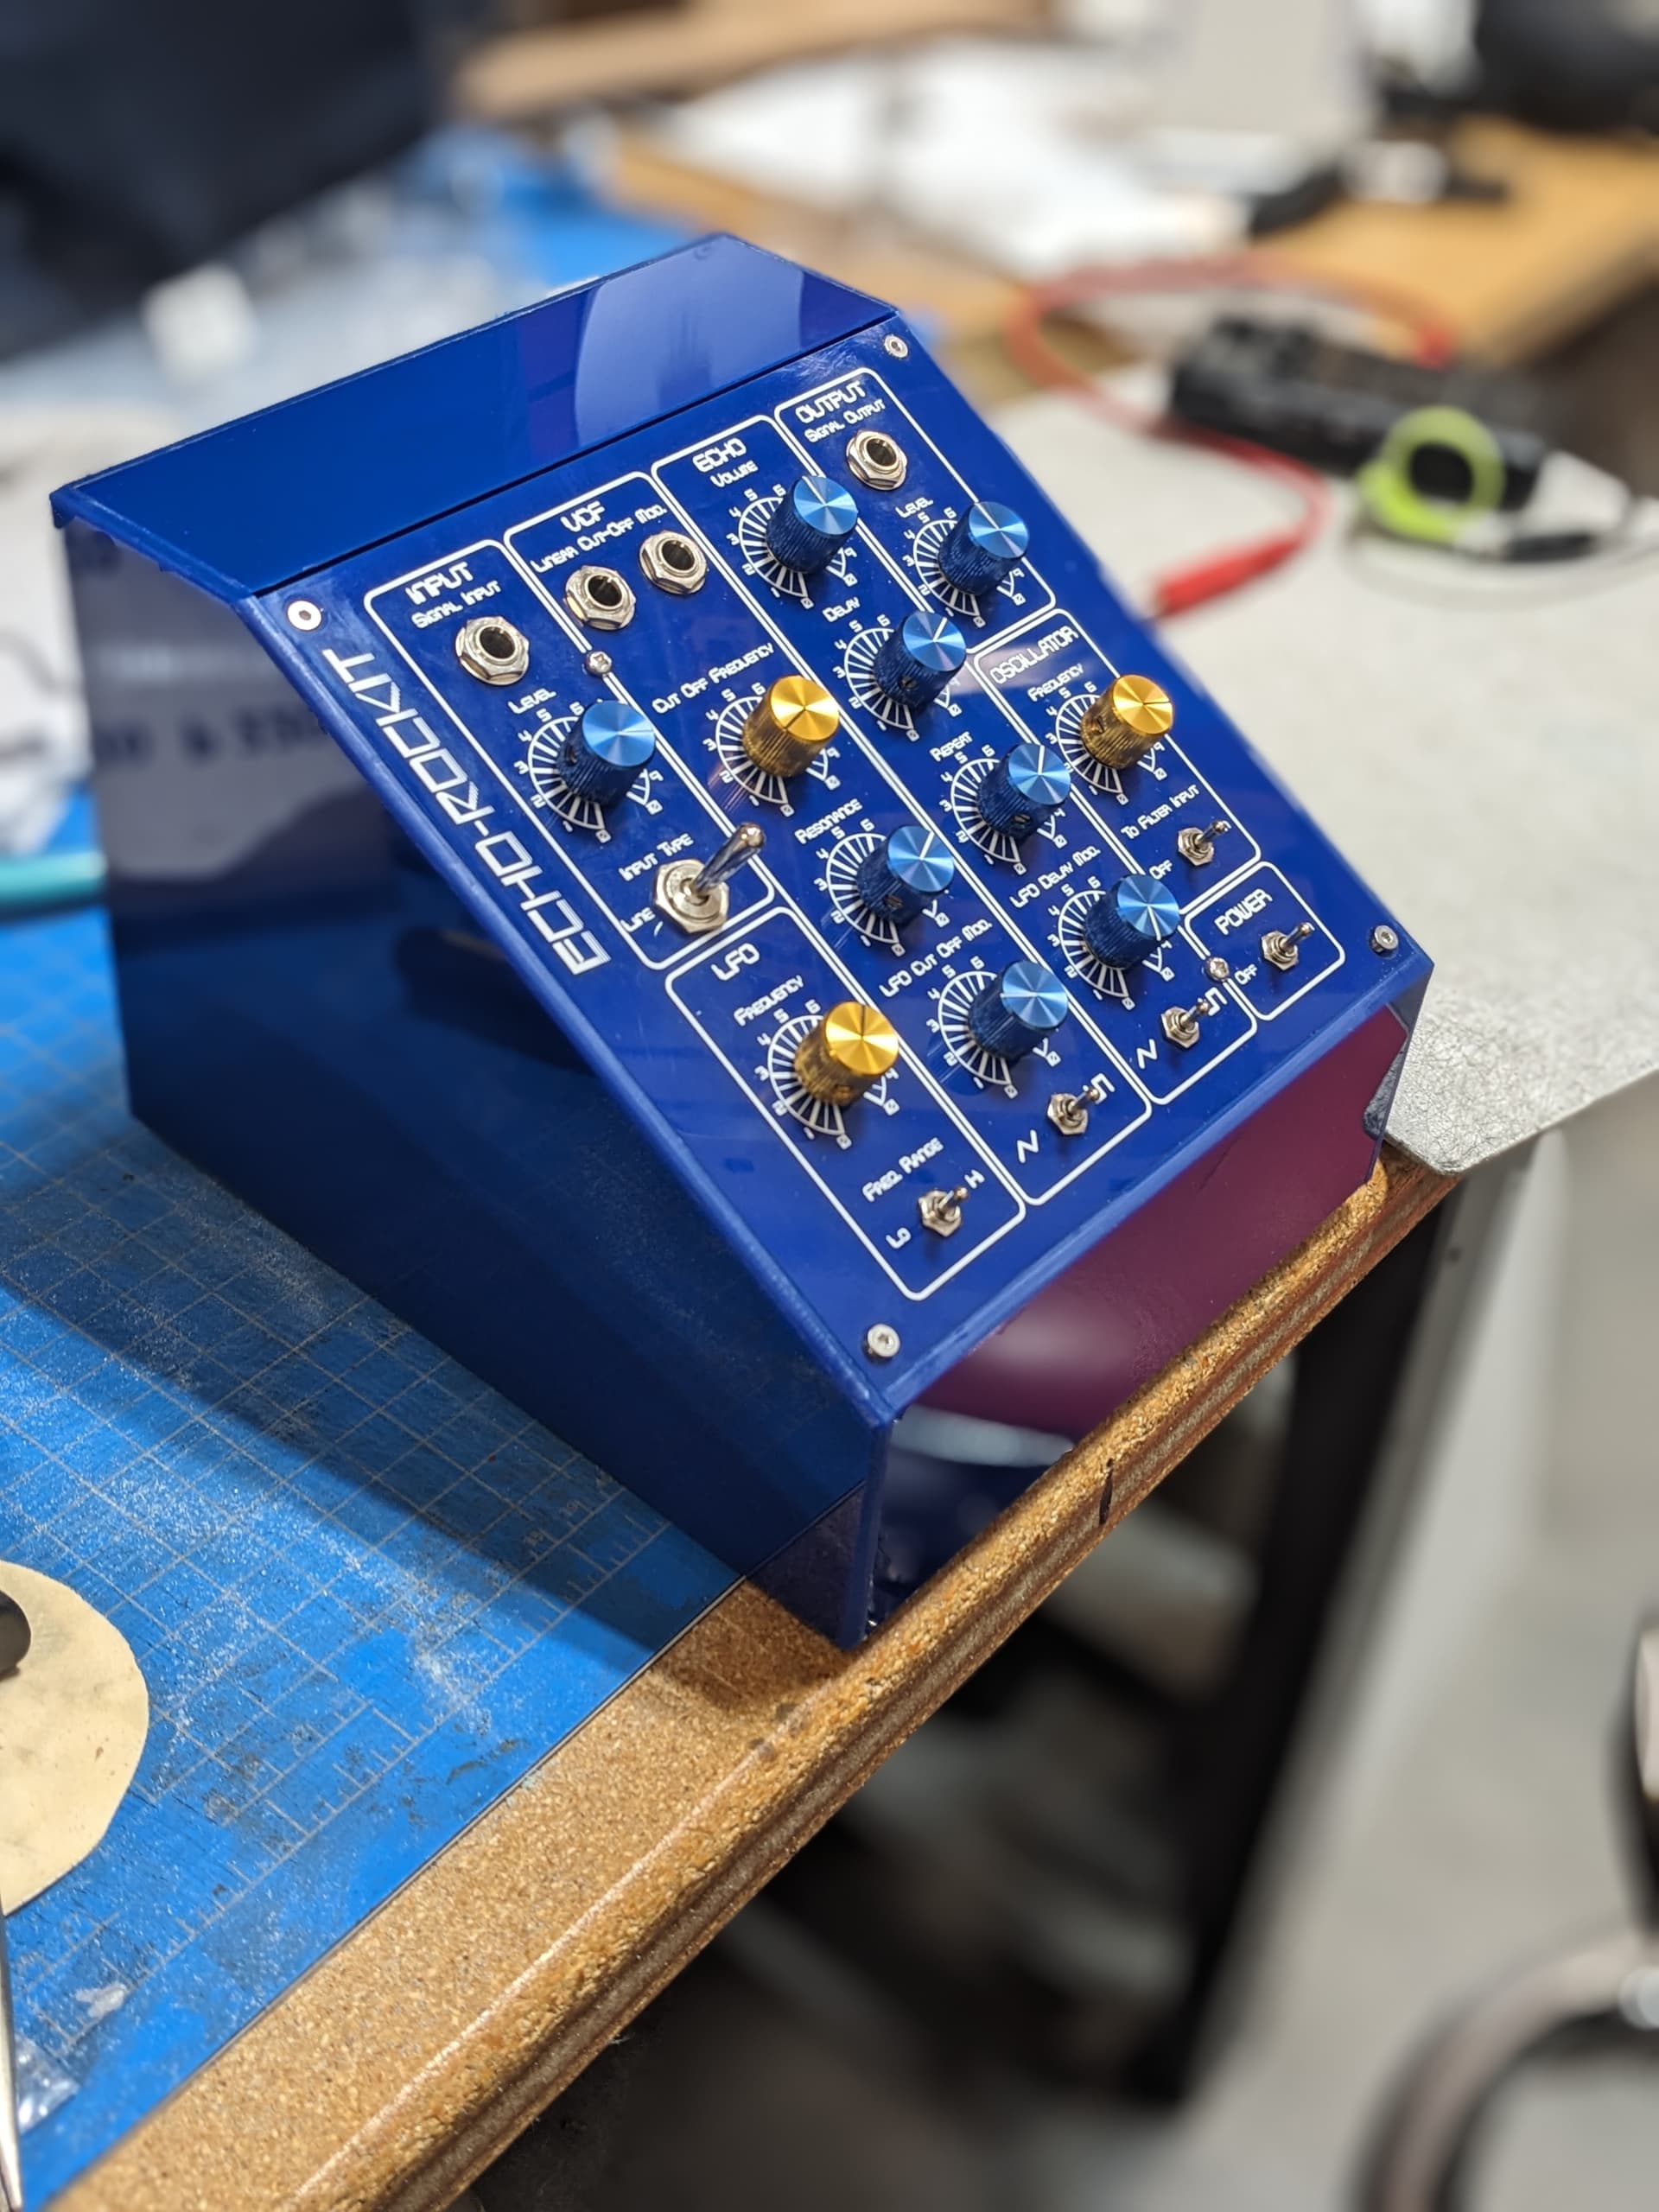
PCB was a success, I don’t have any good sound recordings yet but I just finished this blue acrylic enclosure at work.

14 Likes
Short 1 min video with some proper audio of it going through a mic’d guitar amp. I can also run a guitar or synth through it to use it’s (very smooth!) filter and lofi pt2399 echo. You’ll notice that the frequency knob for the oscillator is very sensitive, I think I bought the wrong taper of pots but oh well.
so im at the “mistake making” stage of my diy electronic journey and i’ve got a noob question.
i’m making the look mum no computer simple VCO on these little strip-type circuit boards but instead of having long continuous strips of copper back there, it has a disconnected handful of groups of three in a line. when i first went for this i used jumpers to connect the groups that i wanted to connect, but those took up precious space on the tiny board. (i also mislabeled the size of the IC so everything was wrong) is it possible to just bridge the gaps between the groups of three with solder?

For drums specifically the envelope is more important than the oscillator
wellll just soldered those jumpers on and the plastic on the jumpers melted to the board. whoops! maybe im starting to see the bright side of leaded solder.
It’s probably easiest to buy a more appropriate stripboard, but you don’t need insulation between two adjacent pads, you can just use bare wire. Lead free solder has nothing to do with this.
3 Likes