I need to try this too, mine has lost contrast, had no idea about the trim pot! Fingers crossed, I’ll have a go tomorrow 
Cam here to say thanks for posting this @Elektroskop and @gbravetti
Just did this with mine and it looks like new.
Thanks folks!
1 Like
doest this also work on the AR MK1? Yesterday I just noticed the display start looking weird.
Yes. Towards the end of this thread, some people report having success adjusting the contrast of their AR MKI display:
1 Like
that´s really great! thanks for sharing, This should work on the Analog keys as well ?
Ever figure this out? My analog keys screen is awful! Kinda scared to open the thing…
Anyone did this on AK ?
here the black is really fading away…
btw what’s the correct positioning for that trimmer?
I believe I cannot leave it switched on while doing this…
Thanks.!
2 Likes
Facing the same question here . . .
1 Like
Could you fix the screen issue meanwhile?
I haven’t give it a chance. I dont want to waste time without knowing even if I have to turn the potentiometer clockwise or counterclockwise…
Update, I just fixed the screen contrast of both, my Analog Four MKI and Analog Key, and both units were powered on during the adjustment. It works — not perfect but a huge improvement. Going to share pics in a bit.
So far I couldn’t find any documentation online about how to do it with the Analog Key, but in fact, it’s not that difficult (I’m not a super tech-savvy person either). But after studying how to open and dissemble the Analog Keys, I felt to give it a try.
As for the trimmer, you can’t do much wrong, simply turn and find the sweet spot for your liking.
1 Like
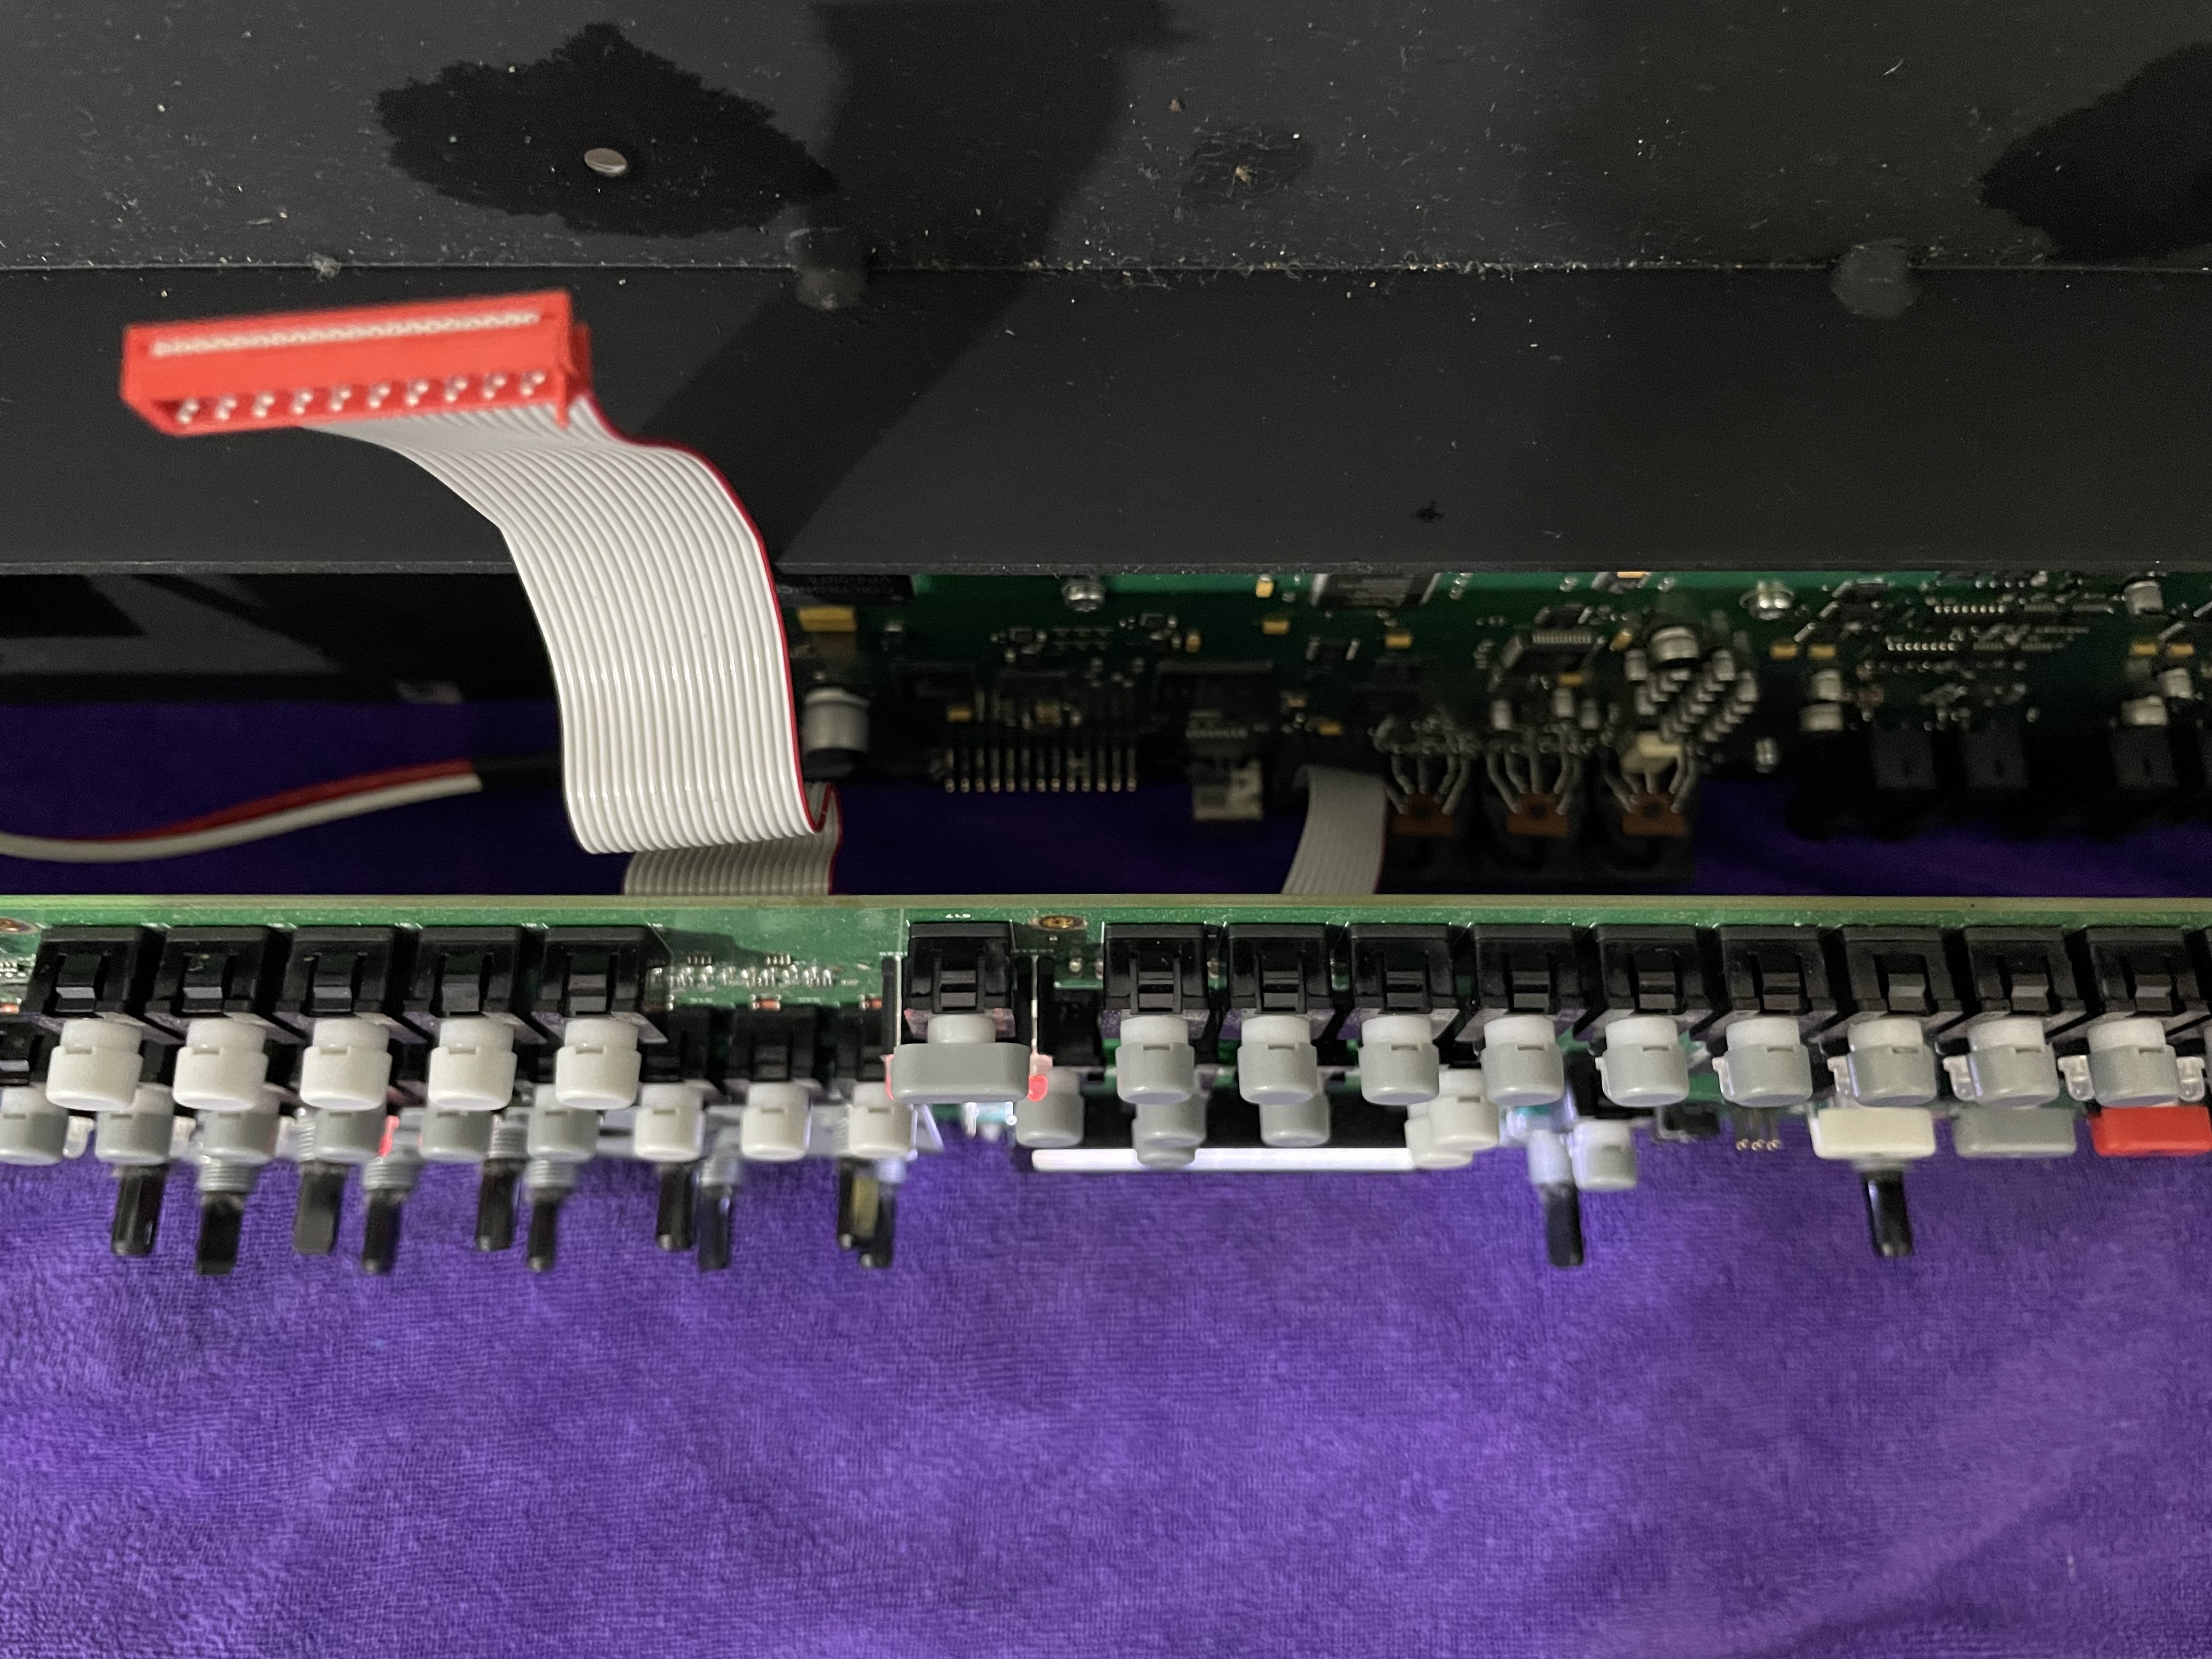
First off, there is at least one post here in the forum, showing fairly well, how to open the Analog Keys. All you need are the right tools for the different types of screws:
2 Likes
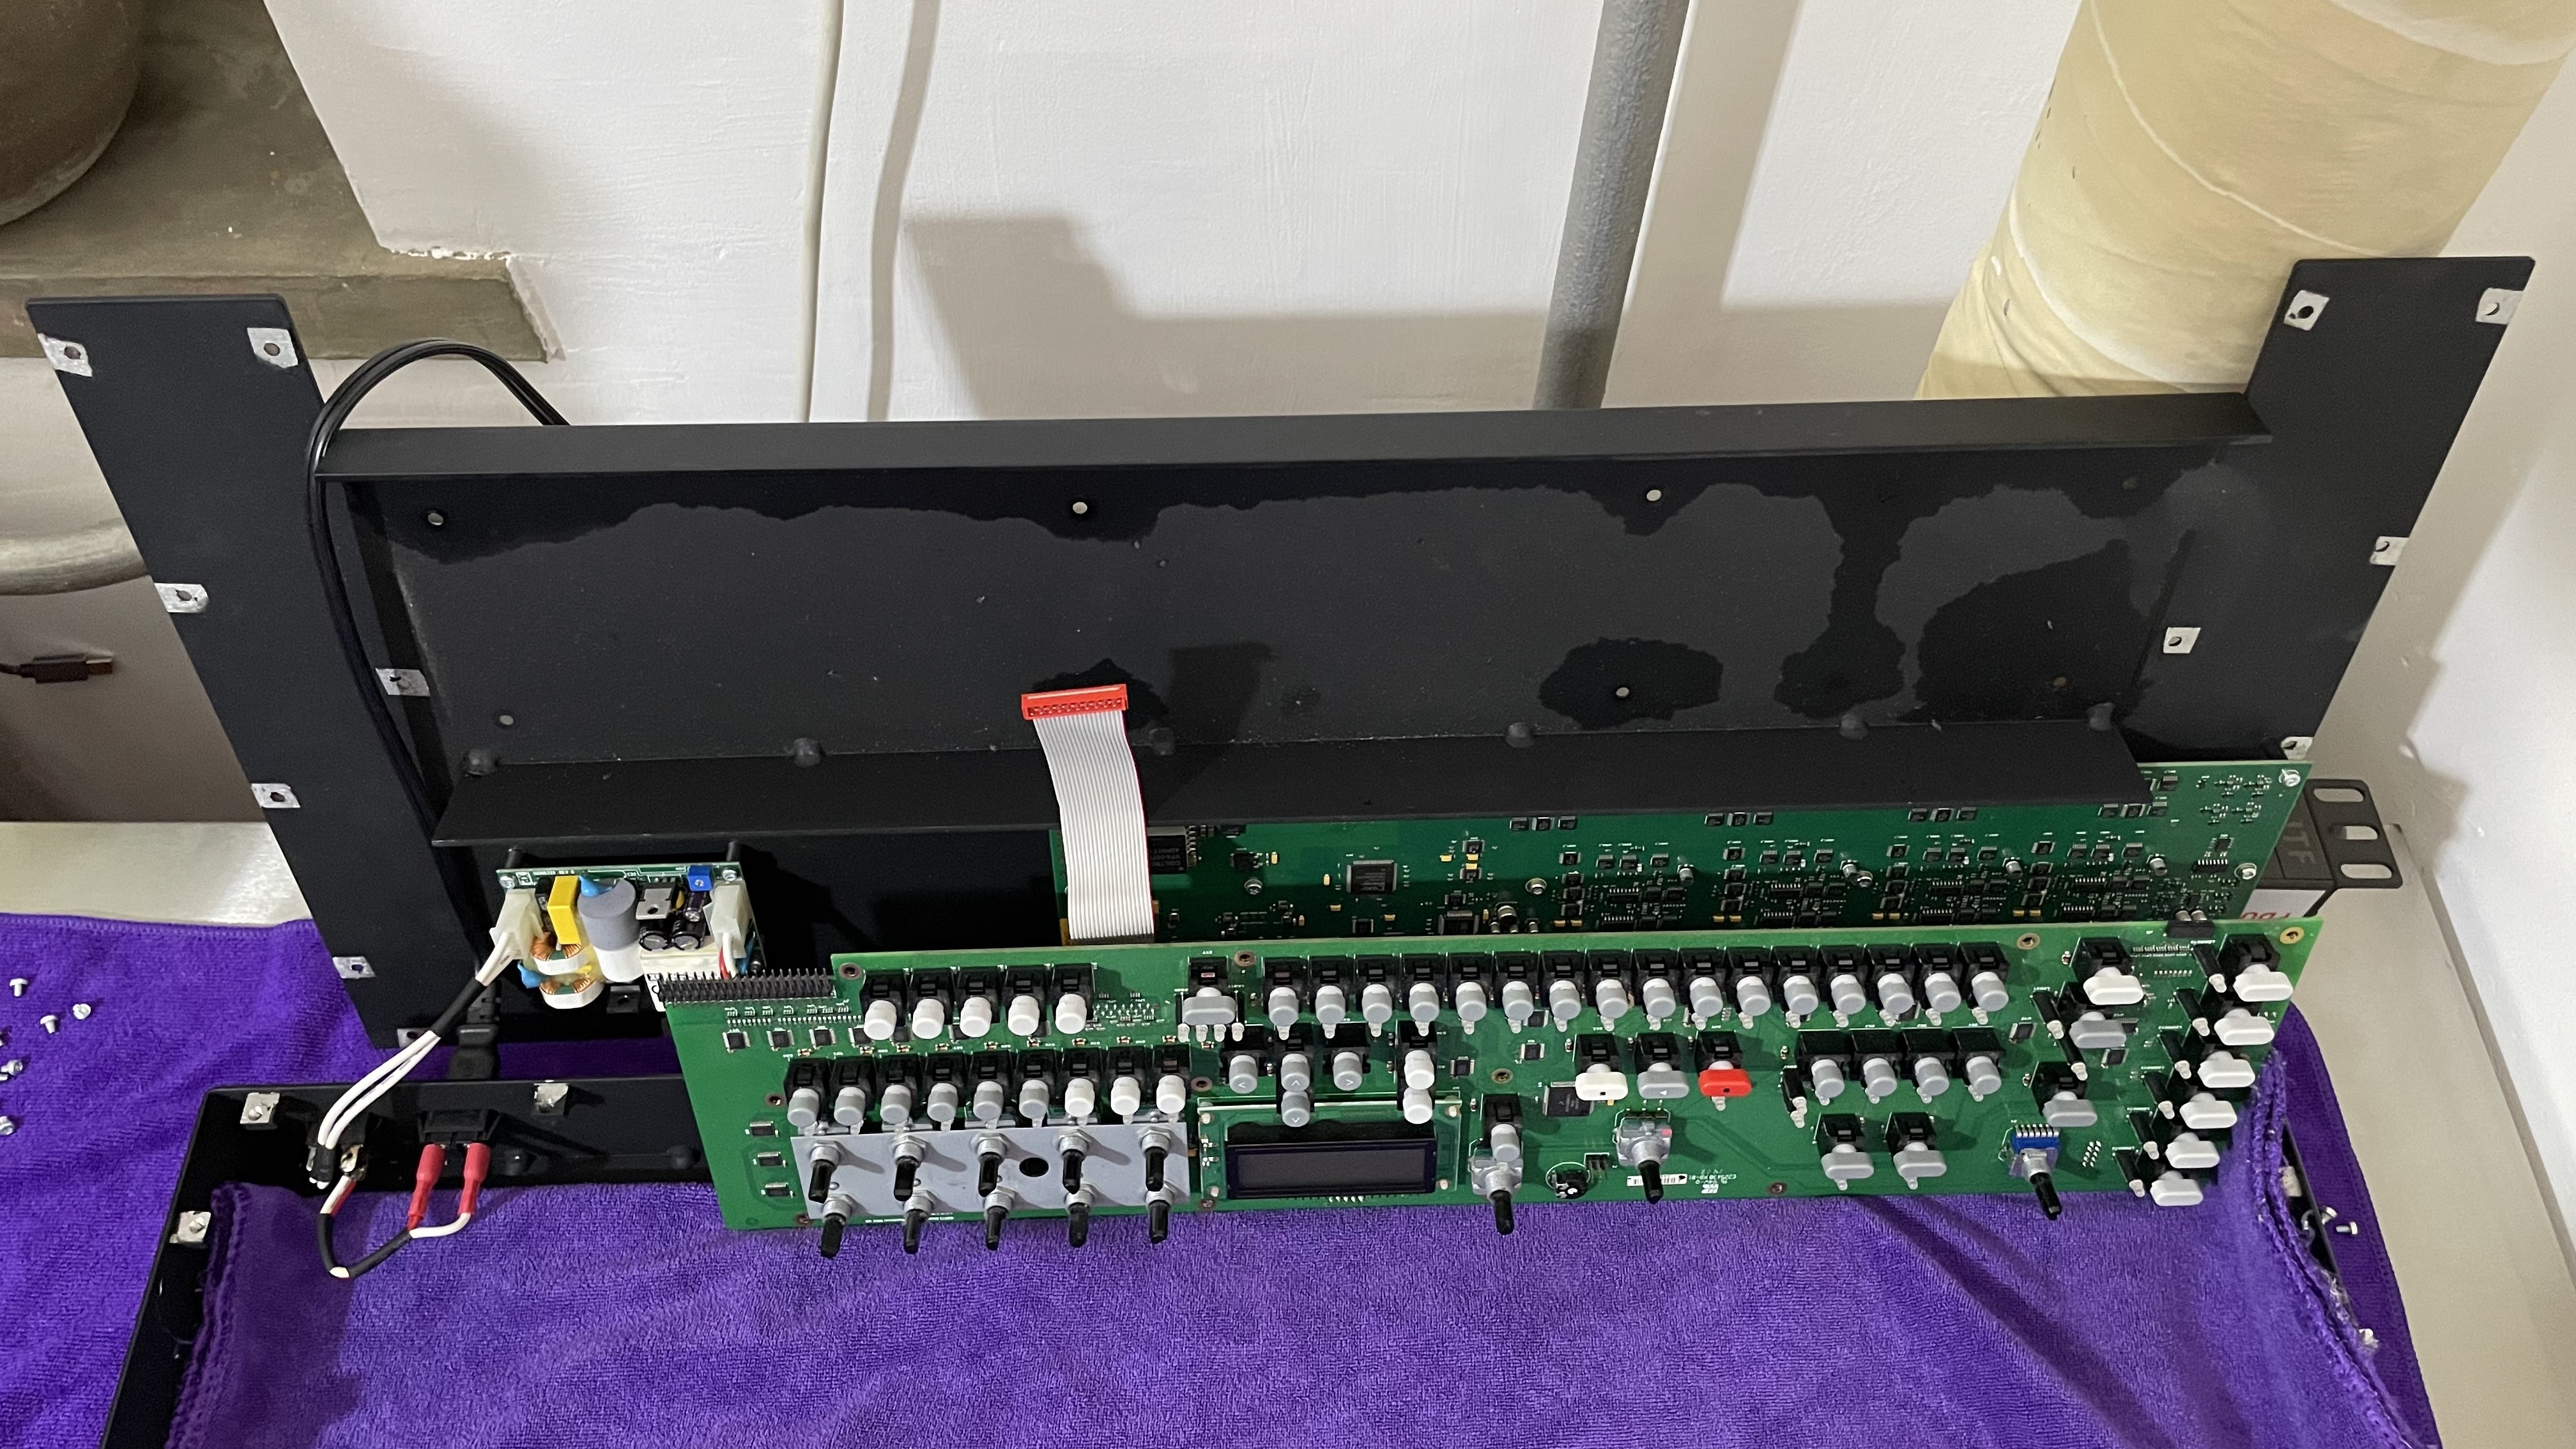
These are the tools I used. You can also see how I had to place the boards, in order to be able to turn on the unit. The keyboard and the joystick board are not connected. It still works.
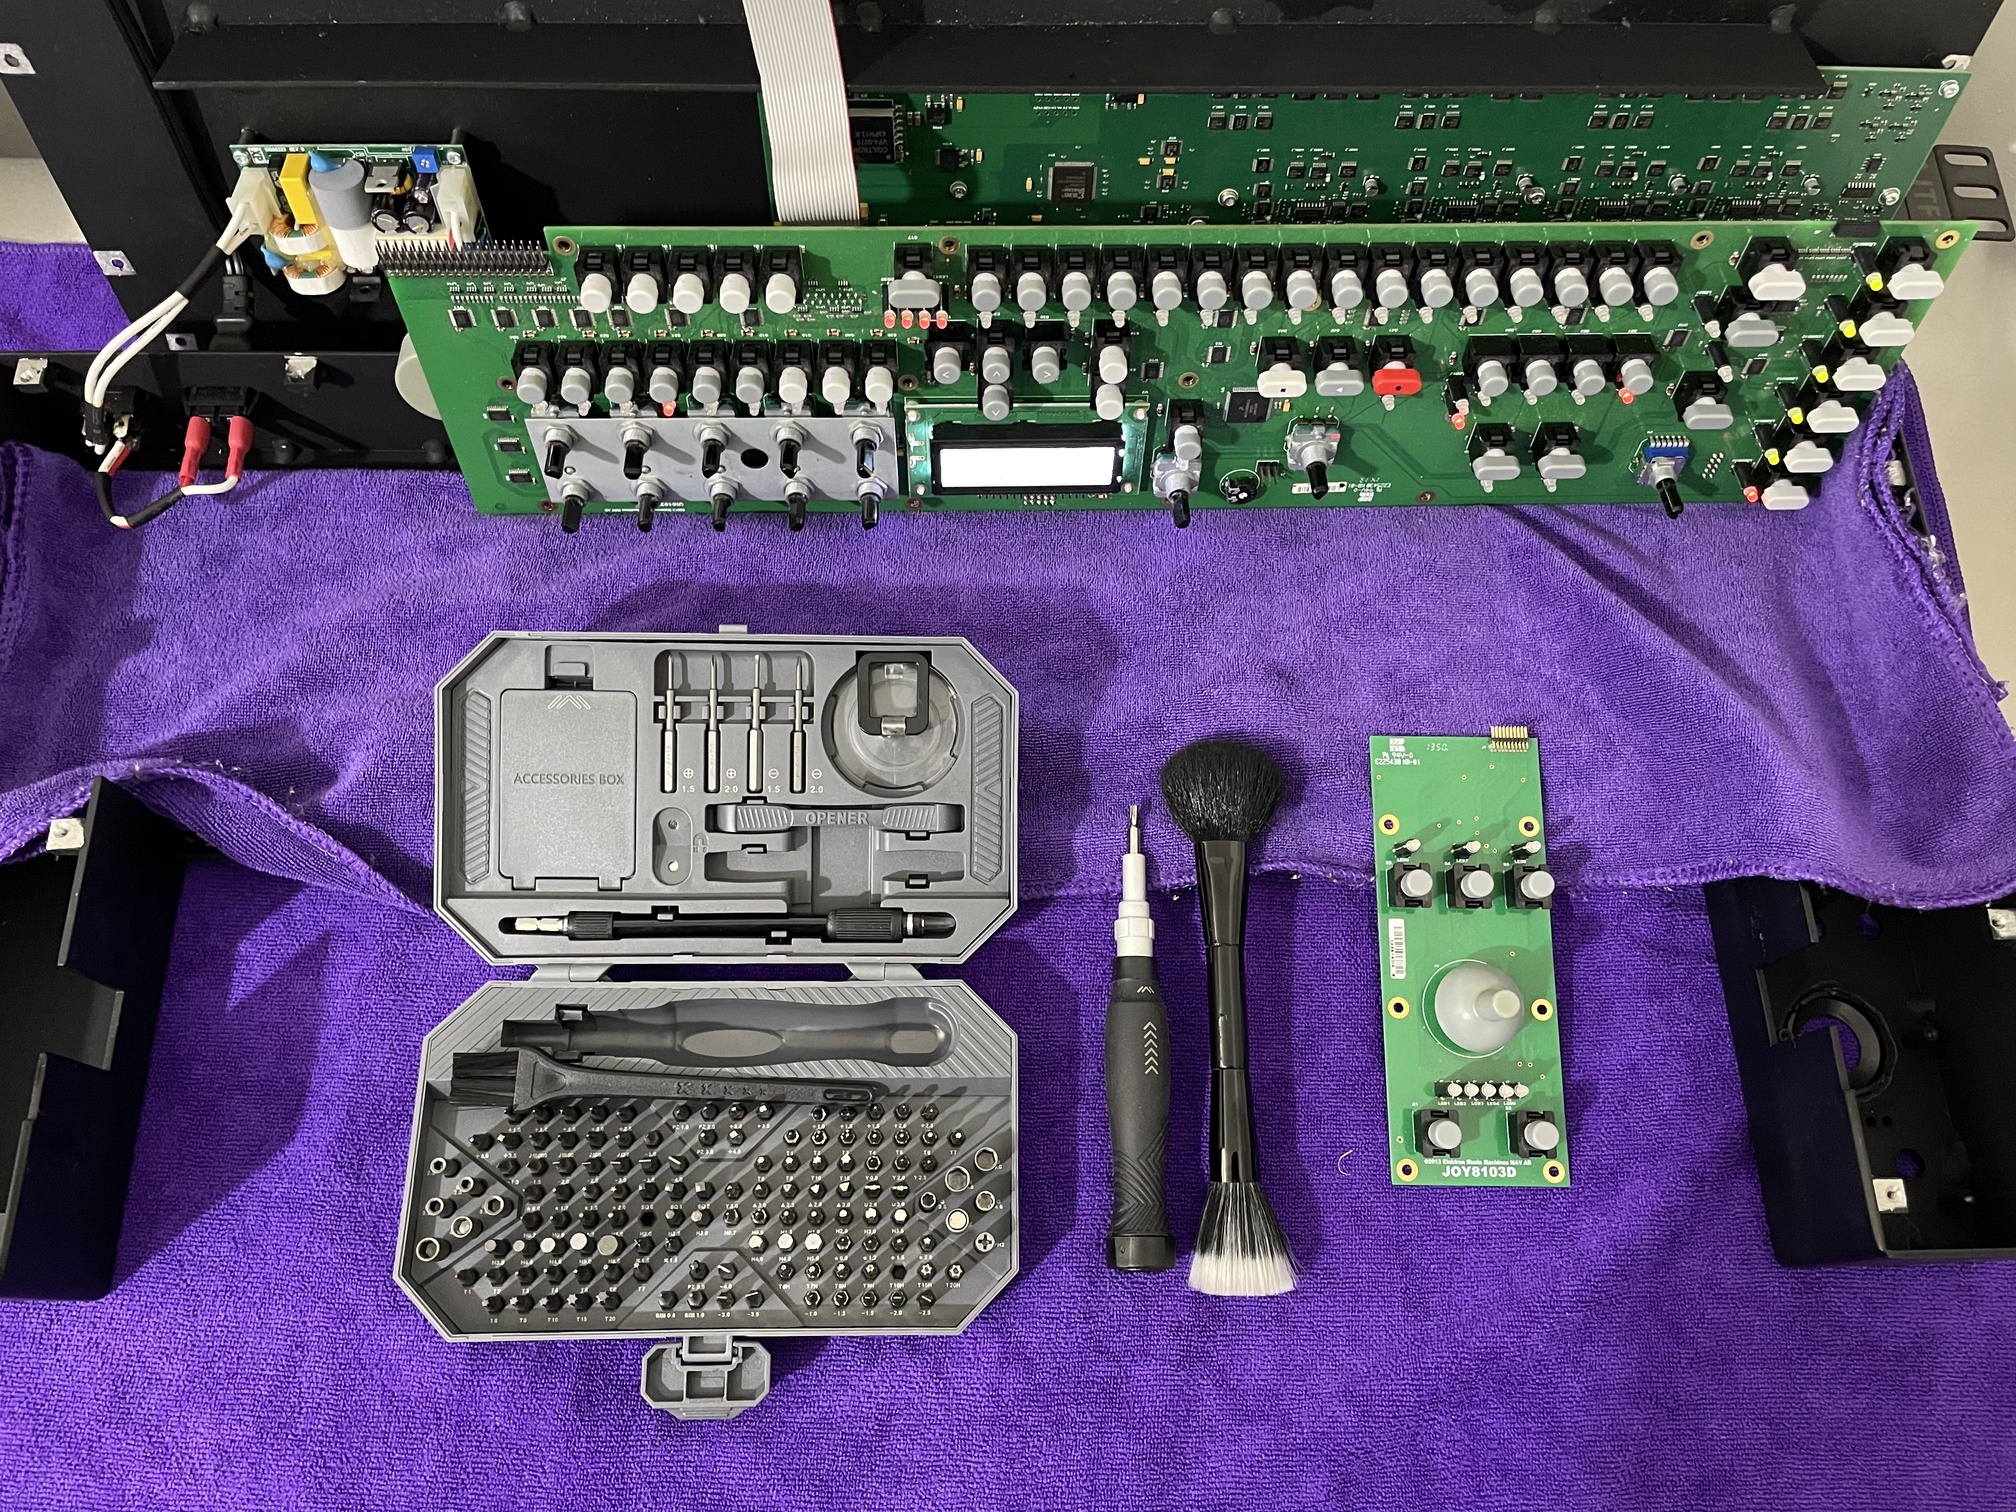
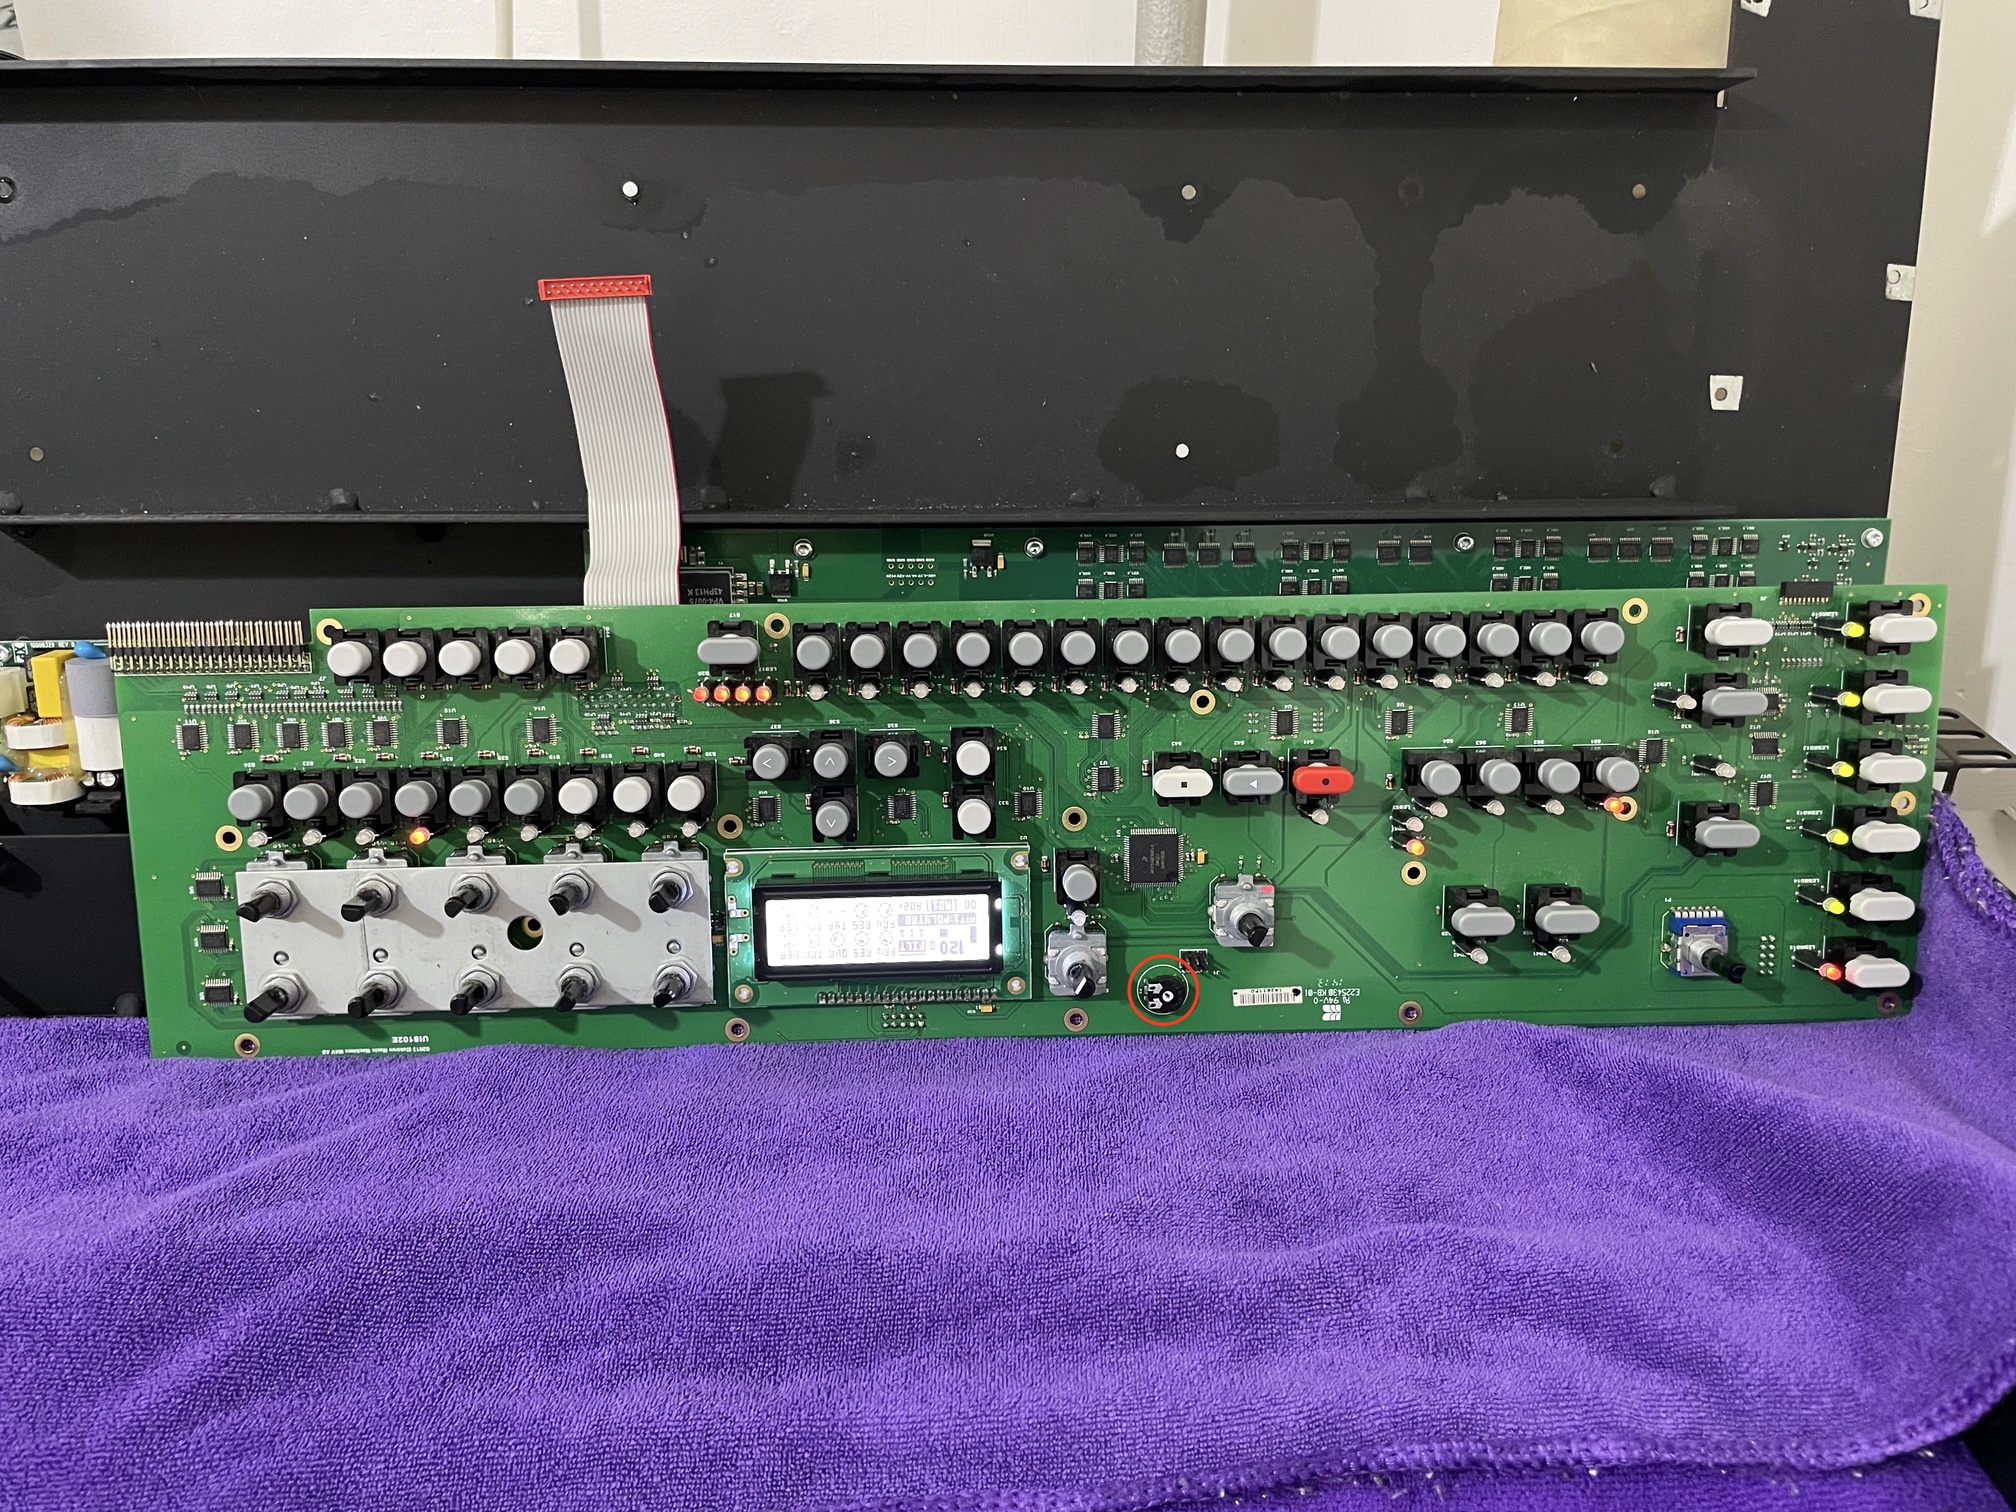
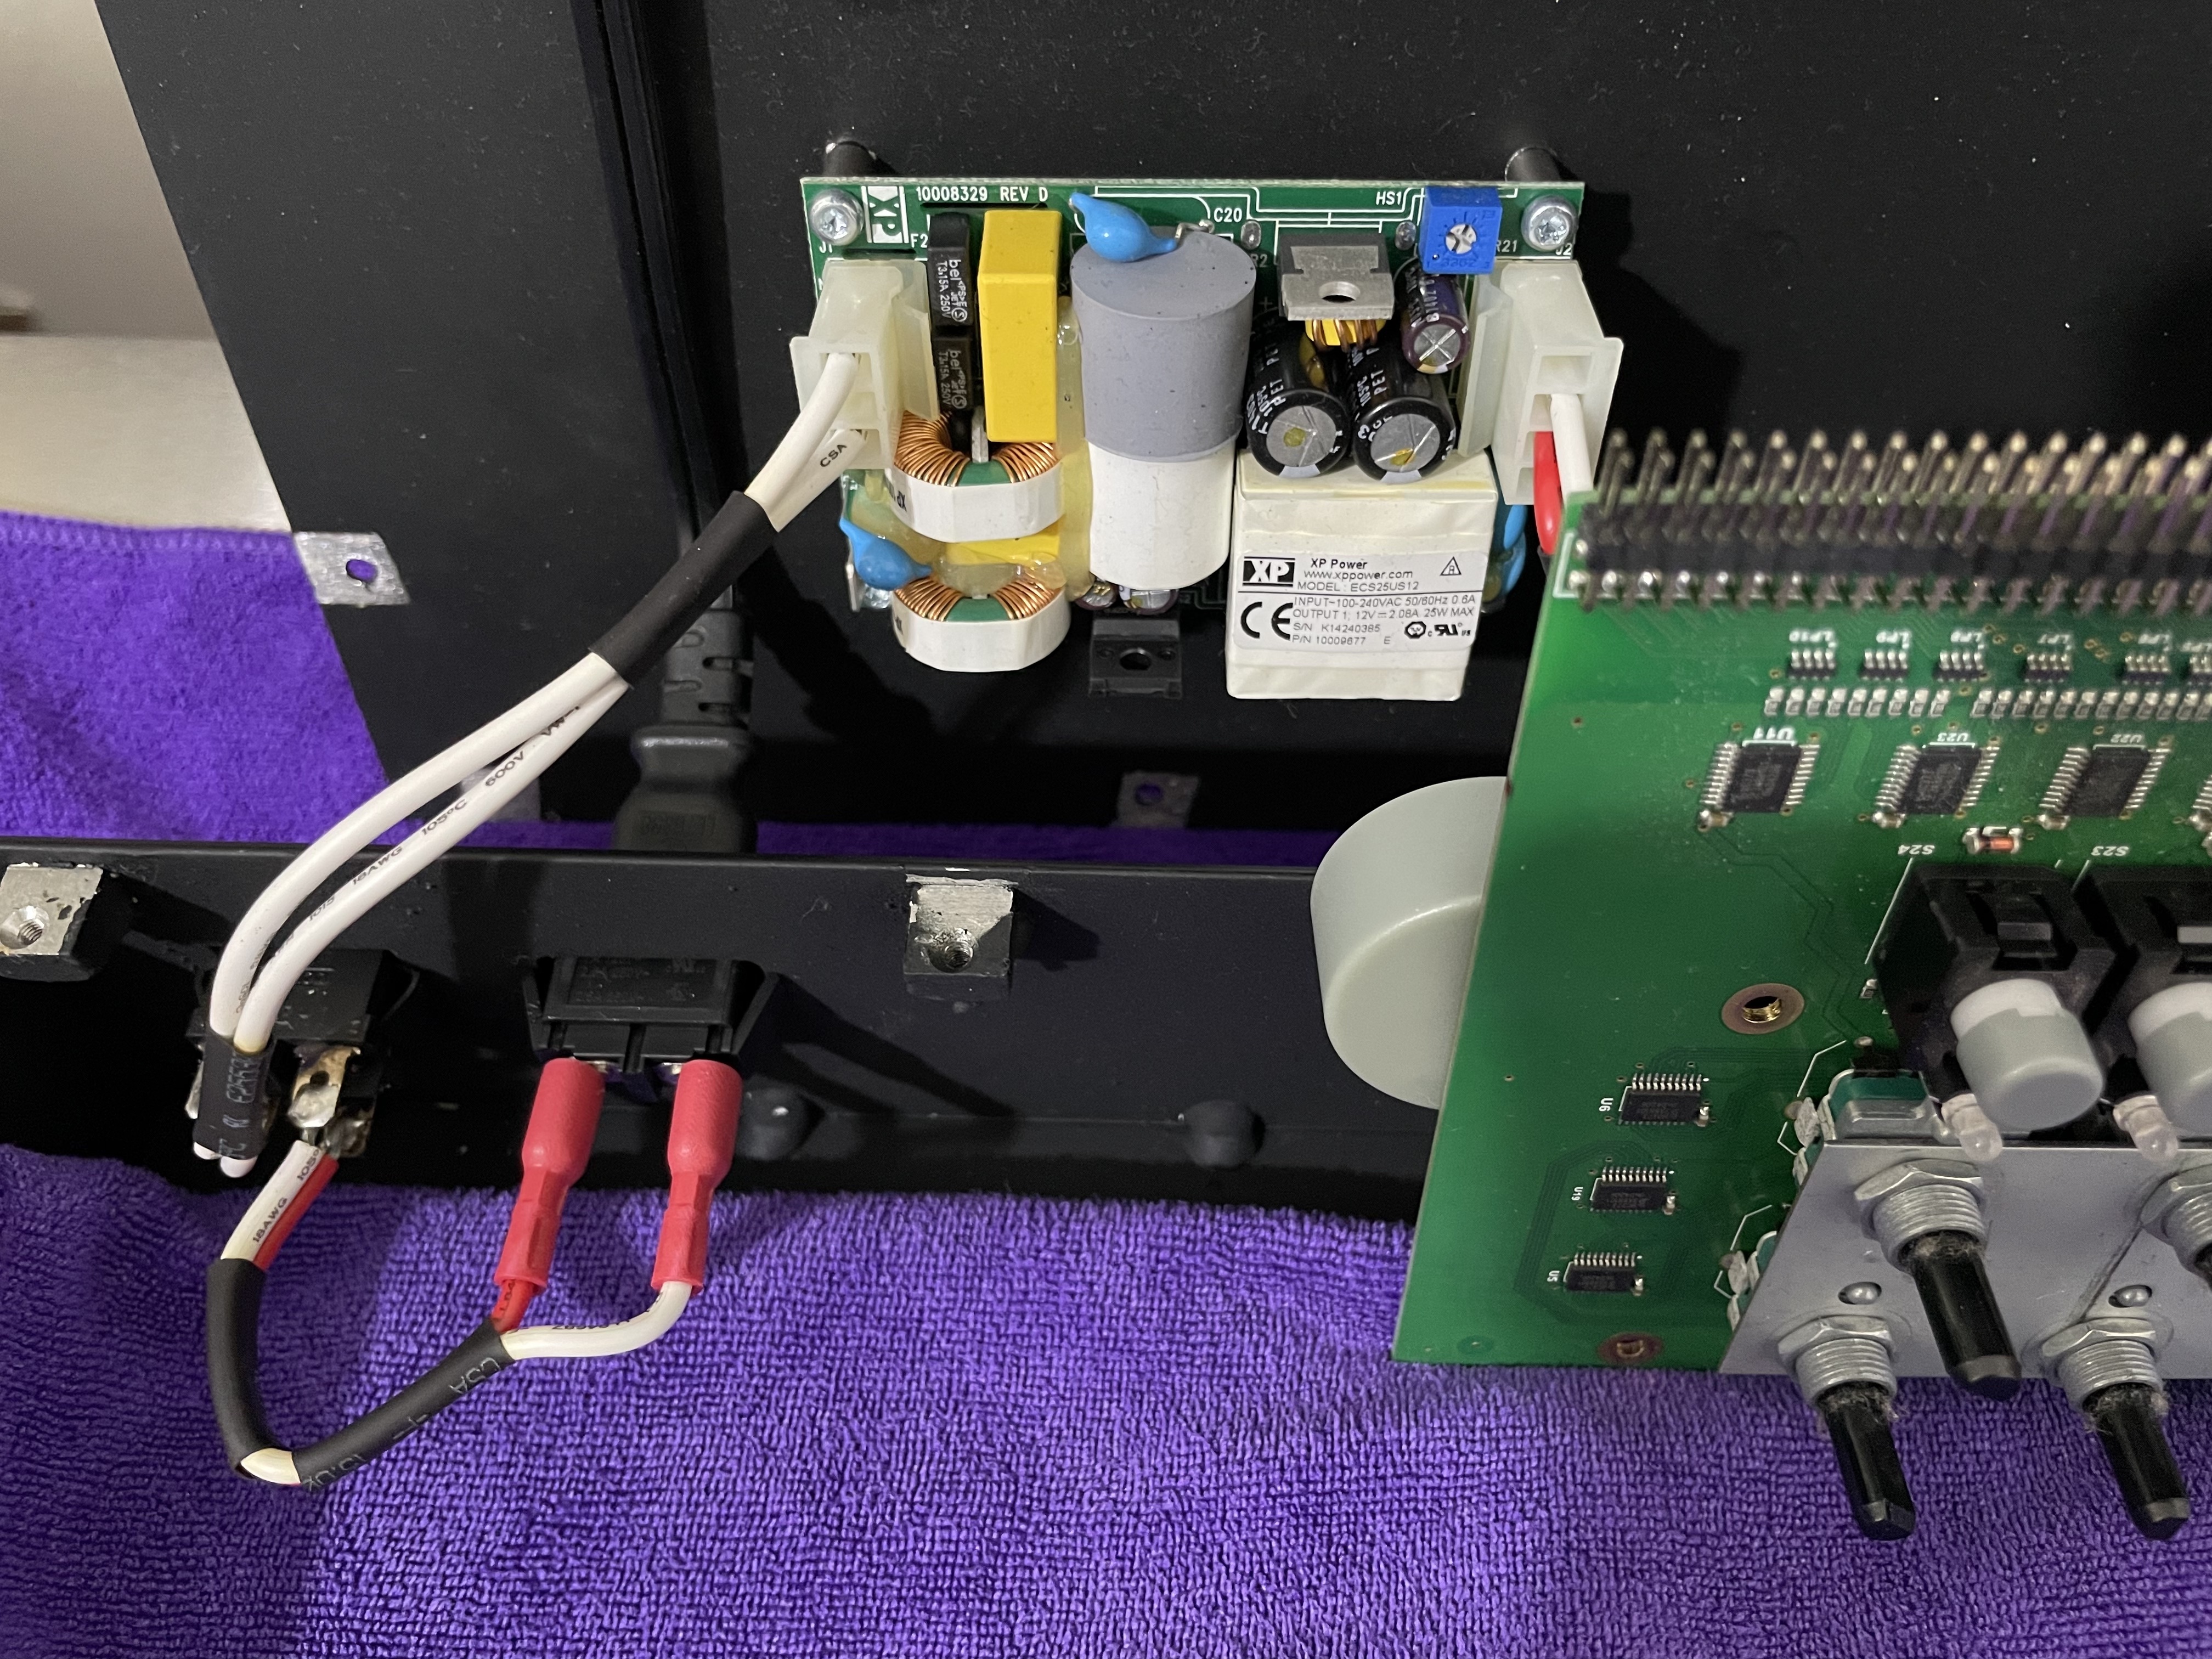
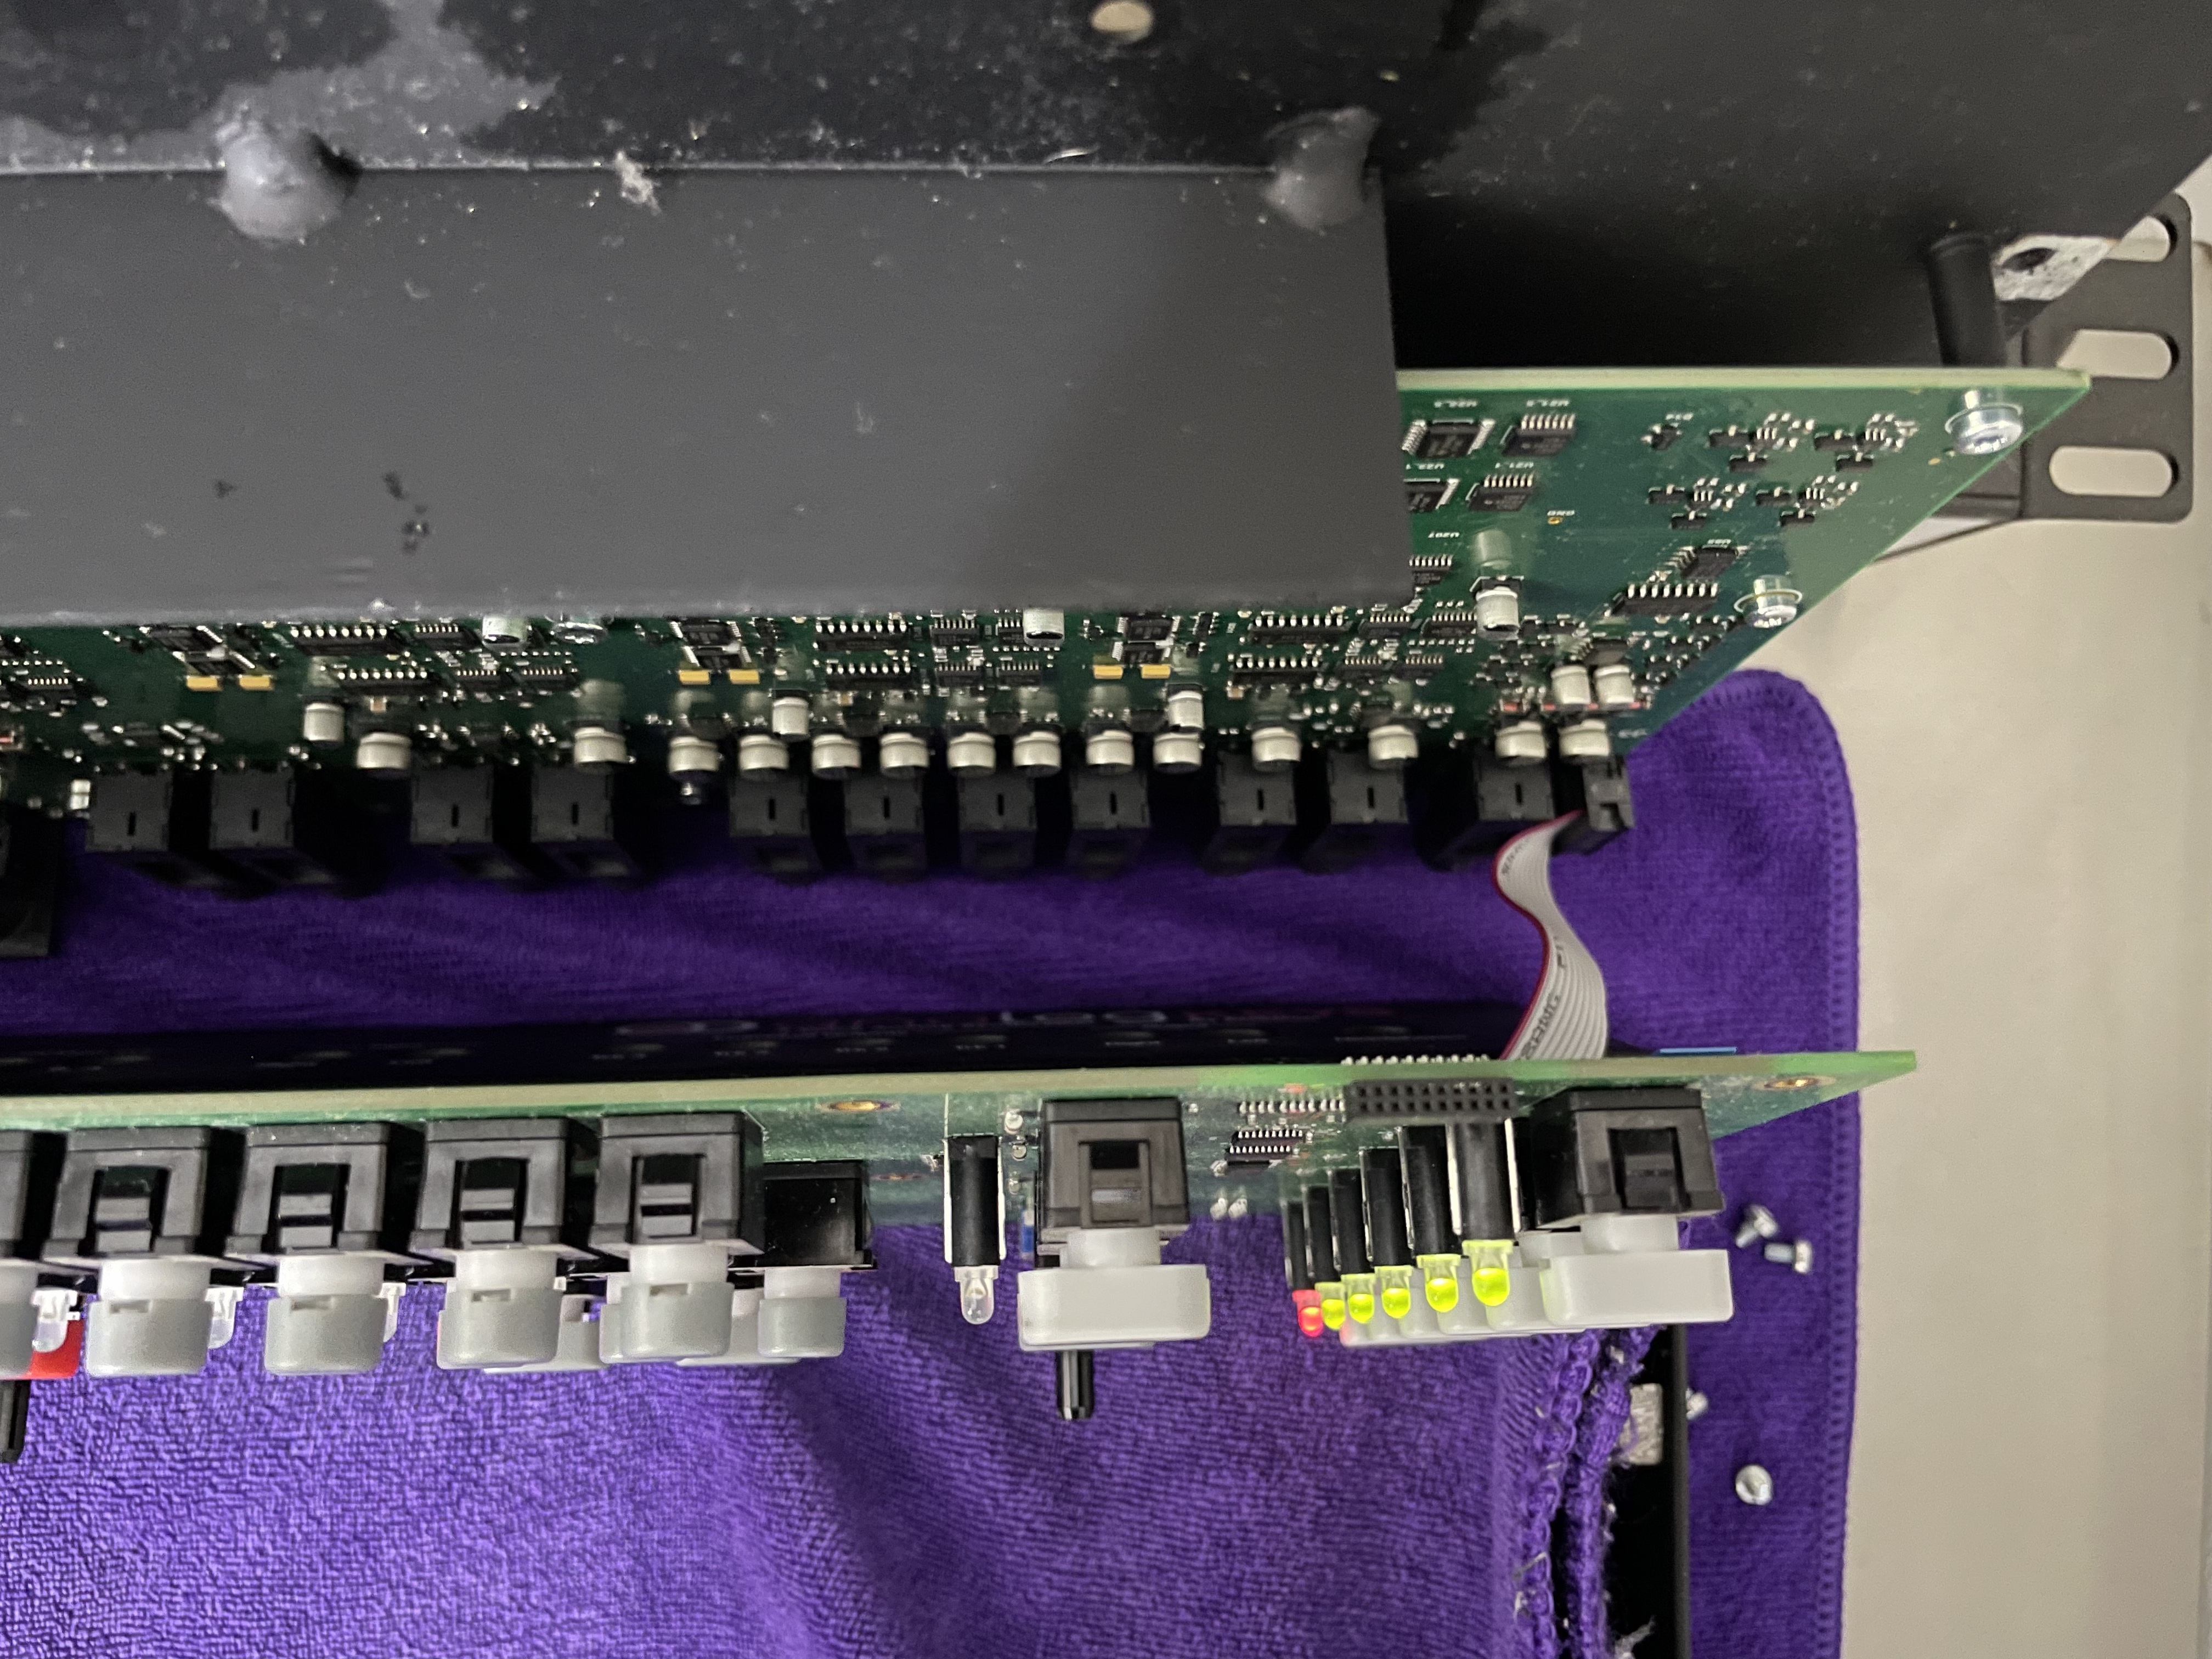
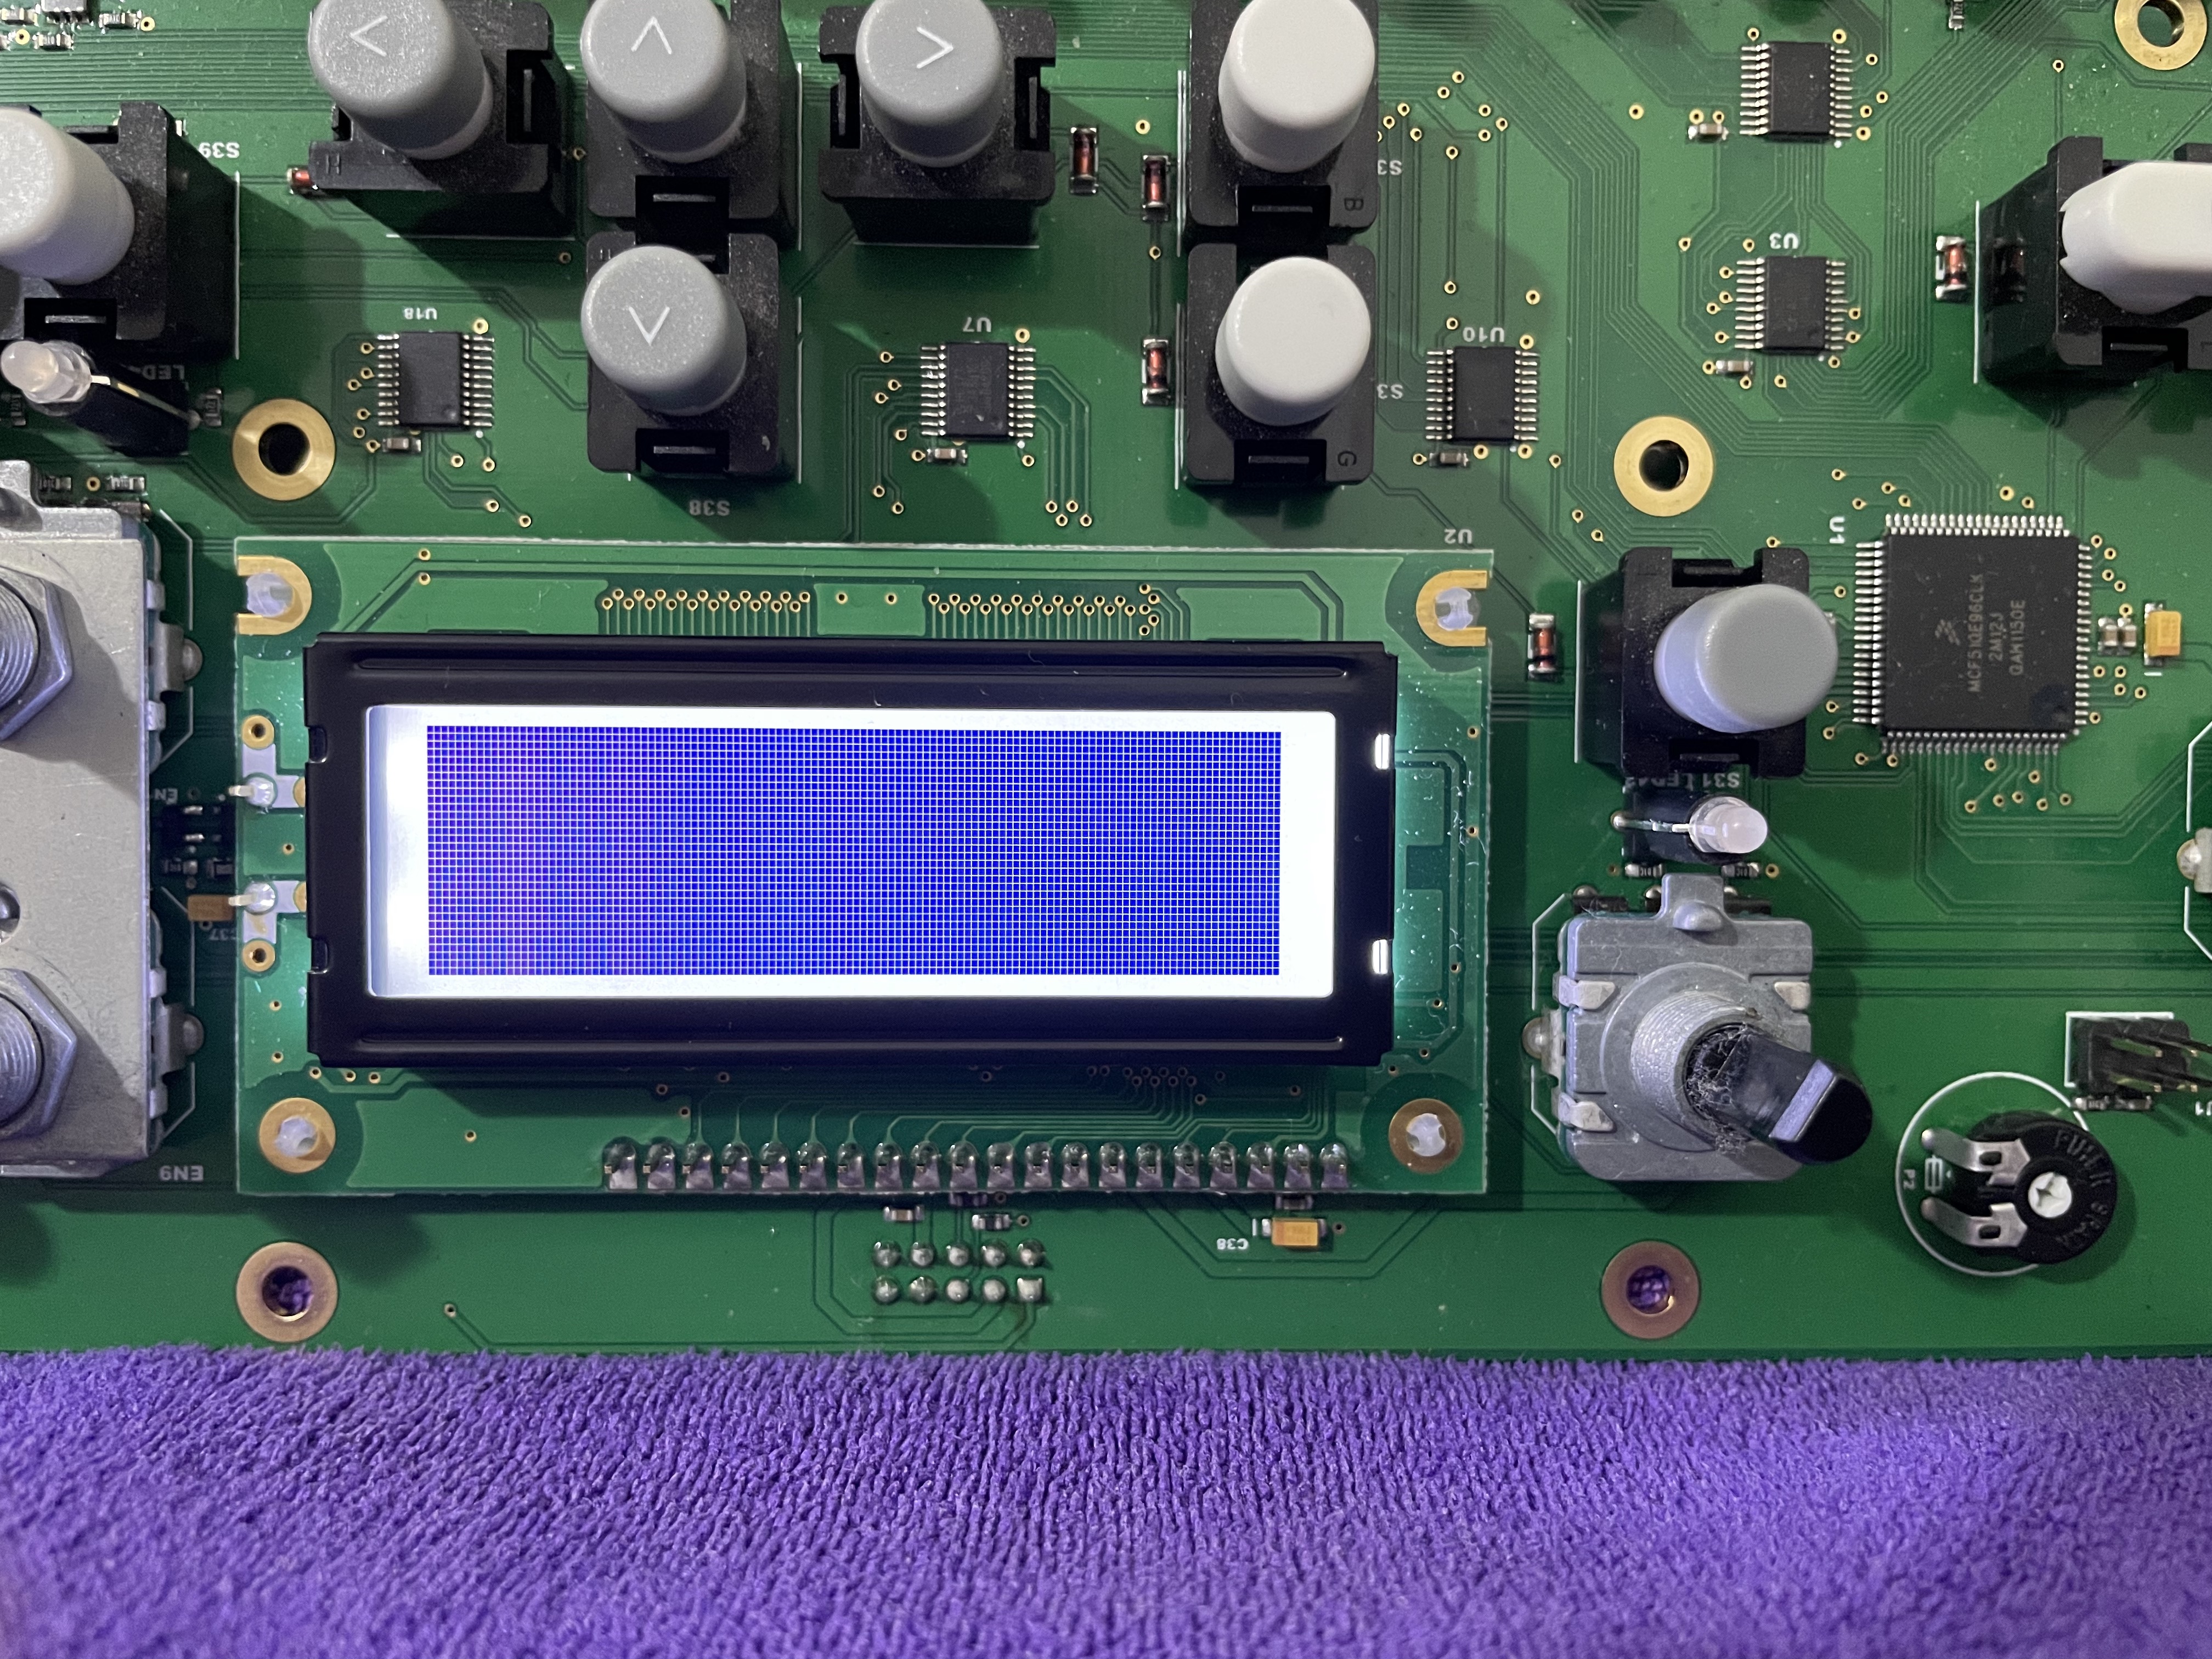
The next pics are showing more details about the placements of the boards. I first disconnected them and after finding the right position for the cables from power to board connectors, I plugged all in and powered on. Then adjusted the contrast with the trimmer pot (marked red).
I put the sound select cap in between the front board and the housing, to avoid any accidental current to flow. I wasn’t too careful though.
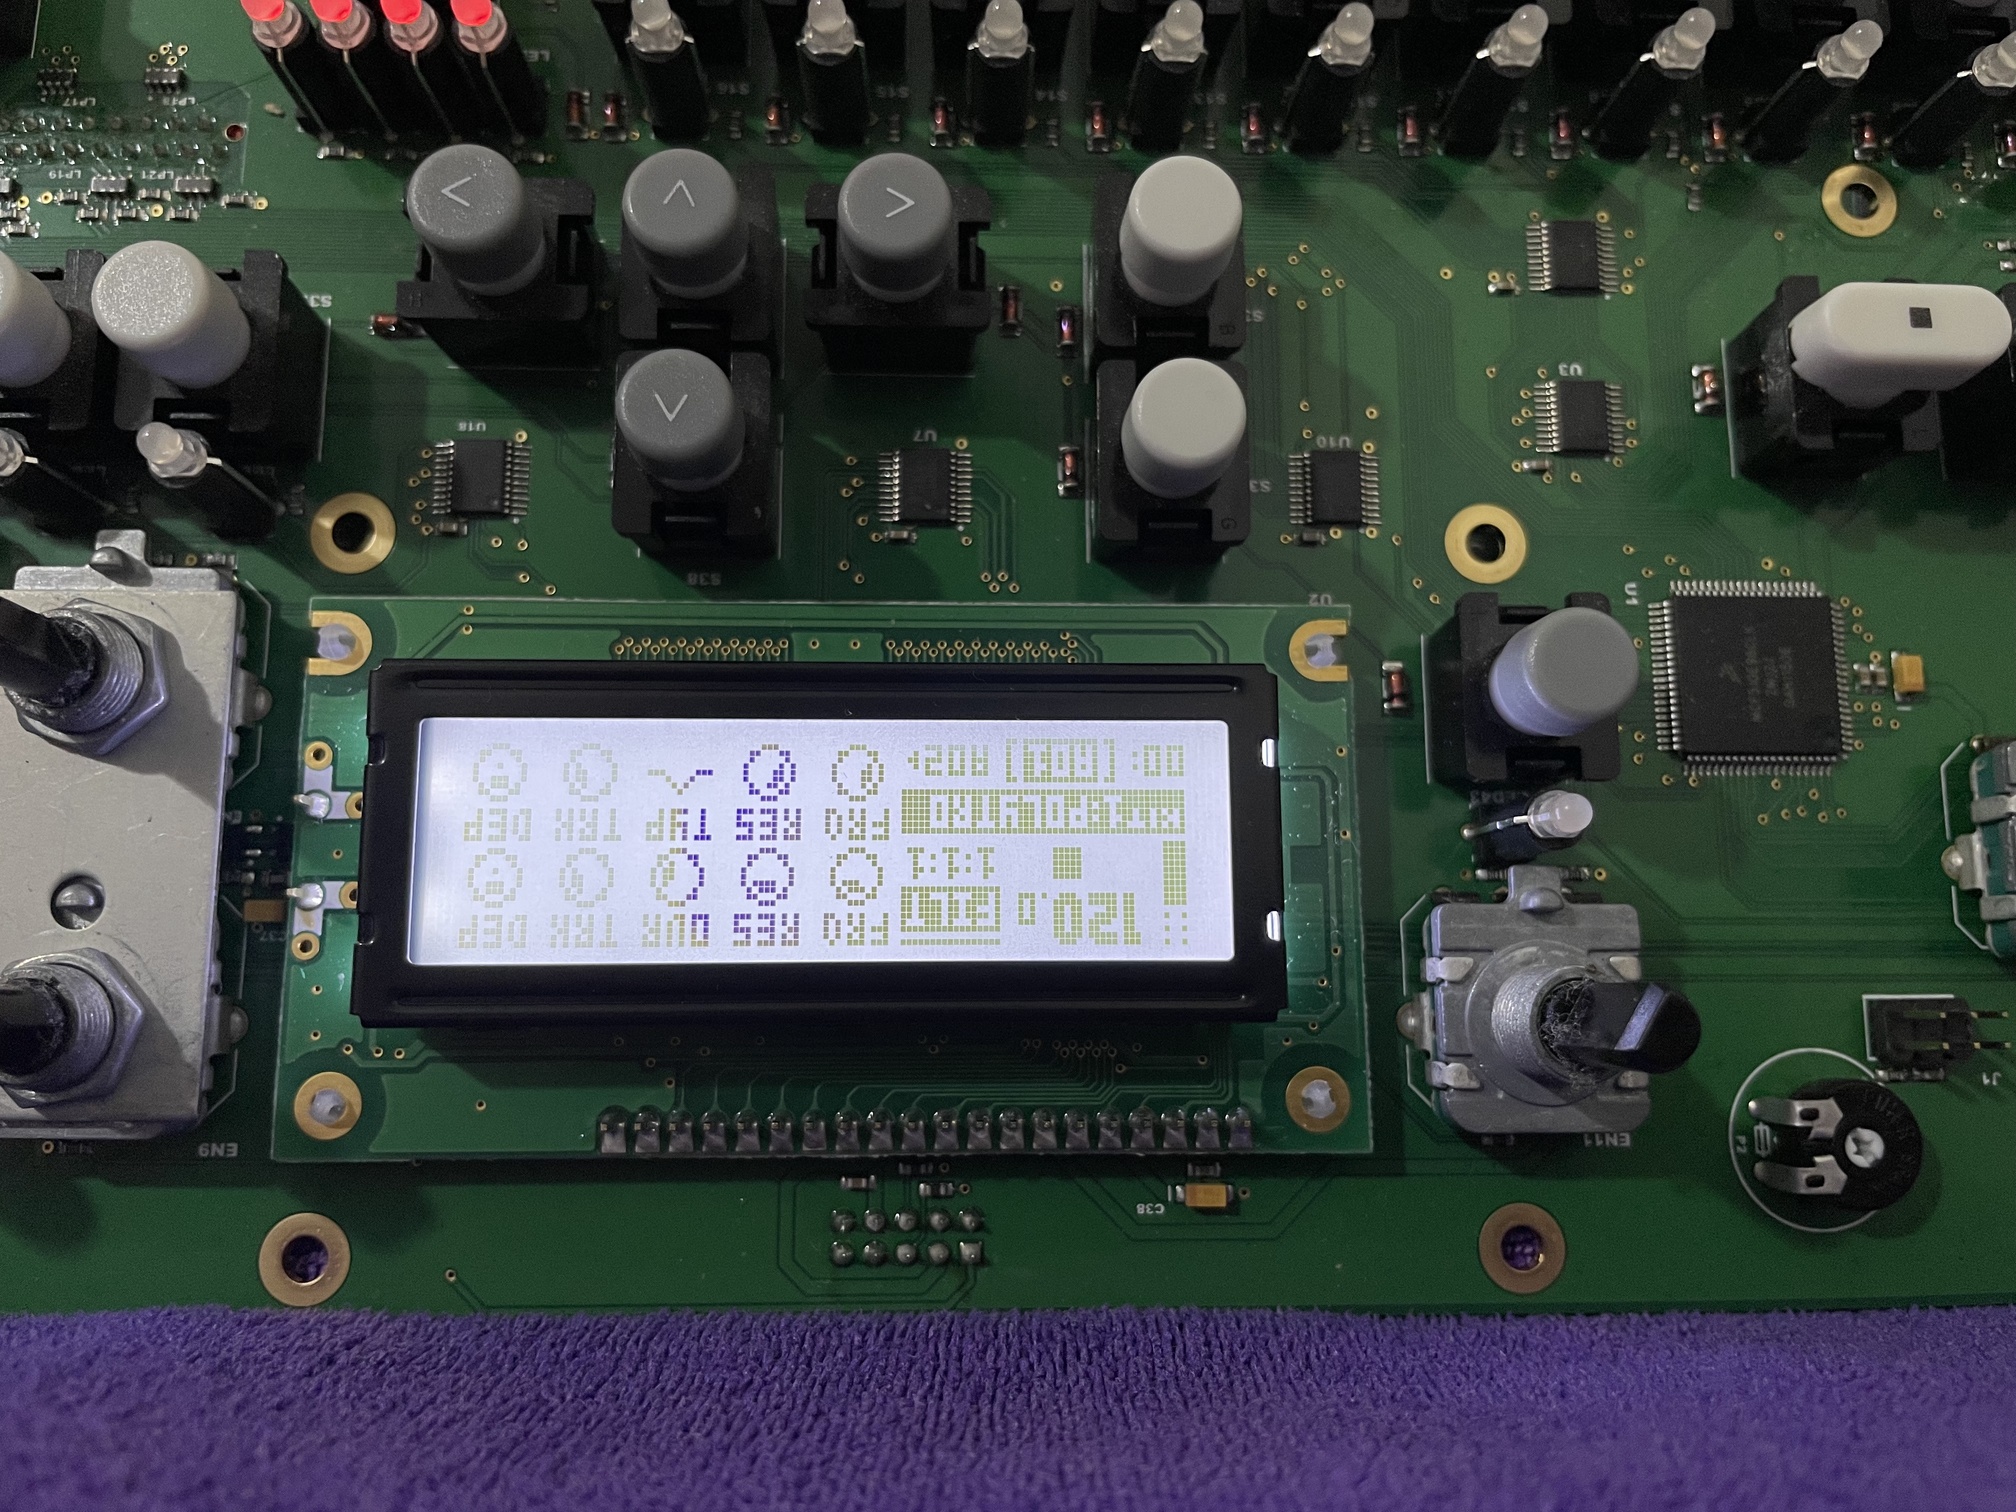
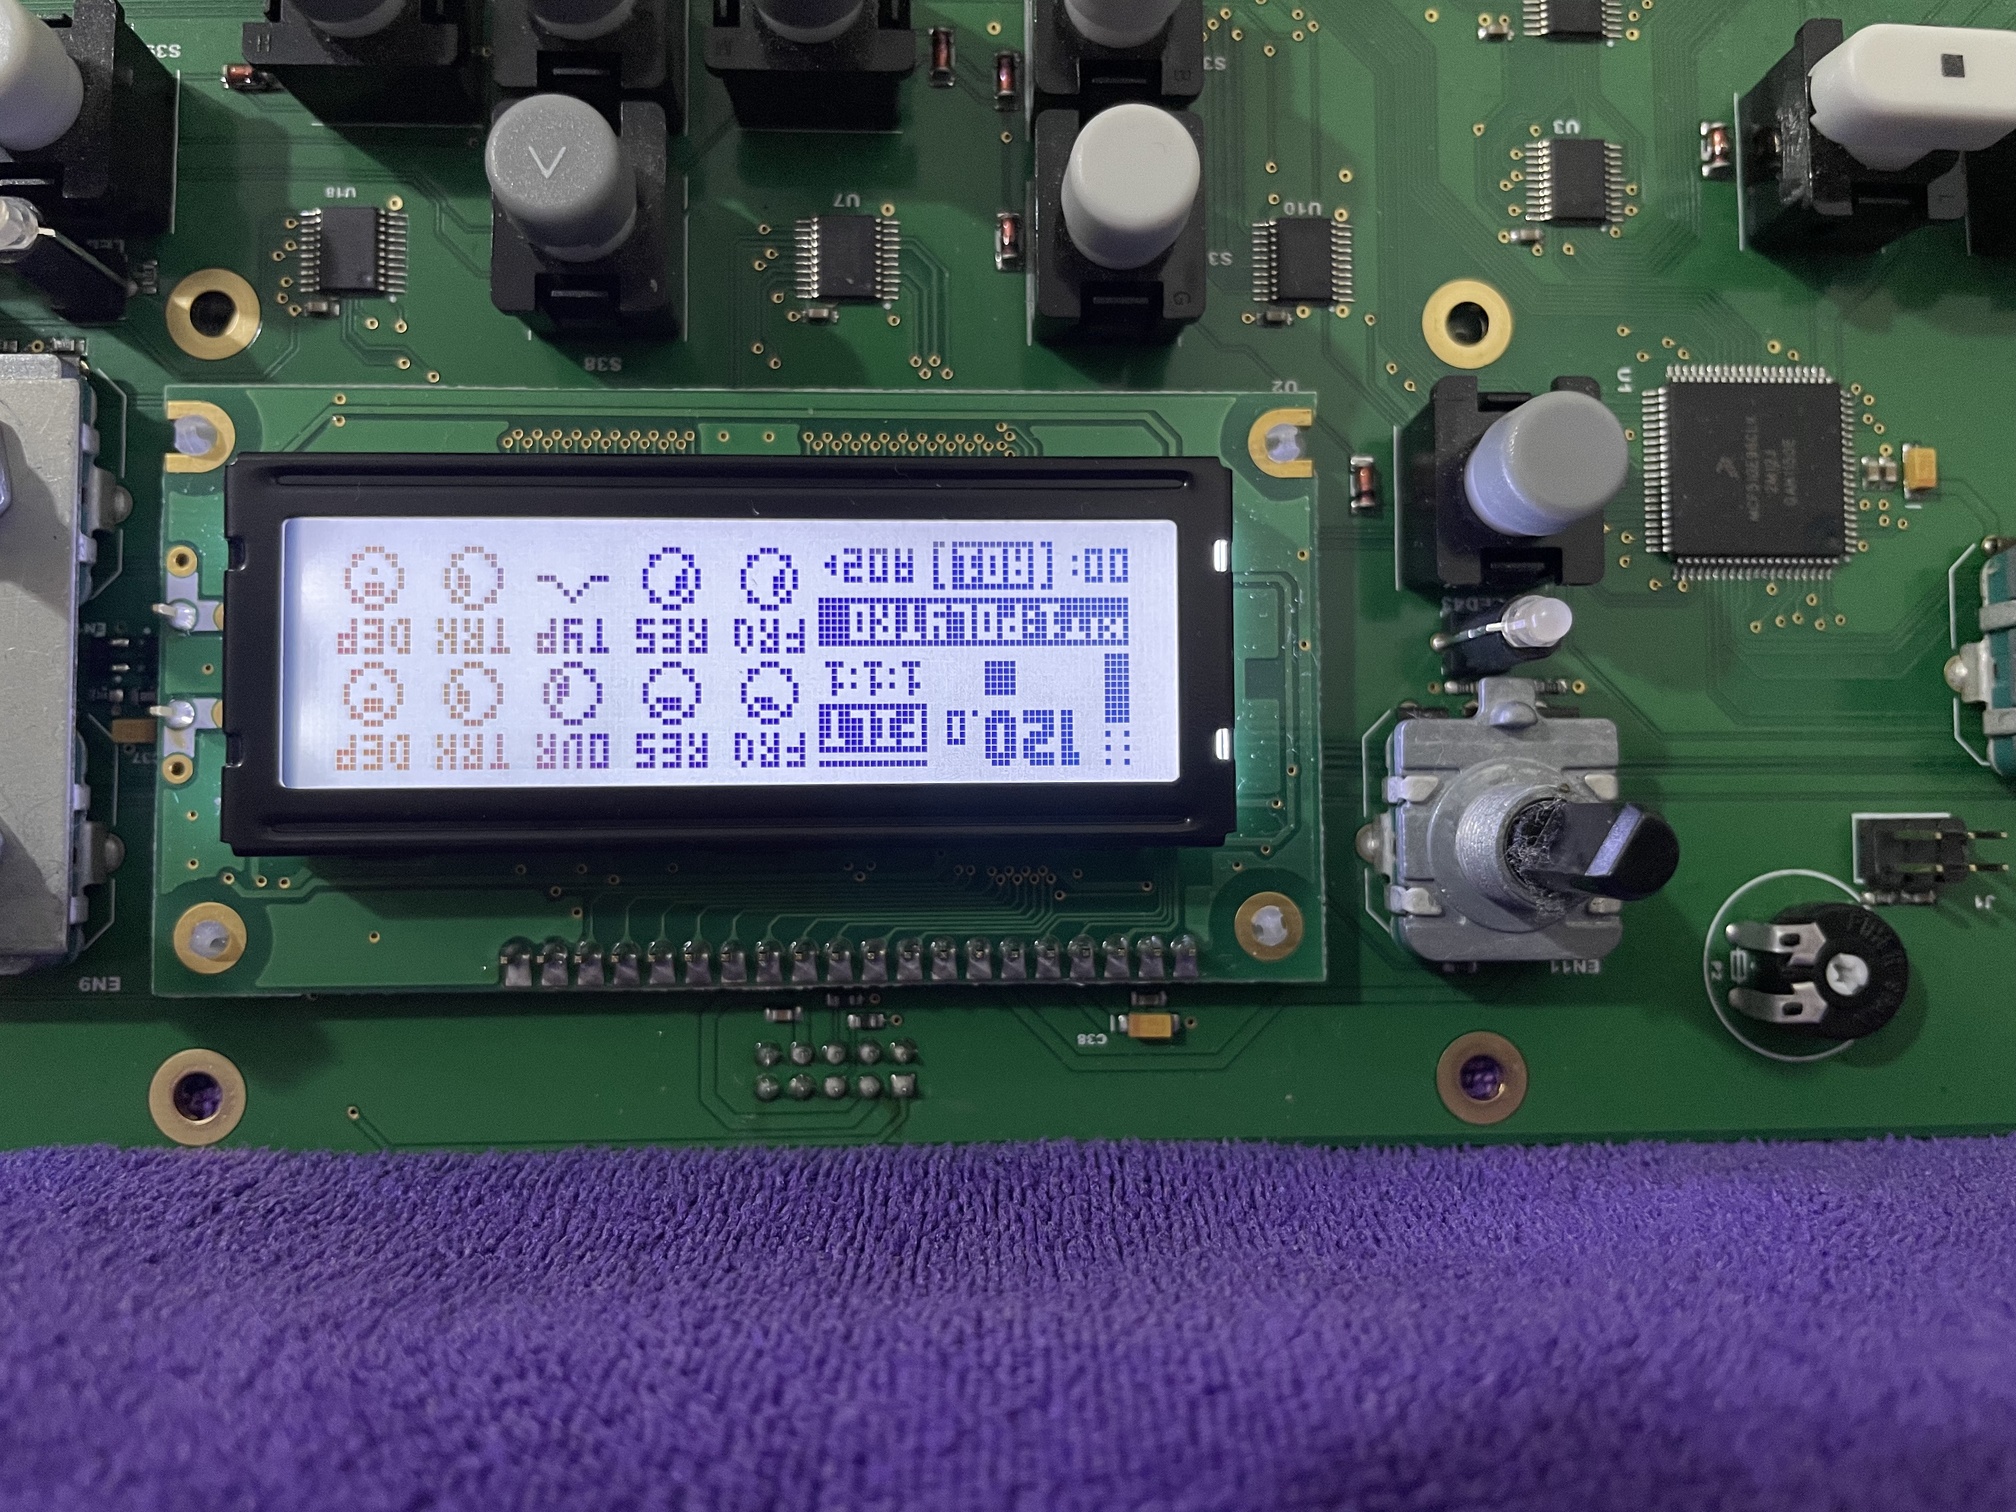
In the adjustment process, I turned the trim pot all the way to minimum and maximum, simply to see if the display would be still able to switch from all on to all off (see pics).
The display before was barely readable, and now I can finally work on the Analog Key with more pleasure again. The lousy display turned me off quite a bit.
Before putting the Analog Keys back together, I will leave the unit on like this and see if there are any changes in the display since from my experience the display tends to improve (hence change) after leaving it on for some time. I’ll post a final pic once done.

5 Likes
Thanks dude for your braveness and success! I’ll give it a go as soon as possible!
I owe you multiple beers, all served with a pulsating analog riser!
2 Likes
So here’s the result of the fix. No miracles, but a very clear improvement in the overall readability. The photo doesn’t catch it 100%, yet you can see.
The assembling process wasn’t perfectly smooth, you gotta make sure that all connectors perfectly snap in and fit. The Analog Key (at least mine) seems to be quite sensitive about its board connectors. The entire process took me a few hours (including keeping the unit powered on as mentioned) much longer than fixing the screen of the Analog Four, which took a few minutes only.
Since there are many screws, my tip would be to test the Analog Key first, with a few screws tightened, and then do the rest, once all works. I also suggest running the hardware test before that, simply press function+1 during boot-up. After the test routine (pressing 1 after the menu pops up), you can also test your screen by pressing 2 & 3 (if I’m not wrong).
Hope this helps a few people here, it’s worth it.

5 Likes
It is definitely worth giving it a try & Beer sounds great, multiple even better — Cheers!
1 Like
Hello, does it need to be turned clockwise or anticlockwise? Maybe I will have the ability to keep it on while in the trimming…but so far I unscrewed all.
Thanks
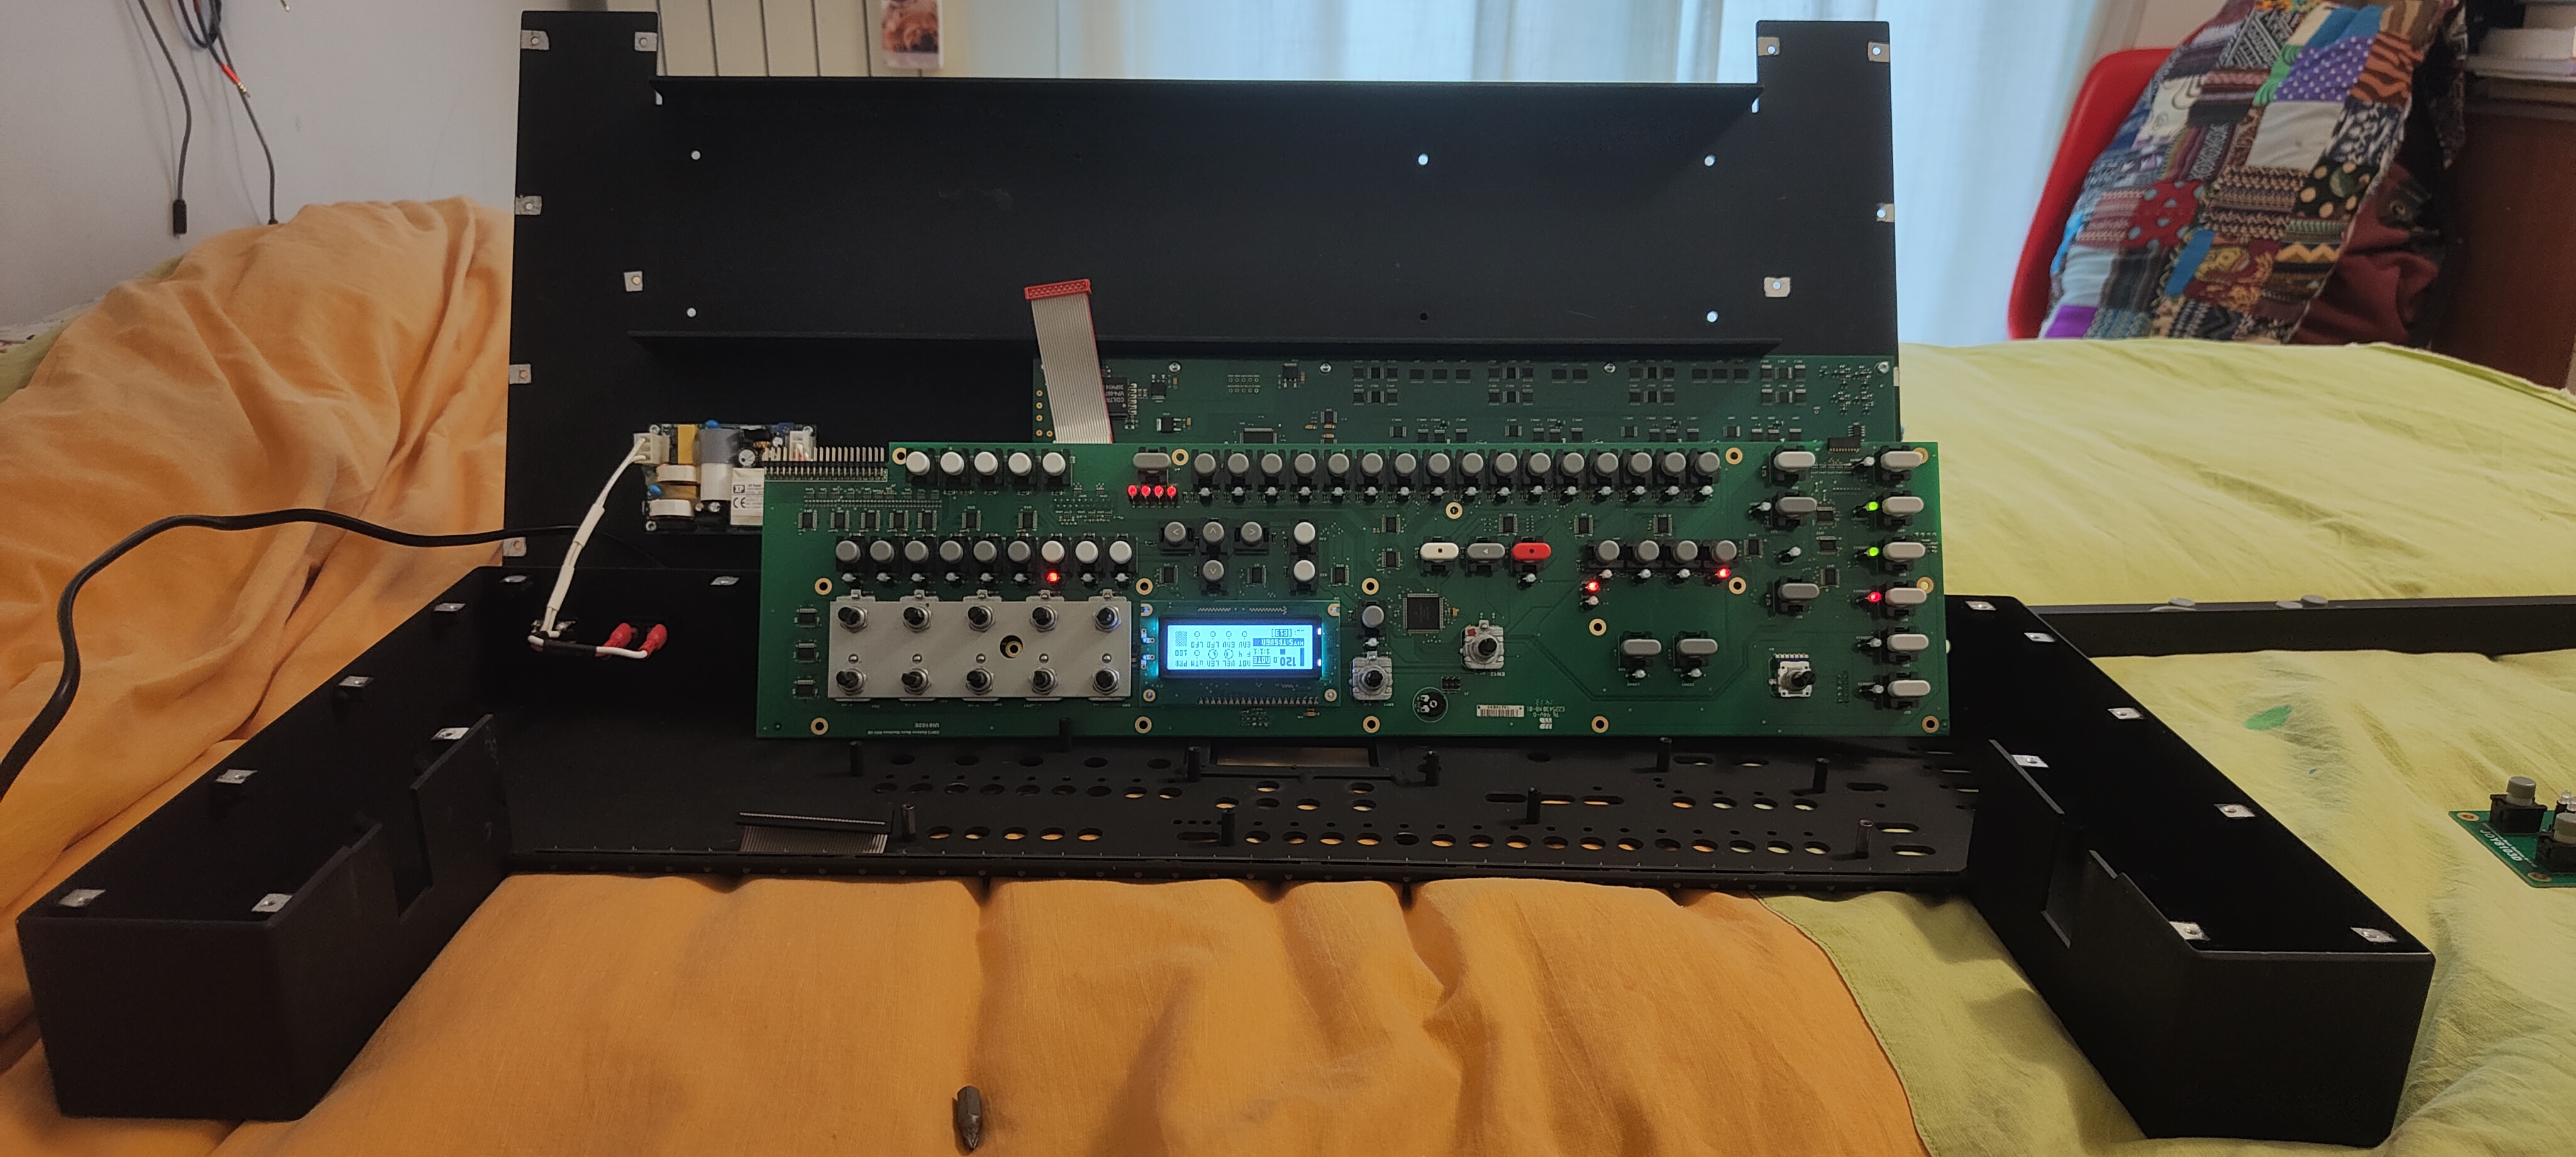
Please do NOT disassemble your treasured electronic devices on synthetic towels/bedding. That’s a great way to kill your device with static electricity.
1 Like
Open it up. Near the lcd inside there’s a screw you can turn to darken or lighten the contrast