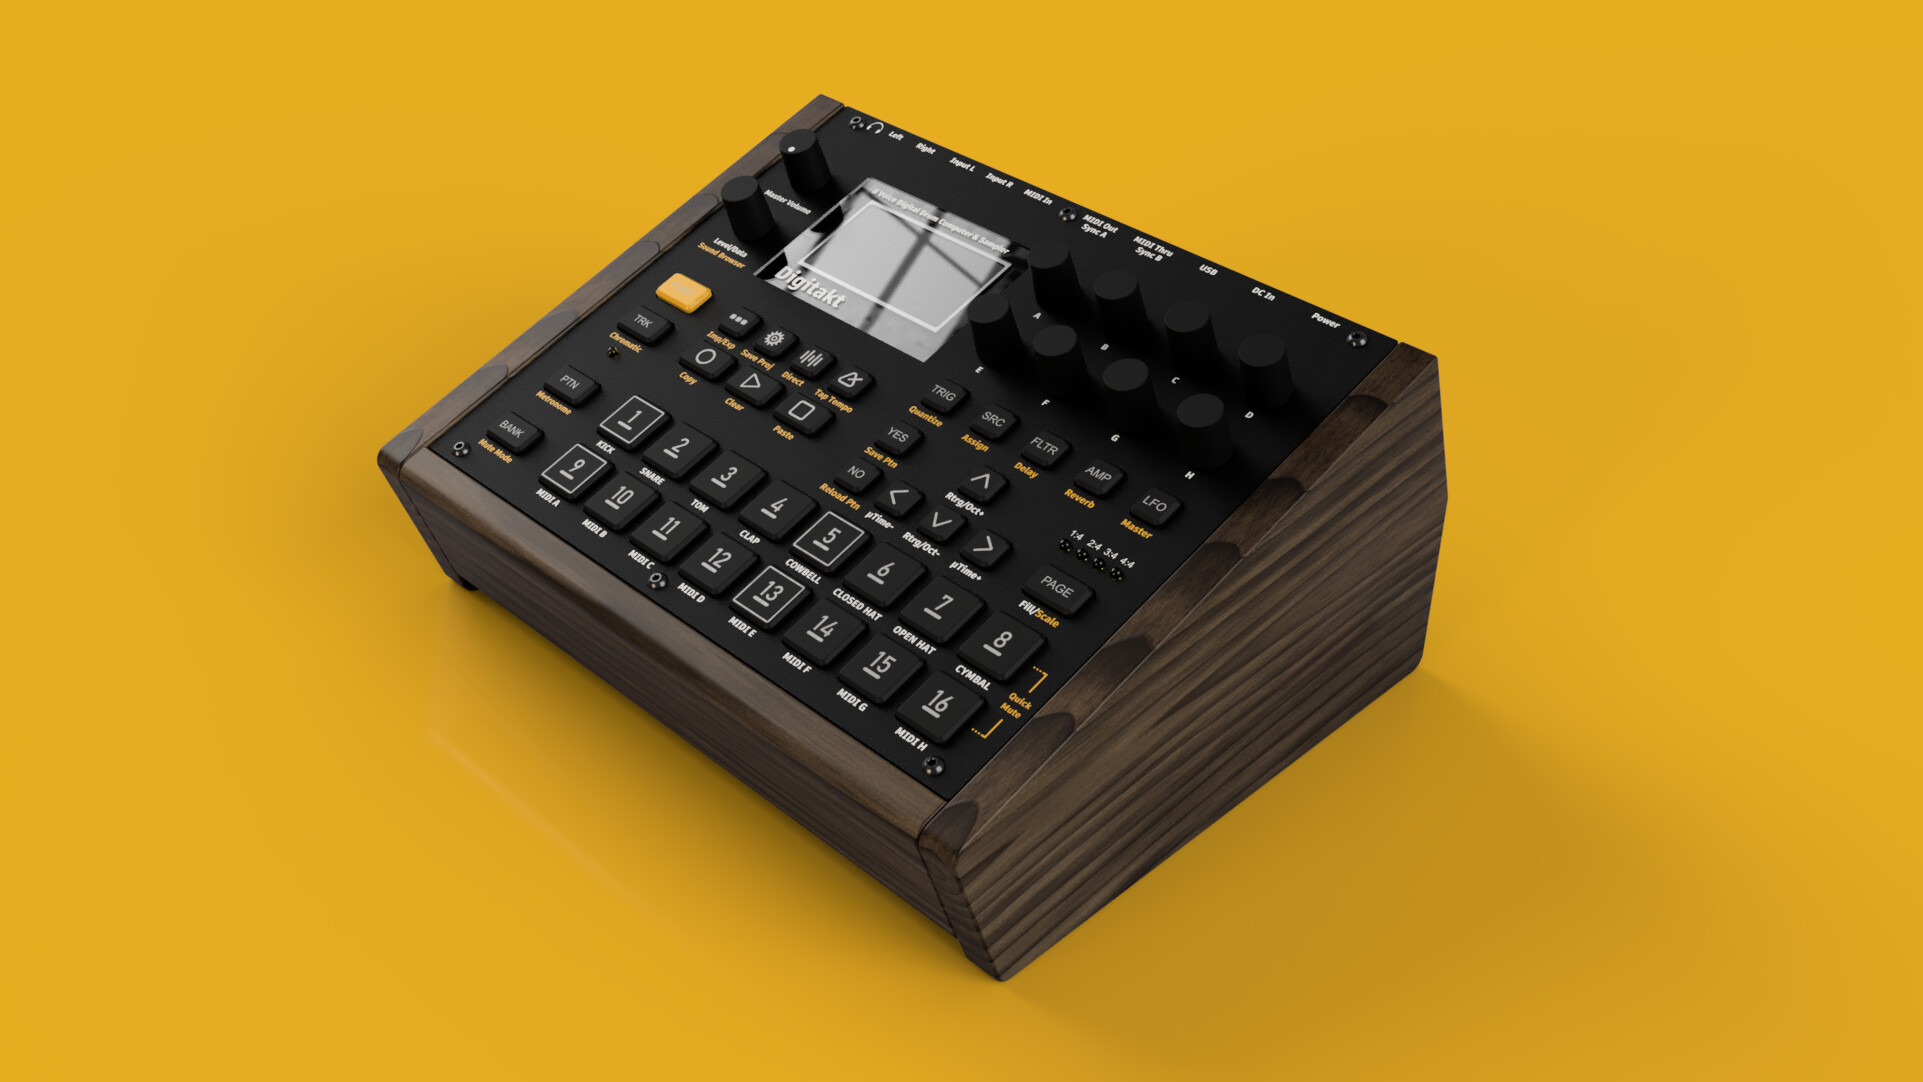
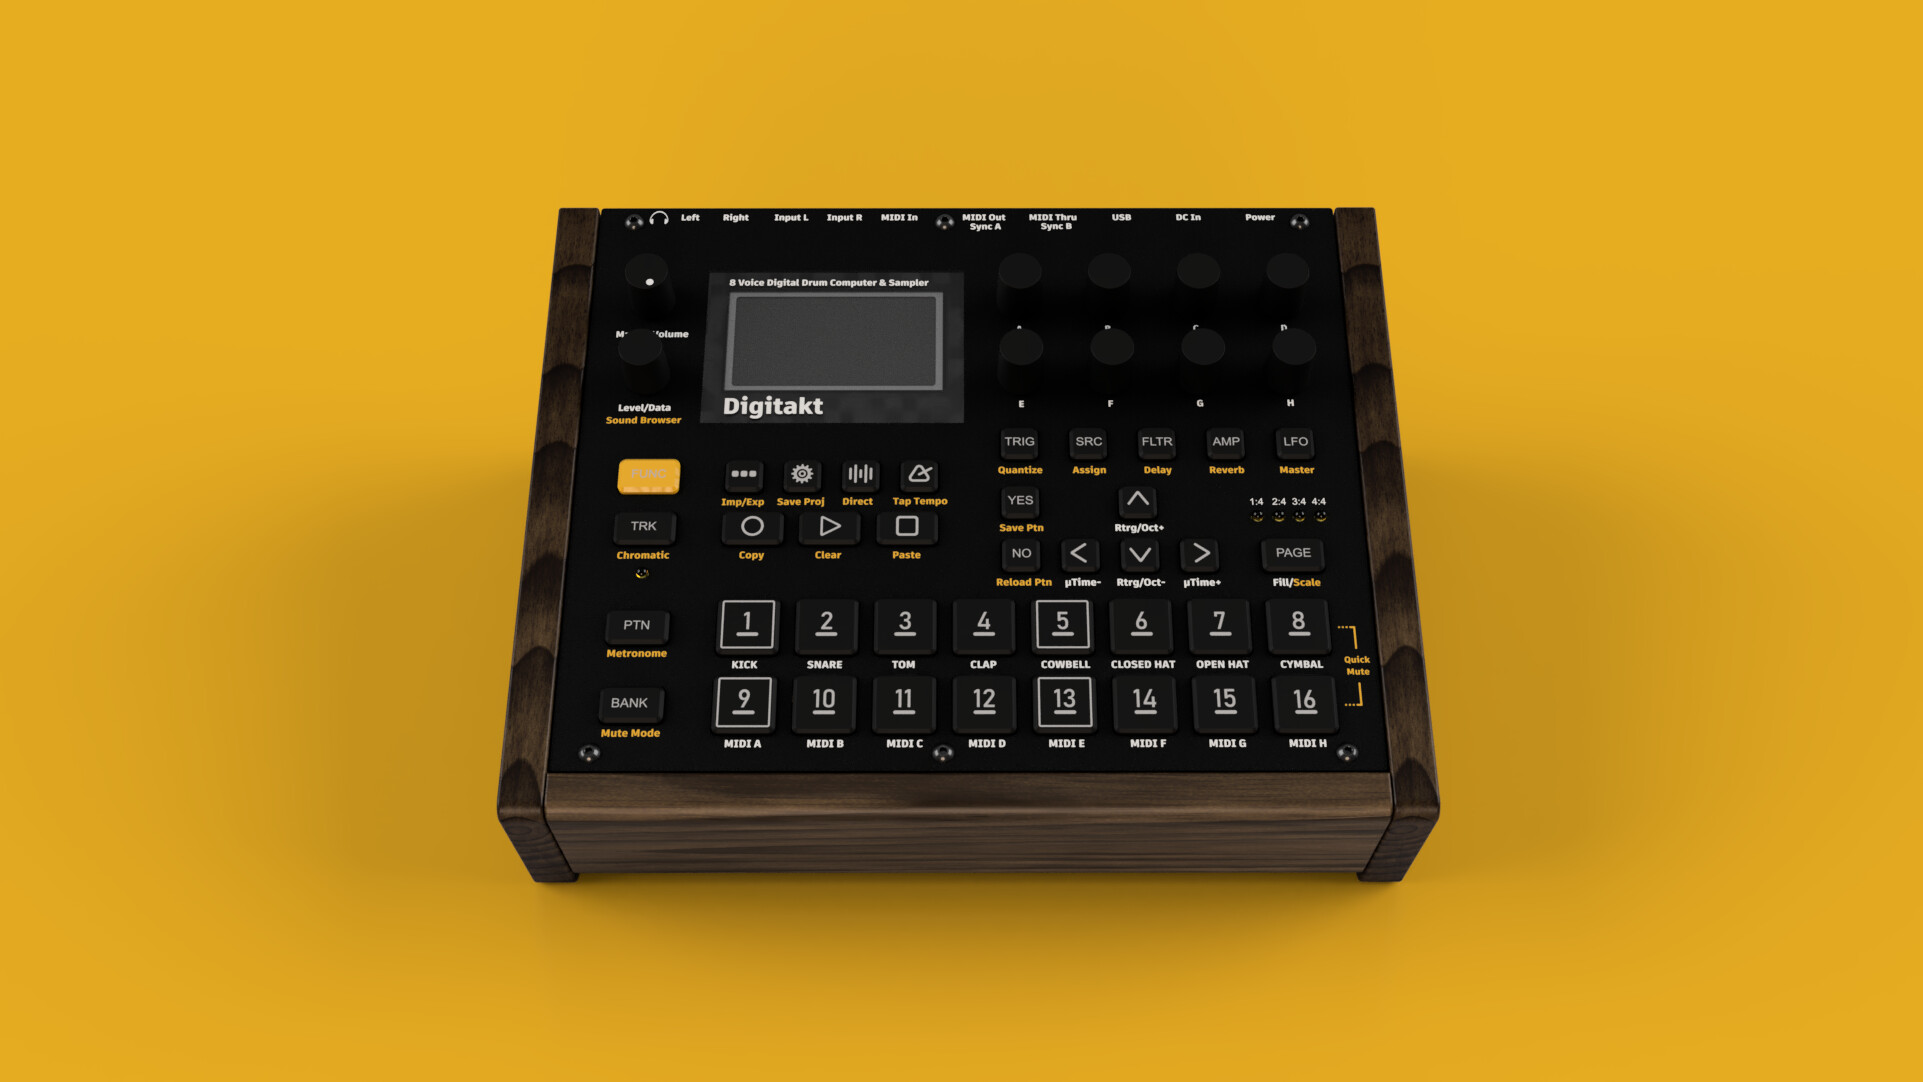
I’ve been spending some time reverse-engineering the Digitakt in 3D, trying to get it as close to 1:1 as possible in terms of proportions and layout.
Mostly did this as a personal project since I enjoy both Elektron gear and design, but it turned out more detailed than I expected so I thought I’d share it here.
Proportions and layout are as close to 1:1 as I could get using calipers, fonts are approximated.
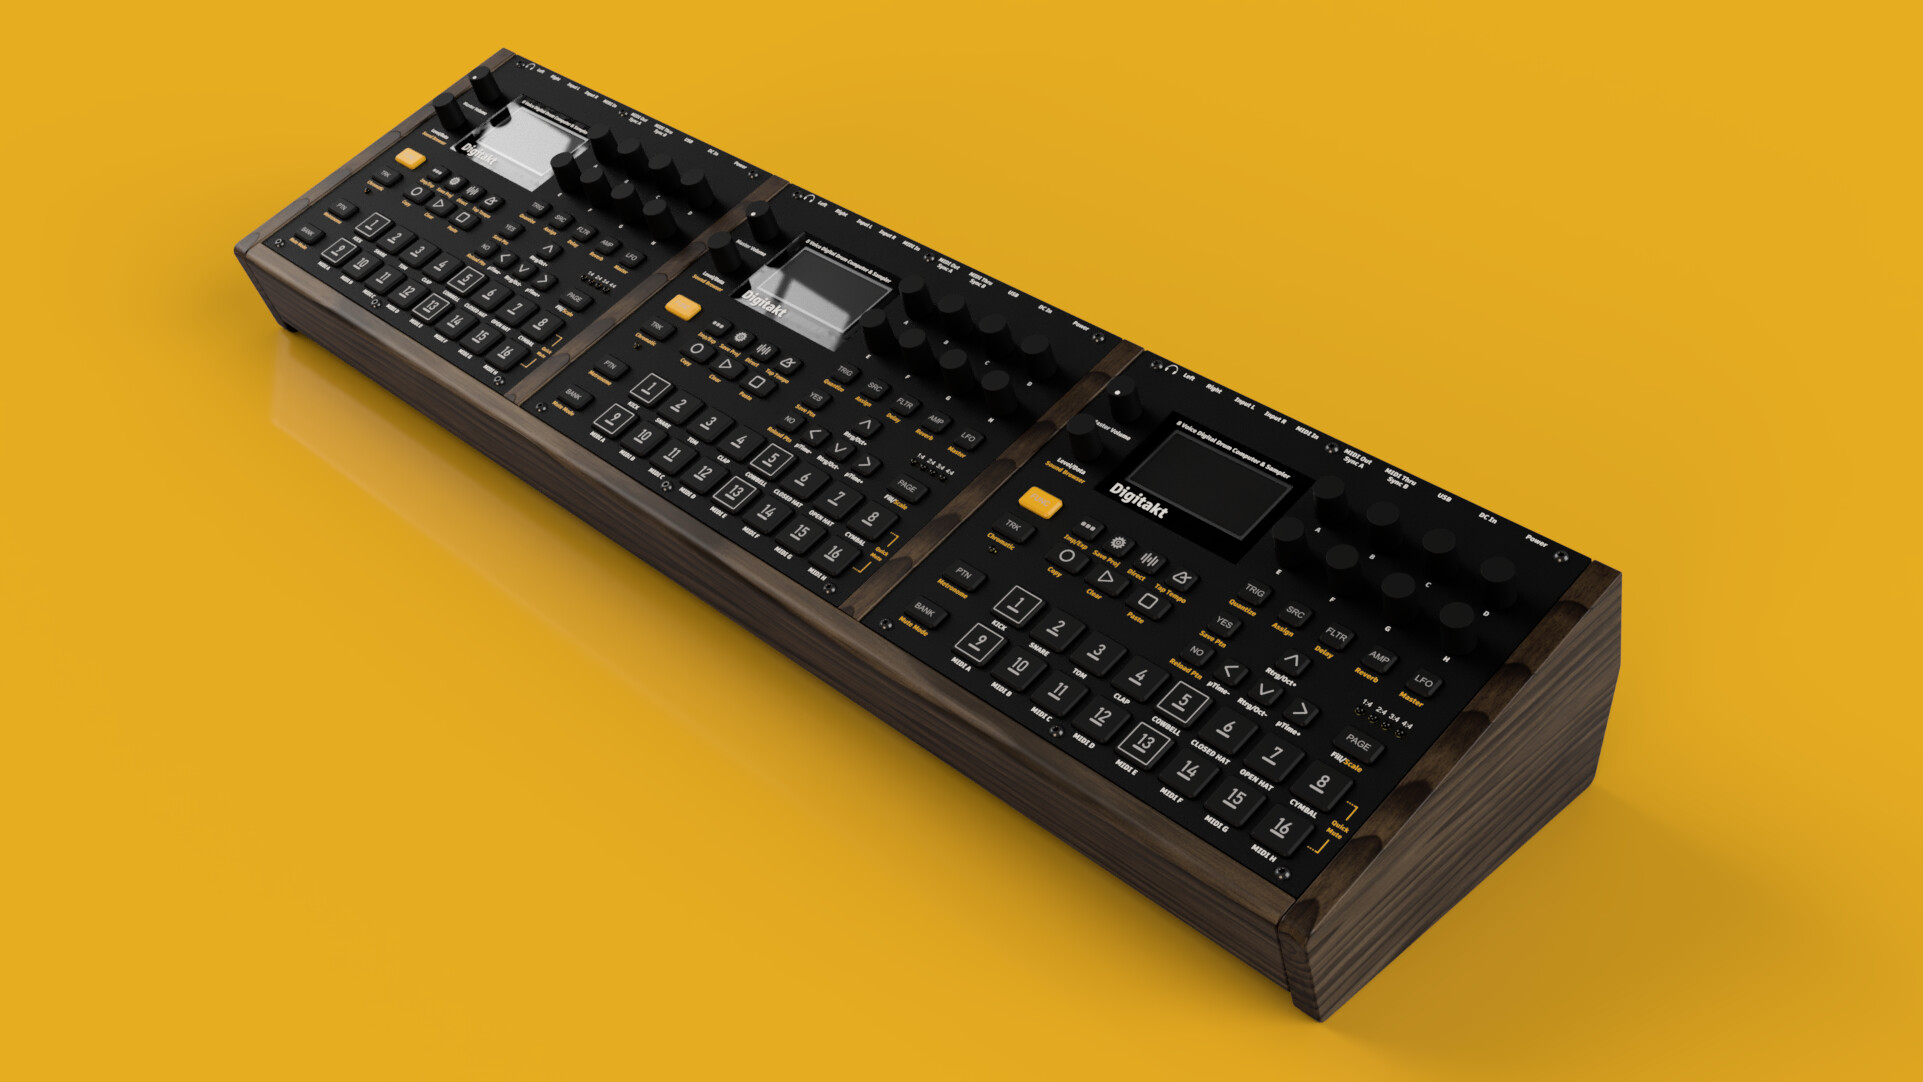
As a next step I’ve started exploring a walnut stand concept, something that would match the Elektron aesthetic but feel a bit more “furniture-grade”.
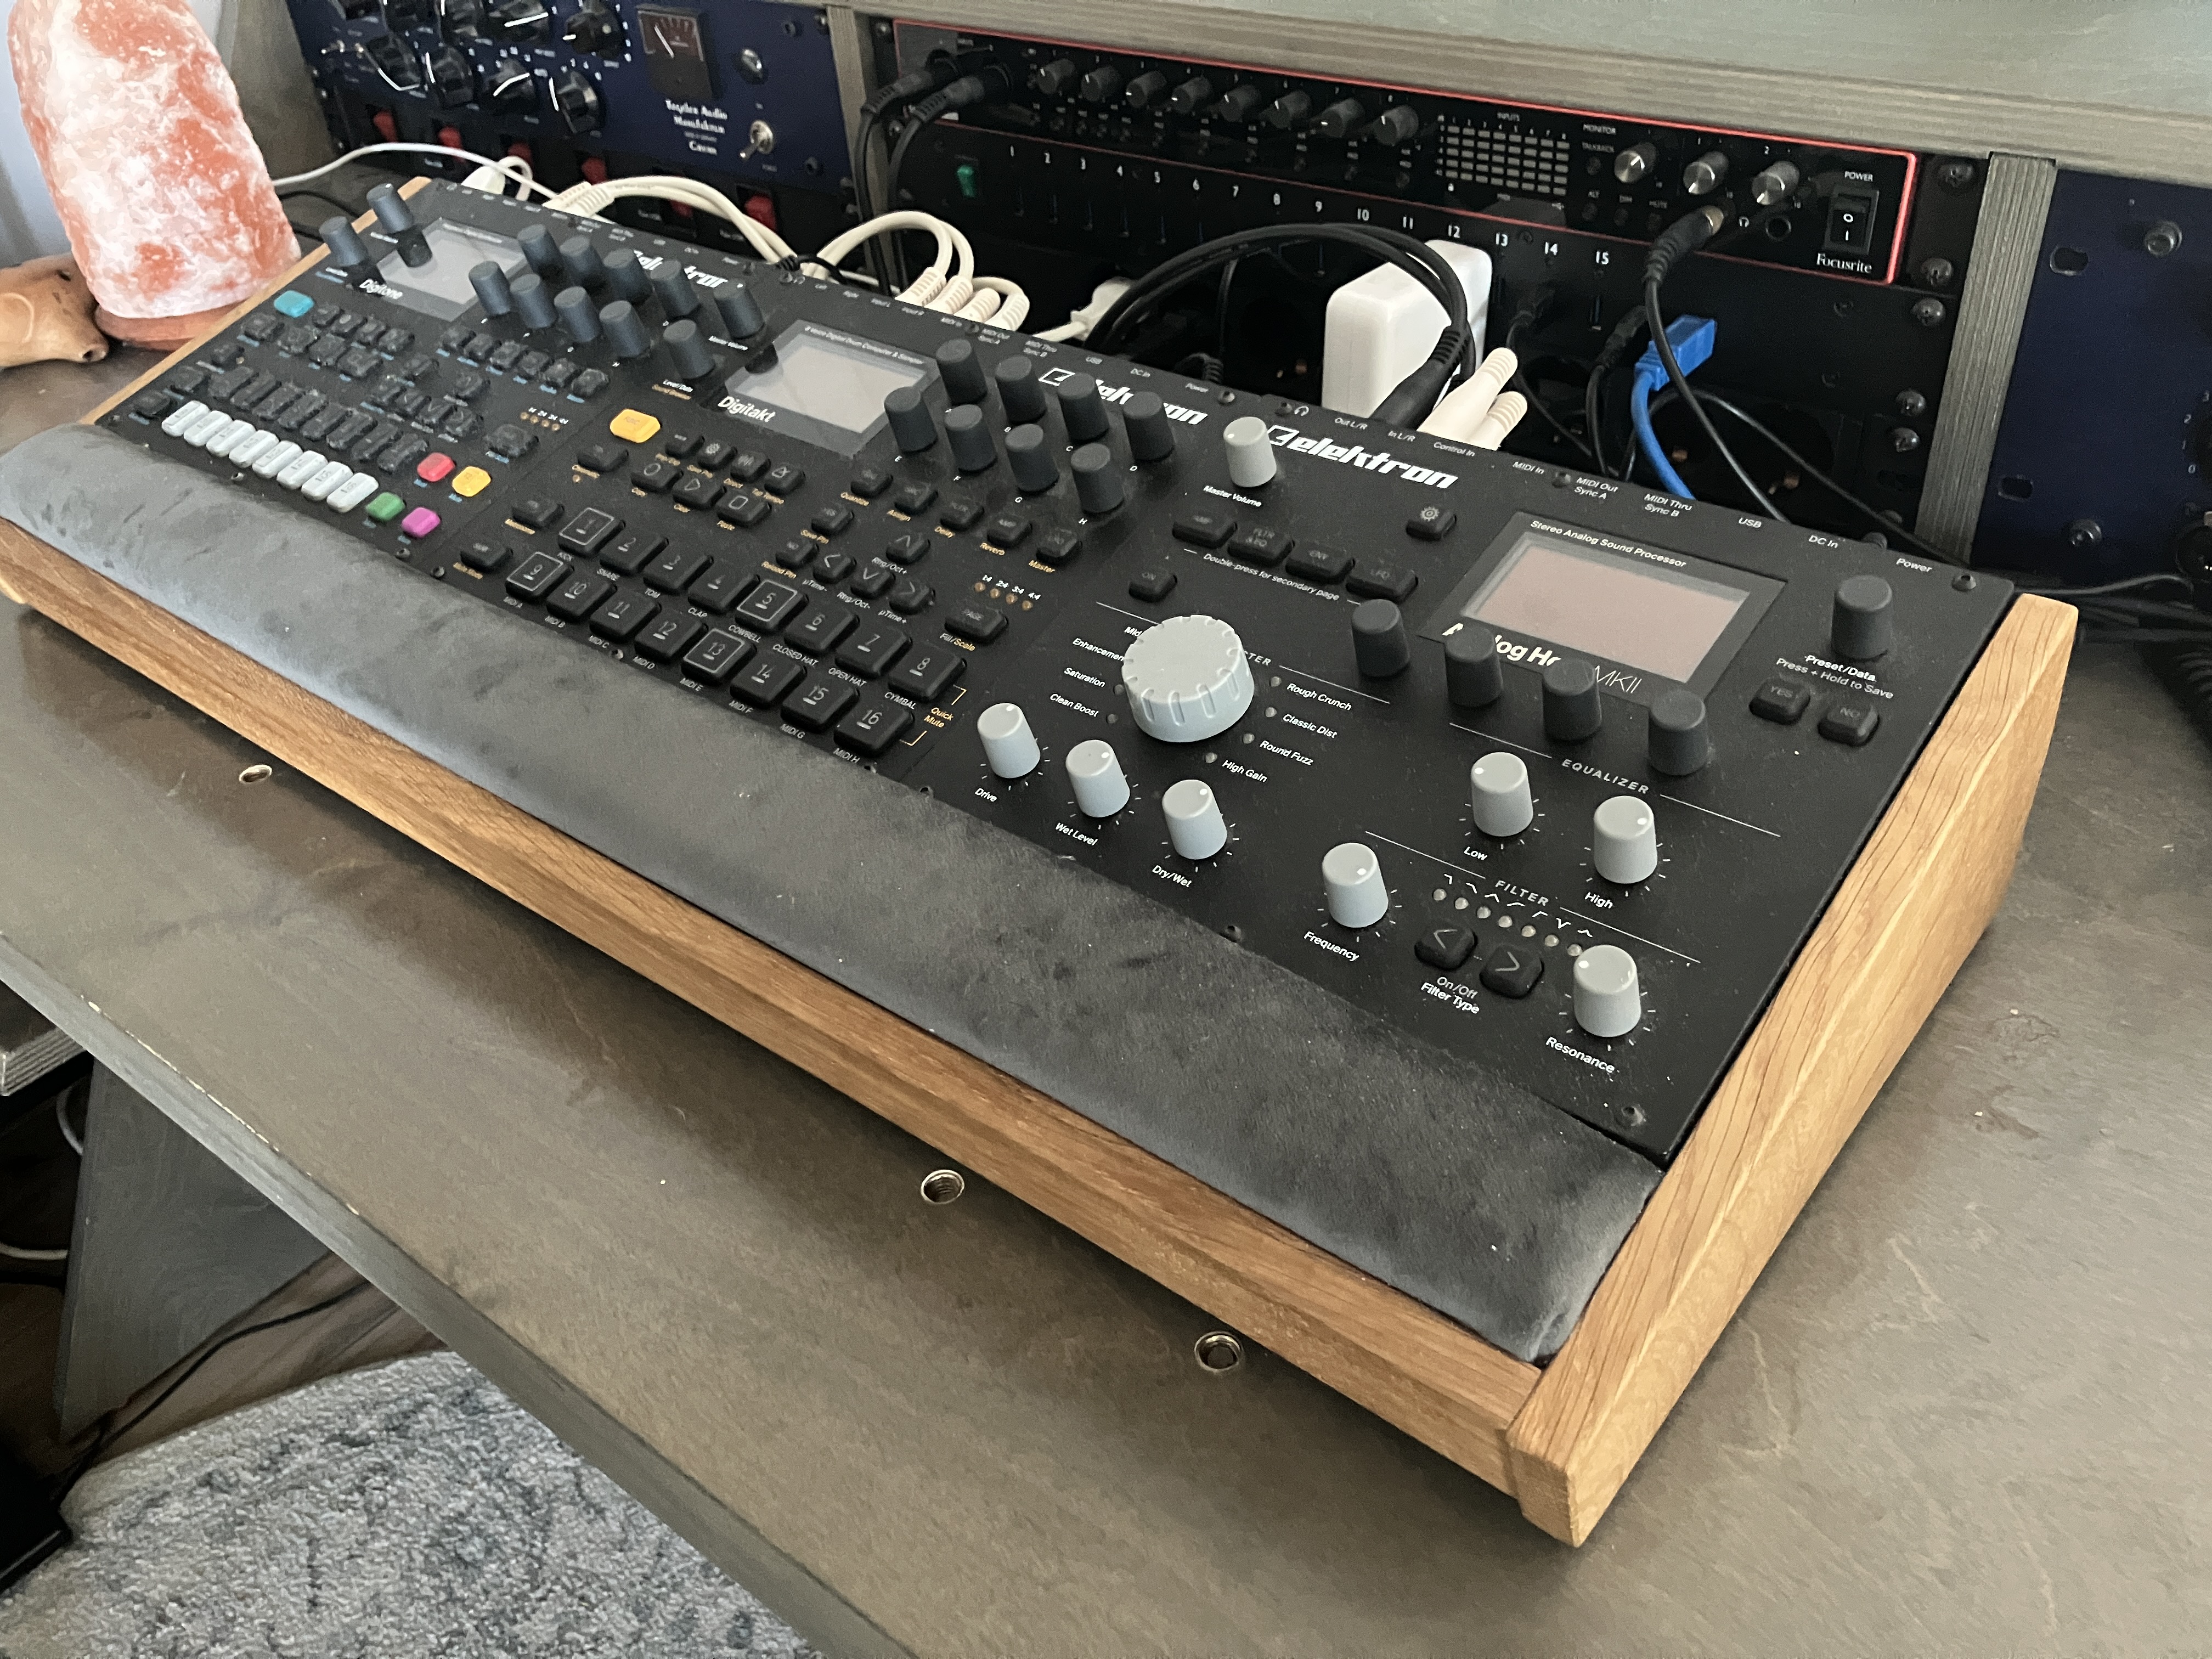
I’m personally building a 3-unit version for my own setup (Digitakt, Digitone, Heat).
The concept scales — single, double, or triple.
For now I’m focusing on getting the single stand right first.
Would really appreciate some input here, especially from those of you using stands regularly:
– Do you prefer your Digitakt flat or angled, specific degrees?
– Any annoyances with current stands?
– Cable clearance underneath? Currently 8mm. Enough for your setup?
– Ergonomics things I should think about?
– If you were to get something like this, what would be dealbreakers?
I’m aiming to do a small run (10–20 units), but want to make sure it’s properly dialed in first.
Would be great to hear what’s actually worked (and not worked) in your setups.
I share mine that I ordered from Etsy. I really appreciate the arm rest. For a three Digi model, consider the bending in the middle due to their weight if they are only standing on the outer corners. I have an additional spacer to increase the height to the table, to place MIDI controllers beneath it. What also would come handy if you find a way to attach the power adapters and their cables to the stand, so it becomes one unit like mine.
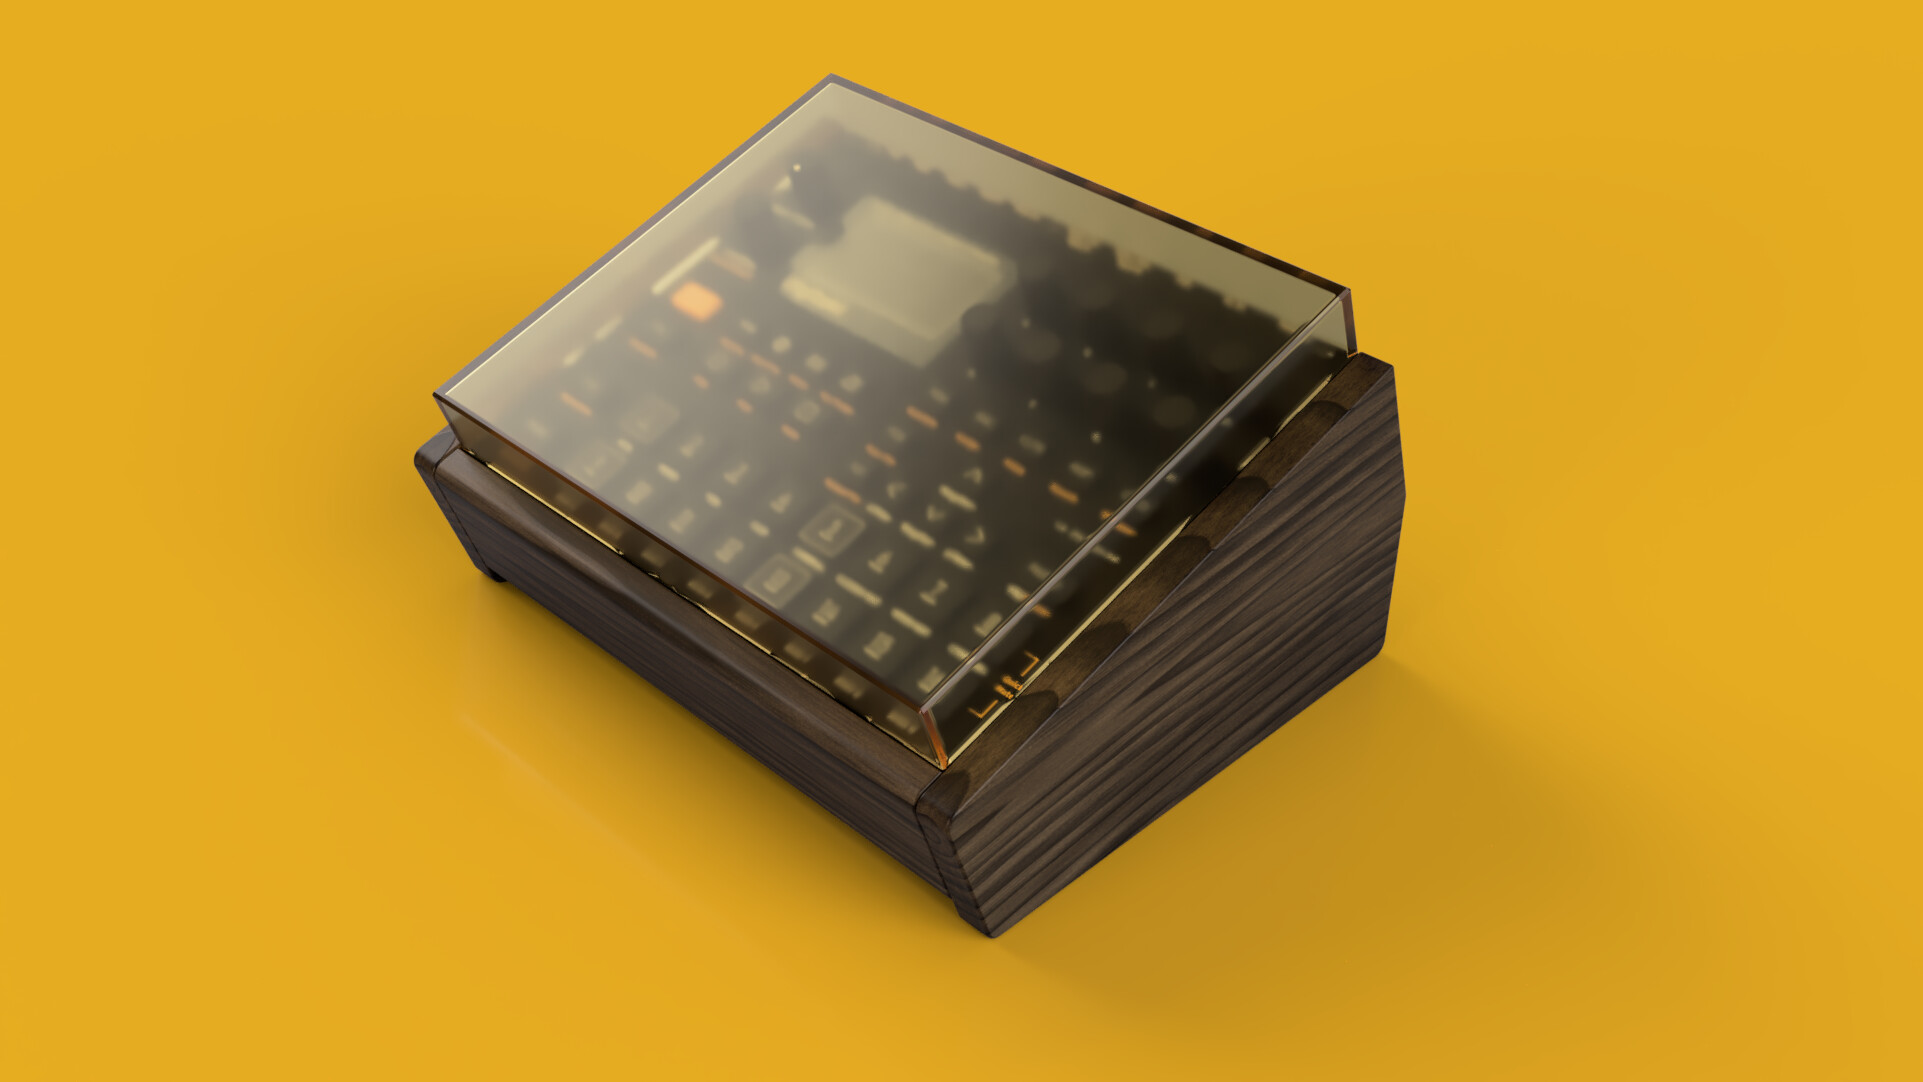
I actually designed it tight on purpose to keep the profile clean. I’m working on a custom dust cover for it as well, inspired by 70s turntable lids with a warm amber tint so it fits the frame perfectly.
This is just a quick early render, didn’t quite nail the color yet but you get the idea.
That’s a great setup, thanks for sharing. I have pretty much the same, except I’m running the OG Heat and an Analog Keys as well.
Good call on the bending. I actually accounted for that in my design with center panels for mid support.
Curious about your power/cable solution, how did you handle that on your setup? I’ve been thinking about adding a recessed compartment at the back to keep adapters and cables out of sight, but would be great to hear what you did.