mm)
1 Like
Hi again.
I want to make sure I don’t order the wrong hardware parts.
Could you possibly send me the link of the correct hardware parts to order and how many of each please?
From this website ideally: https://www.accu.co.uk/en/
I’d really appreciate that!
sure
those are 8 of these bolts for side-cheeks (m3x10):
http://uk.rs-online.com/web/p/machine-screws/4830940/
and 2 of these bolts for joints (m6x12):
http://uk.rs-online.com/web/p/machine-screws/4831044/
with 2 of these m6 locking nuts - sorry I haven’t find black ones for you:
http://uk.rs-online.com/web/p/locking-nuts/0524326/
( :
1 Like
Cheers!
As a heads up for anyone who gets these 3D printed.
Opt for the tougher resin!
The resin I used is already wearing at the hinge part.
2 Likes
Any good ideas on which online service is best for printing these? I was also just thinking of getting them cut as well
Hey,
Thanks for sharing these @intertexter, really awesome!
I’ve just been quoted £280, does anyone know if that sounds reasonable for 3D printing?
Joel
glad you like it)
i’ve paid some 20euro. but that’s kiev, ukraine
1 Like
Any chance of a link to your printer, it’d be cheaper to ship!
yo man
frankly ukraine is still not that edge on commitment-to-what-you-do country and i don’t believe these guys will get into the story because of shipment and the need of talking english to you)
but it’s worth trying: http://www.3dprinting.kiev.ua/contacts/
in any case. should they refuse - just PM me and i’ll get that for you personally. somehow. but just 'cause you’re the first asking)
1 Like
lol
Just finished printing out a set with a dense infill using PLA, looking forward to giving it a whirl! Next gotta order the screws, once I clean it up I’ll post some pics.
I get the bolts for the side of the cheeks but I didn’t seen any holes for joints? Or maybe I just didn’t check out the final print, someone else was doing it for me. Very excited!
ought to be there, man - they’re present on the blueprints)
I’ll check again but in the .stl I gave my friend, when it opened it wasn’t there. Oddly enough though I do not feel you really need them due to the thickness of the infill. Also it locks in perfectly. It makes it easier, not having the screw, if you wanted to switch out pieces of gear. Just remove one side then you would be good to go.
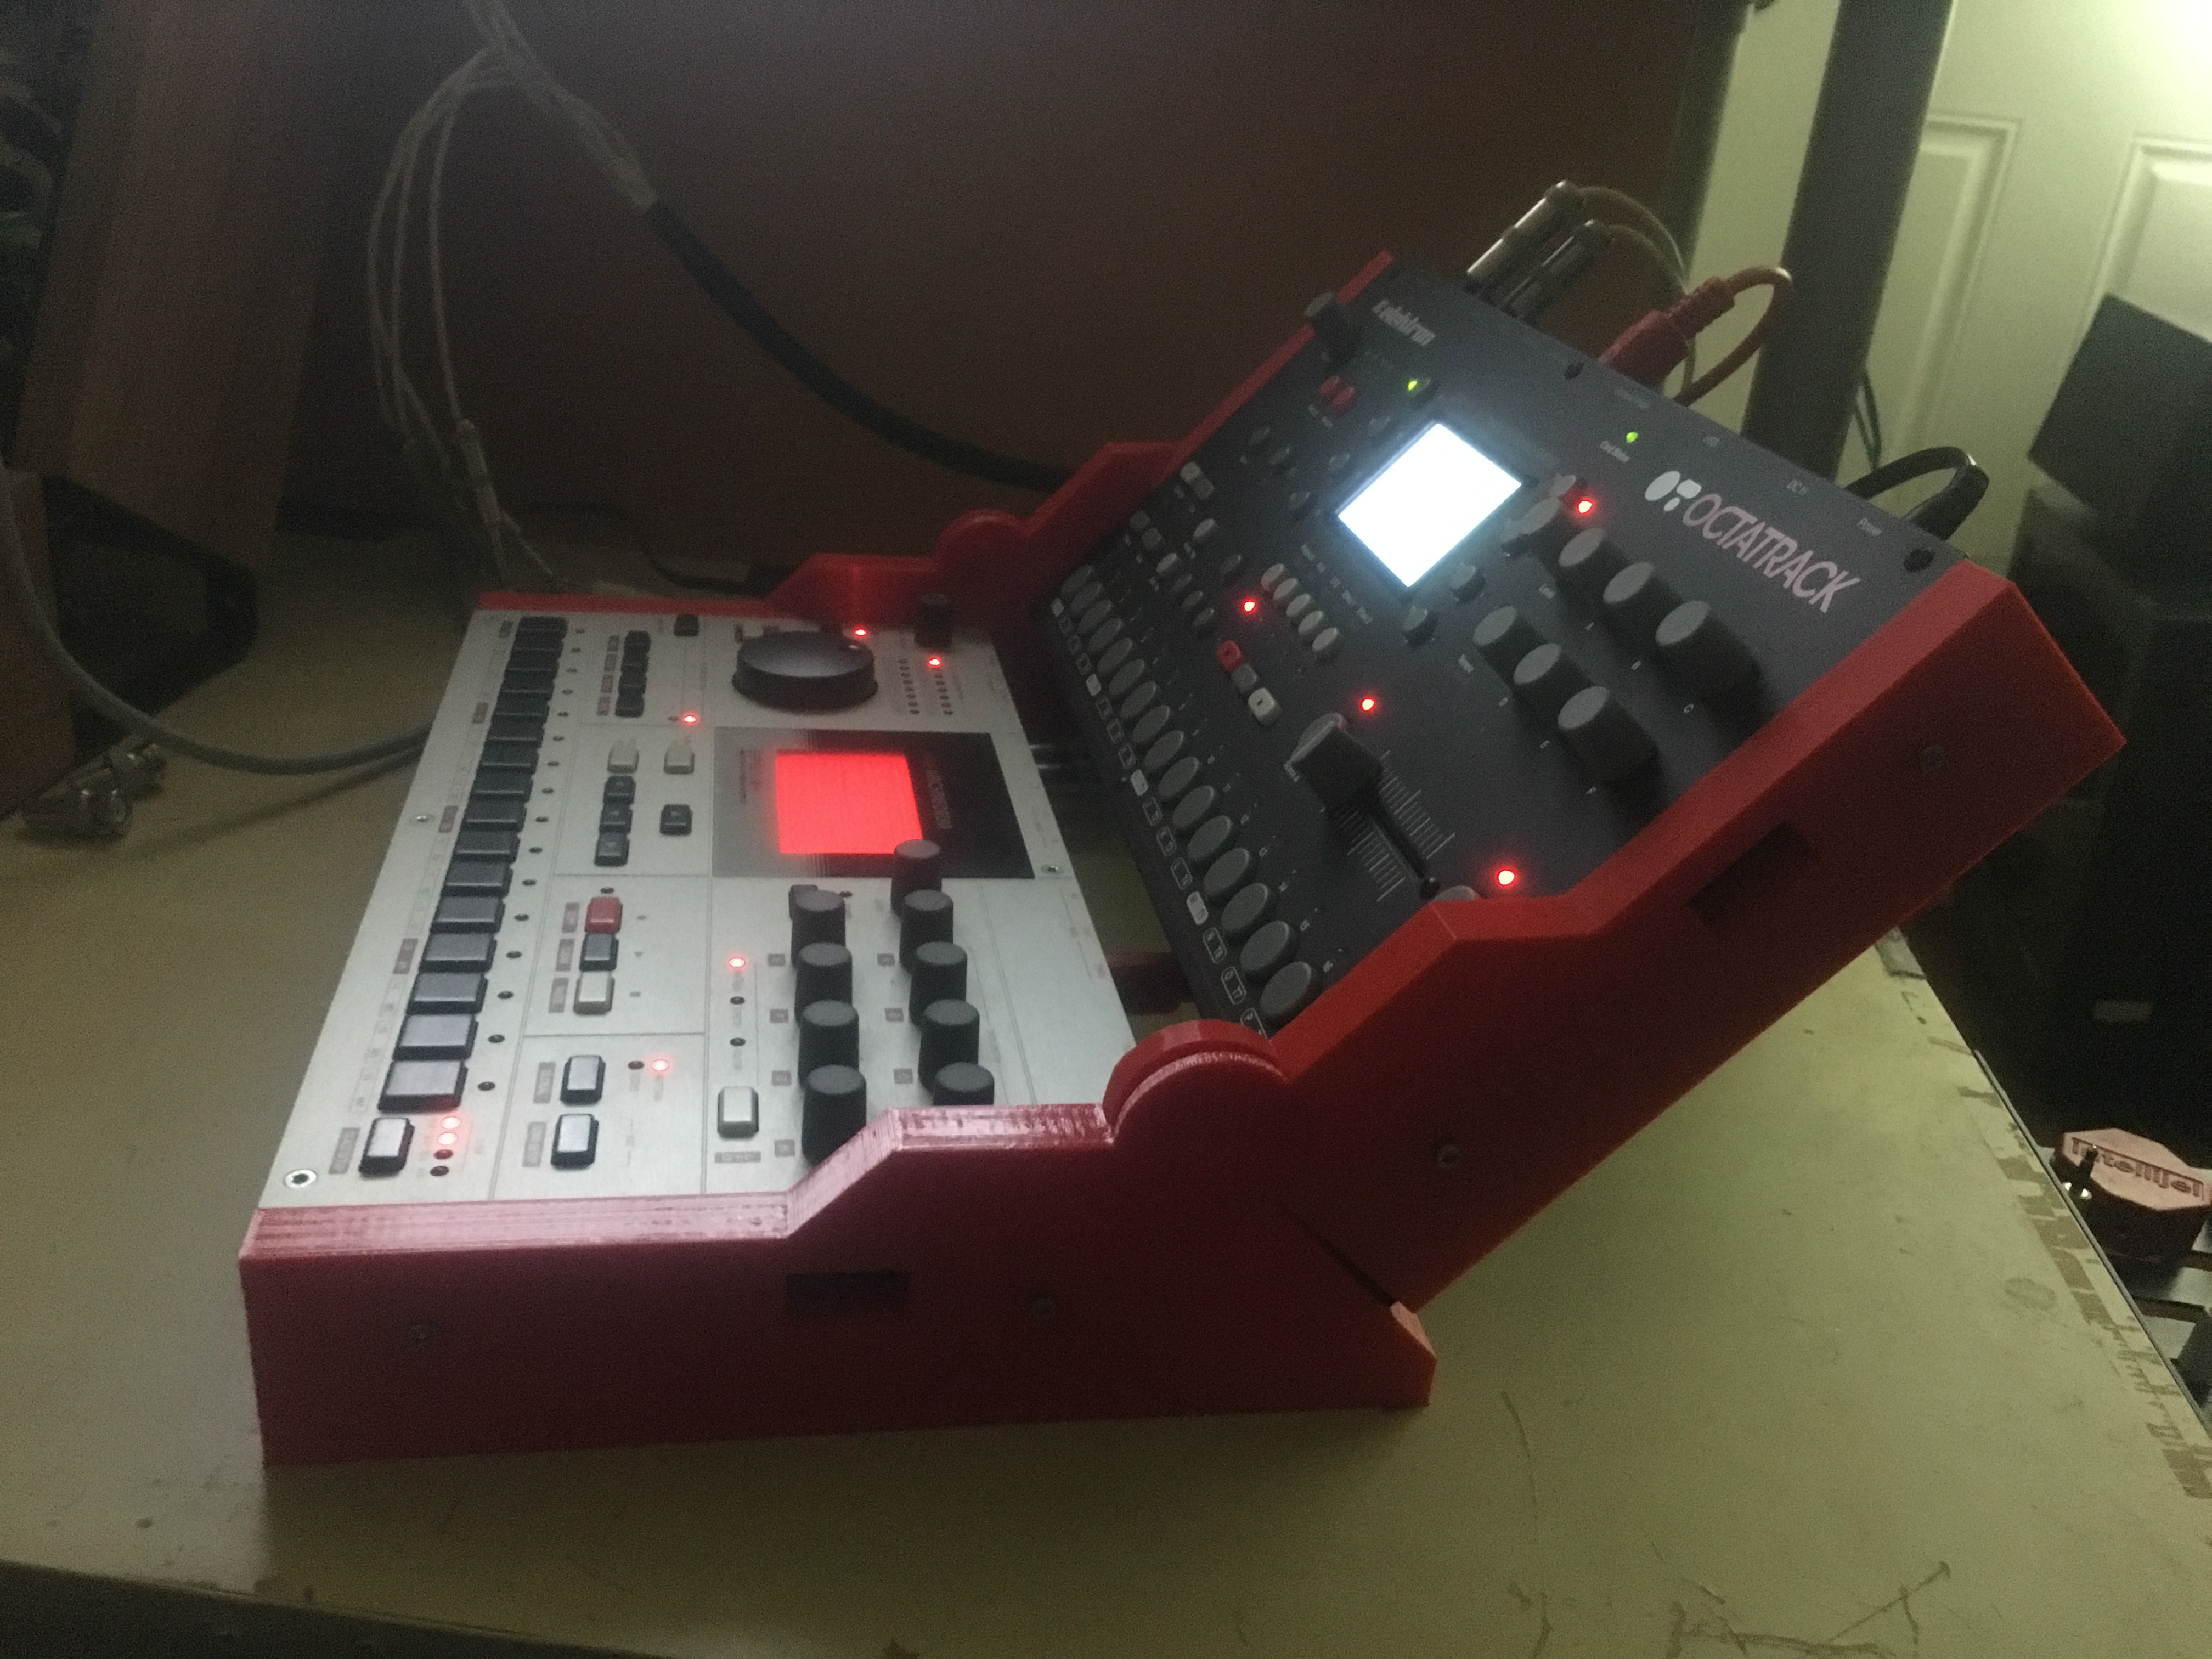
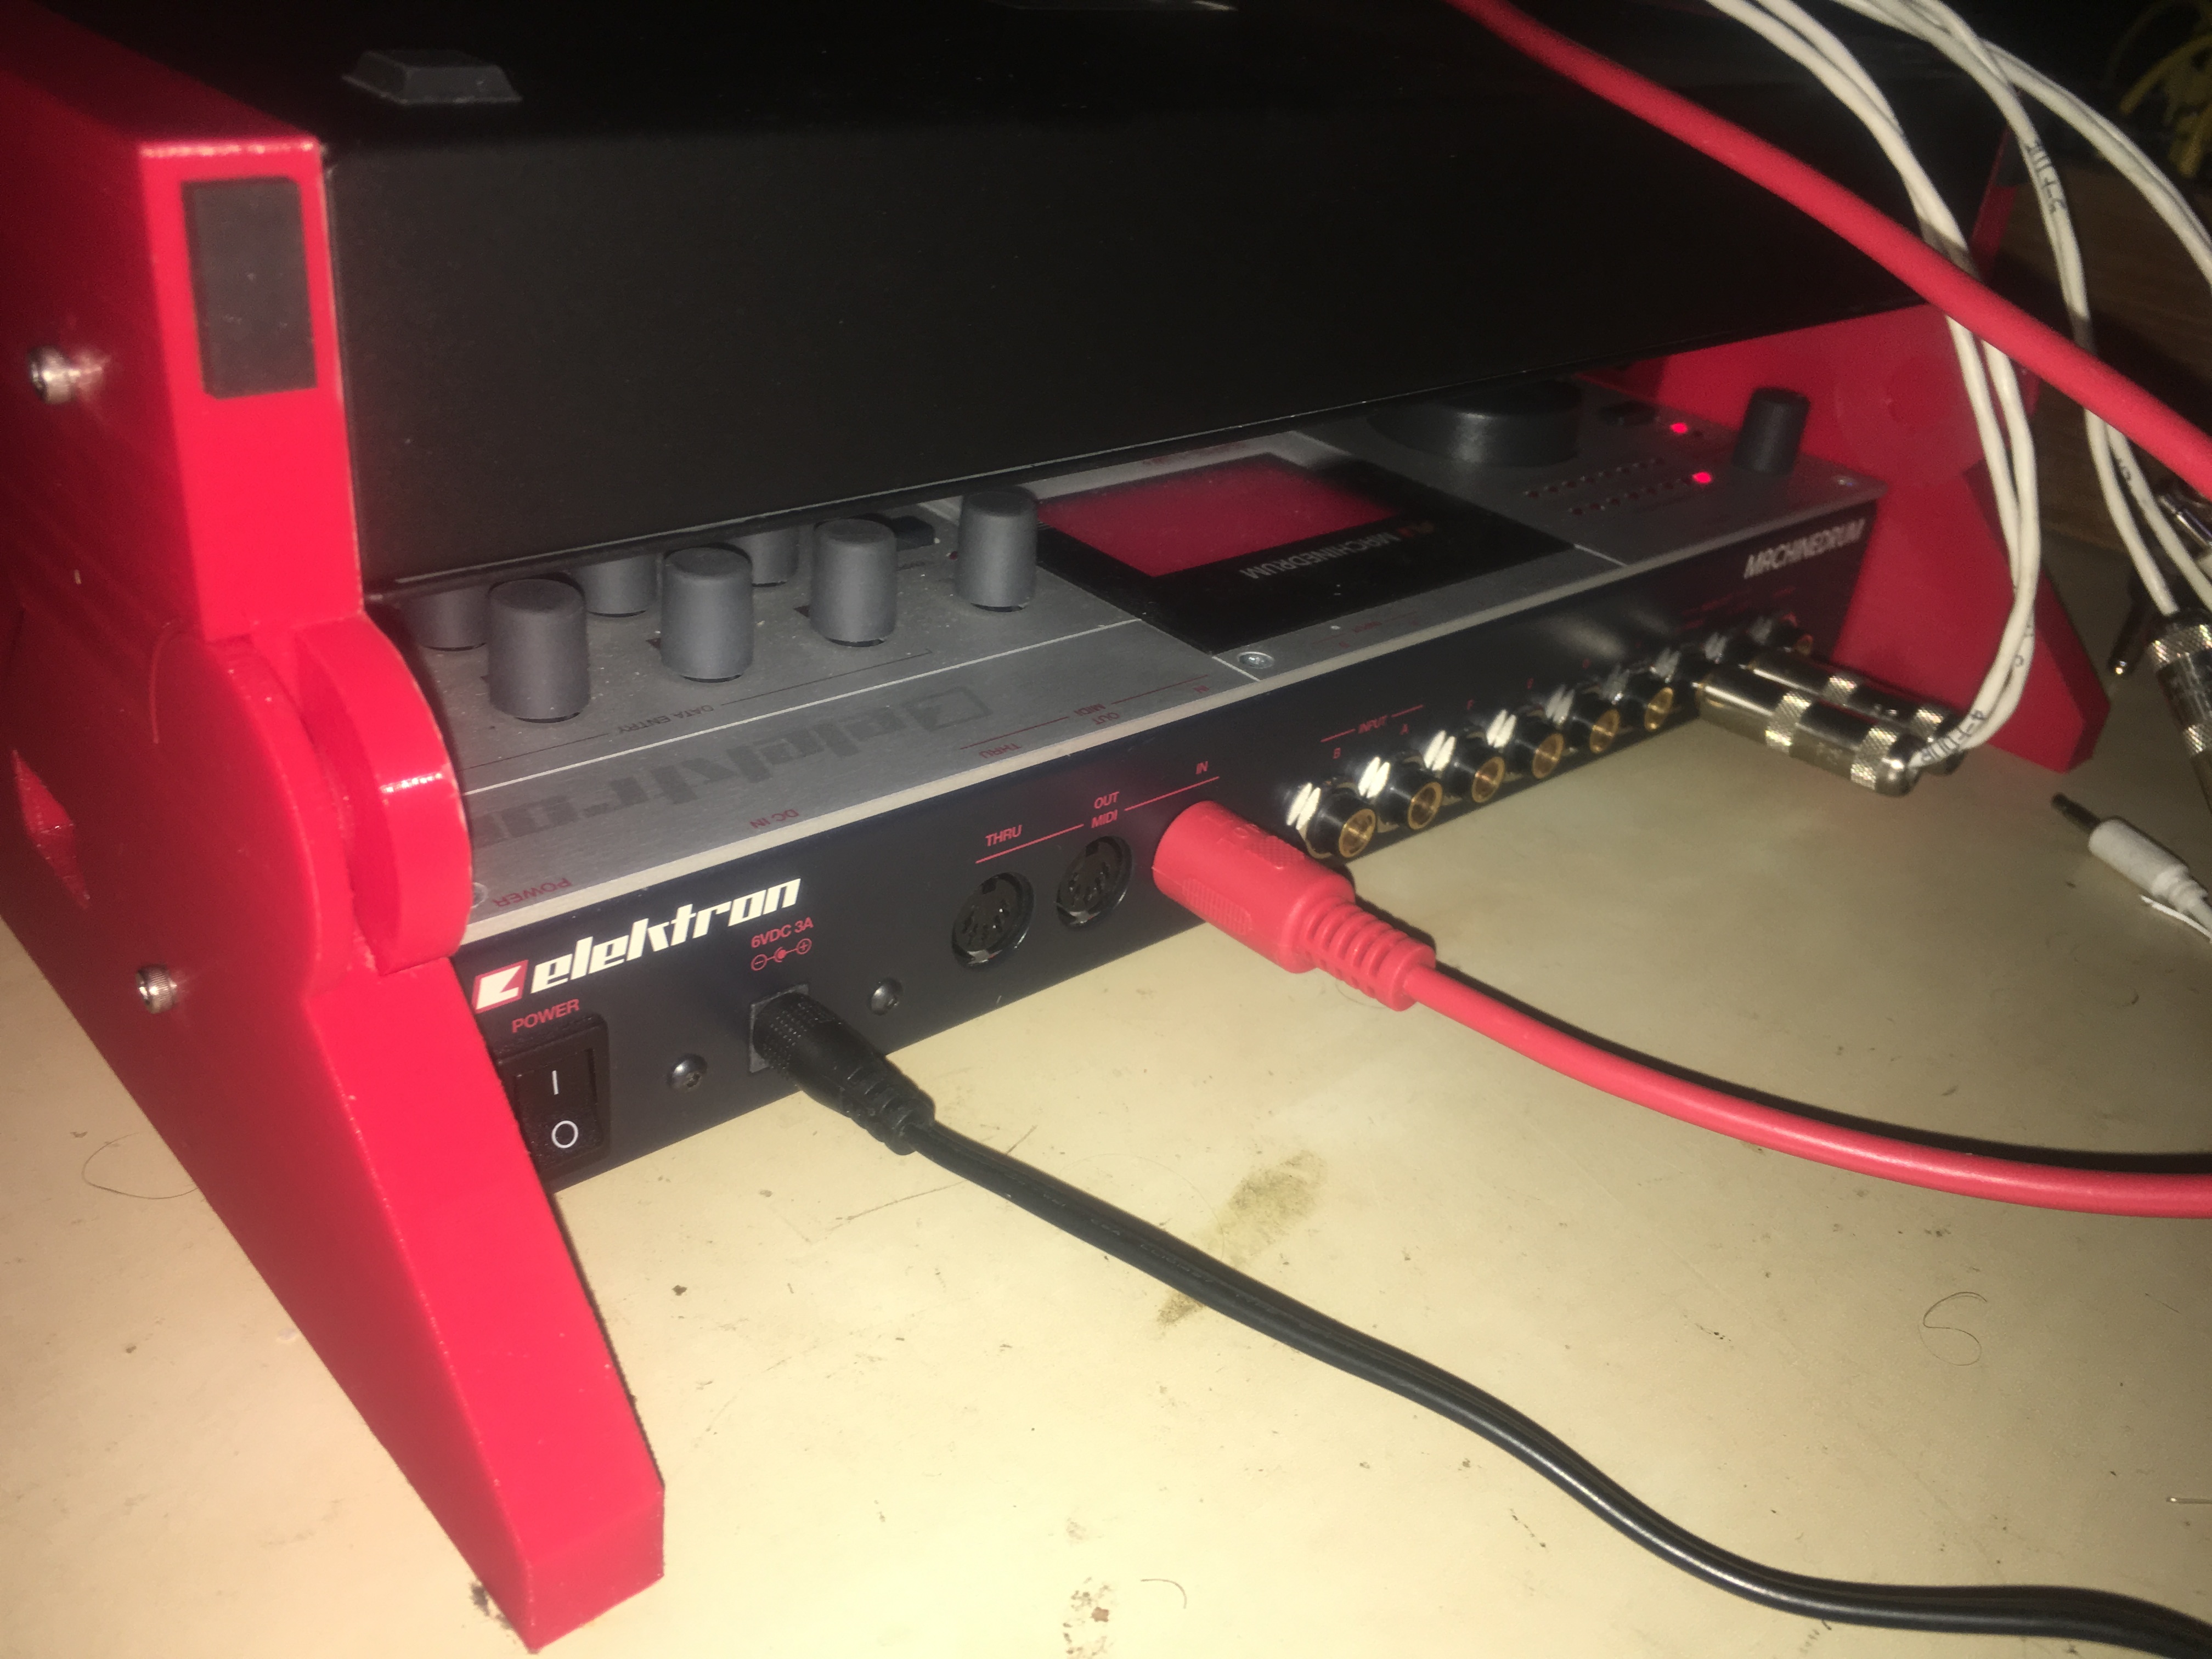
Here are some pics, my room has awful lighting rn so I can take some better ones soon. Works like a dream. My only complaint is that I couldn’t have my OT on bottom, due to the height of the in/out on the back, whatever unit is on top would rest on the 1/4 cable, so a right angle would be required. The MD on bottom is significantly better since the clearing is almost clean with a normal 1/4. To be sure I added a small pad behind where the joint comes together, problem fixed. It fits perfectly in a suitcase but definitely need to find a proper case. I talked to my buddy and he said he would look into making a version that can accommodate hard tops as well, needs more time though. Love this setup and I’m significantly more productive with this design since I have to switch my up desk off and on depending on the situation.


3 Likes
oh, i see: those blueprints that you’ve used are the first ones. they are for the thicker cheeks and there are no bolt joints required. bolts are needed for the thinner cheeks from the second version
issue with wires - that’s what i hate about amateurship. mine in this case. i should have checked the configuration with OT at bottom before but i just haven’t. and that’s it. sorry
anyway your stand looks wow)
Thank you for this.
I commissioned this to the mill
They say they need 2D drawings.
Could you give me a 2D drawing?
Thanks again.
unfortunately i’ve got no 2d prints. just 3d. sorry
Not at all! I’m fine.
Thank you for making this.
I saw a new slim version.
thin version lower and thin version upper
However, there is no left or right division.
Can you give this to me?